2024-06-26 17:22:03
一个每天只需要运行一次的策略(每天只需要去交易所拿一次行情数据,计算完成后输出结果),放到EC2里跑有点浪费资源,不如部署到aws lambda中。
本篇内容主要记录在使用lambda时遇到的依赖资源过大的问题。
下面主要分两部分来记录,
关于lambda应该不用详细介绍,直接看这里即可:lambda文档
lambda的使用比较简单,创建时有三种方式,前两种(从头开始创建和使用蓝图)可以直接在aws面板上编辑代码,或者上传代码压缩包(zip)来部署,第三种是基于容器来部署。
根据项目不同情况,有三种部署方式:
import json


def lambda_handler(event, context):
    return {
        'statusCode': 200,
        'body': json.dumps({'content': 'hi the5fire'})
    }
可以直接在面板编辑并更新项目。
import json

import requests


def lambda_handler(event, context):
    r = requests.get('https://api.github.com/user', auth=('user', 'pass'))

    return {
        'statusCode': 200,
        'body': json.dumps({'content': f'hi the5fire, code:{r.status_code}'})
    }
这种情况需要处理外部依赖,有两个方案:
方案一:在部署项目时需要把依赖打包一起部署。打包命令如下 :
pip install -r requirements.txt --target .
zip -r lambda_function.zip . -x '*.git*'
之后把zip包在aws lambda管理面板上传即可。
方案二:可以通过layer的方式处理
即在lambda管理面包上找到【层】的菜单,进去创建一个新的层,把依赖单独打包上传到该层,最后关联到你的lambda函数下面即可。
这两个方案都有一个限制就是你的整个项目+依赖包的大小不能超过250M,如果超了,那就看第三种方式。
简单来说就是把你的代码放进容器里,镜像打包注册到aws的ecr,然后lambda直接运行容器.
在项目中增加一个Dockerfile:
FROM public.ecr.aws/lambda/python:3.12

# Copy requirements.txt
COPY .  ${LAMBDA_TASK_ROOT}

# Install the specified packages
RUN pip install -r requirements.txt

# Set the CMD to your handler (could also be done as a parameter override outside of the Dockerfile)
CMD [ "lambda_function.lambda_handler" ]
项目结构如下:
.
|-- .github/workflows/deploy.yml
|-- Dockerfile
|-- README.md
|-- lambda_function.py
|-- requirements.txt
|-- strategy.py
部署的话需要使用docker和aws cli工具,参考这里:https://docs.aws.amazon.com/zh_cn/lambda/latest/dg/python-image.html,我自己的使用方式也会放到下面github action workflow配置中。
使用github action部署lambda之前,需要先去aws的IAM管理后台创建访问KEY,然后配置到github 的action/secrets中。
对于使用zip部署的方式也分两种情况,压缩包小于10M可以直接在上传,大于10M、小于250M的需要通过s3来上传。
所以这部分的action配置也分两种。
# .github/workflows/deploy.yml
name: Deploy Lambda Function

on:
  push:
    branches:
      - main

jobs:
  deploy:
    runs-on: ubuntu-latest

    steps:
    - name: Checkout
      uses: actions/checkout@v4

    - name: Set up Python 3.12
      uses: actions/setup-python@v2
      with:
        python-version: 3.12

    - name: Install & zip
      run: |
        pip install --upgrade pip
        pip install -r ./requirements.txt
        zip -r lambda_function.zip . -x '*.git*'

    - name: Deploy to AWS Lambda
      env:
        AWS_ACCESS_KEY_ID: ${{ secrets.AWS_ACCESS_KEY_ID }}
        AWS_SECRET_ACCESS_KEY: ${{ secrets.AWS_SECRET_ACCESS_KEY }}
        AWS_DEFAULT_REGION: ${{ secrets.AWS_REGION }}

      run: |
        # Assuming you have an IAM role ARN for your Lambda function
        aws lambda update-function-code \
          --function-name helloworld \
          --zip-file fileb://lambda_function.zip
这里需要先到aws s3上创建桶
name: Deploy Lambda Function

on:
  push:
    branches:
      - main

jobs:
  deploy:
    runs-on: ubuntu-latest

    steps:
    - name: Checkout
      uses: actions/checkout@v4

    - name: Set up Python 3.12
      uses: actions/setup-python@v2
      with:
        python-version: 3.12

    - name: Install & zip
      run: |
        pip install --upgrade pip
        pip install -r ./requirements.txt --target .
        zip -r lambda_function.zip . -x '*.git*'

    - name: Deploy to AWS Lambda
      env:
        AWS_ACCESS_KEY_ID: ${{ secrets.AWS_ACCESS_KEY_ID }}
        AWS_SECRET_ACCESS_KEY: ${{ secrets.AWS_SECRET_ACCESS_KEY }}
        AWS_DEFAULT_REGION: ${{ secrets.AWS_REGION }}

      run: |
        # Assuming you have an IAM role ARN for your Lambda function
        aws s3 cp ./lambda_function.zip s3://${{ secrets.BUCKET_NAME }}/
        aws lambda update-function-code --function-name ${{ secrets.FUNCTION_NAME }} \
          --s3-bucket ${{ secrets.BUCKET_NAME }} --s3-key lambda_function.zip
这一步需要配置aws account id,你在ECR创建完存储库之后就可以从URI上看到。
name: Deploy Lambda Function

on:
  push:
    branches:
      - main

jobs:
  deploy:
    runs-on: ubuntu-latest
    env:
      AWS_ACCESS_KEY_ID: ${{ secrets.AWS_ACCESS_KEY_ID }}
      AWS_SECRET_ACCESS_KEY: ${{ secrets.AWS_SECRET_ACCESS_KEY }}
      AWS_DEFAULT_REGION: ${{ secrets.AWS_REGION }}

    steps:
    - name: Checkout
      uses: actions/checkout@v4

    - name: get login
      run: |
        aws ecr get-login-password --region ${{ secrets.AWS_REGION}}| docker login --username AWS --password-stdin ${{ secrets.AWS_ACCOUNT_ID }}.dkr.ecr.$AWS_DEFAULT_REGION.amazonaws.com

    - name: update image

      run: |
        docker build -t docker-image:test .
        docker tag docker-image:test ${{secrets.AWS_ACCOUNT_ID }}.dkr.ecr.$AWS_DEFAULT_REGION.amazonaws.com/${{ secrets.FUNCTION_NAME }}:latest
        docker push ${{ secrets.AWS_ACCOUNT_ID }}.dkr.ecr.$AWS_DEFAULT_REGION.amazonaws.com/${{ secrets.FUNCTION_NAME }}:latest

    - name: update function
      run: |
         aws lambda update-function-code \
            --function-name ${{ secrets.FUNCTION_NAME }} \
            --image-uri ${{secrets.AWS_ACCOUNT_ID}}.dkr.ecr.$AWS_DEFAULT_REGION.amazonaws.com/${{ secrets.FUNCTION_NAME }}:latest
需要说明的是,我这里都是只使用github action来做update function code,并没有使用它来创建function的需求,因此没写这创建的逻辑。对于使用ecr来部署的lambda function来说,需要先提交代码到github上,运行action后生成镜像,然后再创建lambda。
最后,关于出口IP固定的配置,参考文档:使用 Lambda 函数、Amazon VPC 和无服务器架构生成静态出站 IP 地址
示例代码: https://github.com/the5fire/action-lambda-demo/commits/main/
阅读原文2023-11-21 09:08:37
简言之就是ssh client更新了,不支持rsa的私钥,导致无法登陆。
ssh登陆服务器,出现类似下面的提示:
debug3: authmethod_is_enabled publickey
debug1: Next authentication method: publickey
debug1: Offering public key: /home/user/.ssh/id_rsa RSA ... agent
debug1: send_pubkey_test: no mutual signature algorithm <-- ssh-rsa is not enabled
debug1: No more authentication methods to try.
user@hostname: Permission denied (publickey).
本来以为是key弄错了,或者服务器被hei了。加上 -v 参数才发现问题。
解决方案也很简单,就是在 ~/.ssh/config 中增加:
Host *
    ServerAliveInterval 30
    PubkeyAcceptedKeyTypes +ssh-rsa
如果是出现:no matching host key type found. Their offer: ssh-rsa,ssh-dss 的错误,还需要配置:
HostKeyAlgorithms=ssh-rsa,ssh-dss
具体原因: https://www.openssh.com/txt/release-8.2 参考:https://confluence.atlassian.com/bitbucketserverkb/ssh-rsa-key-rejected-with-message-no-mutual-signature-algorithm-1026057701.html
阅读原文2020-03-17 21:59:46
一、
前几天@Manjusaka 给我发来一个截图,如下:

自己创作/分享的内容能够帮到别人确实值得开心,尤其是别人给你直接的反馈。
这种快乐我称之为滞后的快乐,这种快乐可以持续很久,知道你的内容被从互联网抹除,或者你被从星球上抹除。
从我的写博客、分享内容的经验来说,分享本身就是让人兴奋的一件事。脑袋中空想的东西,如果不寄托到电子呈现出来的文字上,你很难把它具象化。偶尔会看过去几年十几年写的内容时会好奇自己那时的脑袋中是在想什么,处于什么样的境地,能把想法化为这样的文字。
片段的分享比较轻松,能比较快的击中你的兴奋点,反馈途径足够短。当然快乐也有限。这类经历多了,也就免疫了。所以会发现那些文字写的足够多的人,开始系统的输出。
二、
系统的输出刚开始并不是特别有趣,因为反馈路径足够漫、足够长。
比如我写的《Django企业开发实战》花了一年左右的时间。中间的过程并不是那么舒服,想象下要把一团团棉花不断的压缩成一片一片的样子,然后整理起来。
在此之前我也是花了近两年的时间录制了 《Django实战开发》的视频,时长达 2499 分钟。中间的过程也不是由快乐裹挟,而是要始终拧着一股劲才行,保持、保证足够的专注。说实话,并不容易。
不过好处就是你有了更具象的东西,视频相对于文字,更加丰富,也更由录制时的内味儿。纸质书相对于电子文字更加具象,可触摸,可感受。
三、
从开始写博客几年后通过网络结识了不少人,也收到过很多反馈。至今通过 the5fire 这个 ID 在网上还能找到各种各样的碎片信息。相对于碎片的内容,足够系统的内容显然更能产生成就感和快乐。
比如近两年的快乐就来源于《Django企业开发实战》的读者,以及对应的视频。有些是来自网友的反馈,有些是来自生活中的朋友,同事。正向的反馈会让你觉得这个事做的还不错。具体的反馈内容这里就别贴上来了。当然也有来着网络某一角陌生人的 Diss,这个确实是让人不太舒服的一点,好在属于少数,把内容保留好,激励自己也不错。毕竟这样才能看到上升空间。
四、
前段时间有同事说也要写本书,聊了一下。现在愿意写书的人,都不是冲着钱来的,这点确实遗憾,始终无法形成足够正向的飞轮。大家的目的都是整理、分享、做点实质的输出、有所贡献。
当然,技术书也不是说都不畅销(zhengqian),比如今天要送出的由图灵赞助的《Python 3反爬虫原理与绕过实战》,据说很畅销。爬虫类的内容果然适应性足够广。
本篇文章的正题是分享下我对分享反馈的想法,当反馈的碎片快乐积累的足够多,不如压缩一下,系统整理。有兴趣写书的同学可以给我留言,我推荐编辑给你。
另外捎带着发一些福利,从去年离开知乎后一直在学习新行业的业务知识,疏于书写。发现公众号读者还在不断增加。感谢各种读者的保留(当然也可能忘了还关注着这么个公众号)。
五、赠书 三本
参与方式:
关注公众号:Python程序员杂谈,
在本篇文章(公众号对应的文章)下留言即可,我会随机抽出三位读者,截止日期:2020-03-21 08:00,中奖读者会收到我的回复,需要在2020-03-23 08:00 前发送邮寄地址给我。
阅读原文2019-10-26 08:12:56
更新了近两年的时间,对于早期就支持的读者确实表示抱歉,也很感谢各位的理解。
今天终于上传了最后一节,非常感谢各位读者的支持。
源码阅读如果没有切实的场景确实不那么容易,如果你是检查每节都看过来并且自己翻了源代码的,我对你表示佩服。
事实上the5fire 个人认为,这套源码的课程更适合遇到对应的问题,或者有对应的场景,刚好要看对应的源码,可以顺带着看看 the5fire 的讲解。
源码里的很多地方的应用场景其实已经超过了我的使用场景,因此只能是推测、尝试他的用法和这么写的原因。
需要说明的是,我的解读也不一定正确,受限于个人的使用场景、个人的精力和时间投入。如果读者发现其中哪些内容有误或跟你理解的有误差,欢迎反馈。
最后再次感谢。
接下来会搞一些新的事情。

2019-08-10 12:02:40
这个解读来源于一个读者的反馈,于是花了几分钟看了下这部分源码,打算用十分钟的时间写一下,预计阅读需要 5 分钟。
Django 提供了常见的错误的页面,比如
一个好的网站应该可以给用户友好的信息提示,比如:“服务器提了一个问题”之类的,然后给用户一个引导。对于商业网站需要注意的是错误页面的流量也是流量,应该有明确的引导。
在 Django 中定义这类处理很简单,只需要在 urls.py 中配置:
# 参考:https://github.com/the5fire/typeidea/blob/deploy-to-cloud/typeidea/typeidea/urls.py#L24
handler404 = Handler404.as_view()
handler500 = Handler50x.as_view()
当然你需要定义这里面的 Handler50x:
class Handler404(CommonViewMixin, TemplateView):
    template_name = '404.html'

    def get(self, request, *args, **kwargs):
        context = self.get_context_data(**kwargs)
        return self.render_to_response(context, status=404)


class Handler50x(CommonViewMixin, TemplateView):
    template_name = '50x.html'

    def get(self, request, *args, **kwargs):
        context = self.get_context_data(**kwargs)
        return self.render_to_response(context, status=500)
这样就可以简单的控制出错时展示给用户的页面了。需要注意的是,这个配置只会在非 Debug 模式下有效。
要看这部分源码的第一步是判断 Django 可能会在哪处理这个异常。有很多方法,这里是说一种,从请求的入口开始撸。
注意我看到版本是 Django 2.0.1
1 WSGI Handler 的部分
# 代码:https://github.com/the5fire/django-inside/blob/84f272e1206554b43c86c0f7a50f37d1f3efbc28/django/core/handlers/wsgi.py#L135
class WSGIHandler(base.BaseHandler):
    request_class = WSGIRequest

    def __init__(self, *args, **kwargs):
        super(WSGIHandler, self).__init__(*args, **kwargs)
        self.load_middleware()

    def __call__(self, environ, start_response):
        set_script_prefix(get_script_name(environ))
        signals.request_started.send(sender=self.__class__, environ=environ)
        request = self.request_class(environ)
        response = self.get_response(request)  # the5fire: 注意这儿
        # ... the5fire:省略其他
2 BaseHandler 中的 get_response
    # ref: https://github.com/the5fire/django-inside/blob/84f272e1206554b43c86c0f7a50f37d1f3efbc28/django/core/handlers/base.py#L94
    def get_response(self, request):
        """Return an HttpResponse object for the given HttpRequest."""
        # Setup default url resolver for this thread
        set_urlconf(settings.ROOT_URLCONF)

        response = self._middleware_chain(request)  # the5fire: 这里进去

        response._closable_objects.append(request)

        # If the exception handler returns a TemplateResponse that has not
        # been rendered, force it to be rendered.
        if not getattr(response, 'is_rendered', True) and callable(getattr(response, 'render', None)):
            response = response.render()

        if response.status_code == 404:
            logger.warning(
                'Not Found: %s', request.path,
                extra={'status_code': 404, 'request': request},
            )

        return response
3 被包装的 _middleware_chain
    # https://github.com/the5fire/django-inside/blob/84f272e1206554b43c86c0f7a50f37d1f3efbc28/django/core/handlers/base.py#L76
    def load_middleware(self):
        """
        Populate middleware lists from settings.MIDDLEWARE.

        Must be called after the environment is fixed (see __call__ in subclasses).
        """
        self._request_middleware = []
        self._view_middleware = []
        self._template_response_middleware = []
        self._response_middleware = []
        self._exception_middleware = []

        handler = convert_exception_to_response(self._get_response)
        for middleware_path in reversed(settings.MIDDLEWARE):
            middleware = import_string(middleware_path)
            # ...  the5fire:忽略中间这些代码
            handler = convert_exception_to_response(mw_instance)

        # We only assign to this when initialization is complete as it is used
        # as a flag for initialization being complete.
        self._middleware_chain = handler
4 具体处理异常的部分
    def convert_exception_to_response(get_response):
        """
        Wrap the given get_response callable in exception-to-response conversion.

        All exceptions will be converted. All known 4xx exceptions (Http404,
        PermissionDenied, MultiPartParserError, SuspiciousOperation) will be
        converted to the appropriate response, and all other exceptions will be
        converted to 500 responses.

        This decorator is automatically applied to all middleware to ensure that
        no middleware leaks an exception and that the next middleware in the stack
        can rely on getting a response instead of an exception.
        """
        @wraps(get_response)
        def inner(request):
            try:
                response = get_response(request)
            except Exception as exc:
                response = response_for_exception(request, exc)  # the5fire: 这里进去
            return response
        return inner


    def response_for_exception(request, exc):
        if isinstance(exc, Http404):
            if settings.DEBUG:
                response = debug.technical_404_response(request, exc)
            else:
                response = get_exception_response(request, get_resolver(get_urlconf()), 404, exc)

        # ... the5fire: 省略掉一大坨类似的代码

        else:
            signals.got_request_exception.send(sender=None, request=request)
            # the5fire: 下面这一行,具体的处理逻辑。
            response = handle_uncaught_exception(request, get_resolver(get_urlconf()), sys.exc_info())

        # Force a TemplateResponse to be rendered.
        if not getattr(response, 'is_rendered', True) and callable(getattr(response, 'render', None)):
            response = response.render()

        return response
5 异常处理逻辑
    # https://github.com/the5fire/django-inside/blob/84f272e1206554b43c86c0f7a50f37d1f3efbc28/django/core/handlers/exception.py#L107
    def handle_uncaught_exception(request, resolver, exc_info):
        """
        Processing for any otherwise uncaught exceptions (those that will
        generate HTTP 500 responses).
        """
        if settings.DEBUG_PROPAGATE_EXCEPTIONS:
            raise

        logger.error(
            'Internal Server Error: %s', request.path,
            exc_info=exc_info,
            extra={'status_code': 500, 'request': request},
        )

        if settings.DEBUG:
            return debug.technical_500_response(request, *exc_info)

        # Return an HttpResponse that displays a friendly error message.
        # the5fire: 这里会解析到对应的handler ,比如我们定义的那个
        callback, param_dict = resolver.resolve_error_handler(500)
        return callback(request, **param_dict)
6 最终解析到 urls/resolvers.py 中
    # 完整代码: https://github.com/the5fire/django-inside/blob/84f272e1206554b43c86c0f7a50f37d1f3efbc28/django/urls/resolvers.py#L555
    def resolve_error_handler(self, view_type):
        callback = getattr(self.urlconf_module, 'handler%s' % view_type, None)  # the5fire: 这里就是去获取 urls.py 中对应的配置
        if not callback:
            # No handler specified in file; use lazy import, since
            # django.conf.urls imports this file.
            from django.conf import urls
            callback = getattr(urls, 'handler%s' % view_type)
        return get_callable(callback), {}
实际上花了比预计更多的时间来把完整的代码贴出来,以及明确对应的版本。在 Django 1.11 中的处理逻辑有些不同。
实际阅读时间也会比预计的久,但如果能理解这个过程,你对于Django也会有更深的进步。
阅读原文2019-05-25 07:41:29
这个回答是我在知乎认真回答的问题中,点赞和收藏最高的,所以题目高赞是对我来说的(捂脸
------- 以下是正文 -------
我在换第二份 Python 工作时也被 HR 问过类似的问题:你花了多少时间学习 Python,然后开始能正式工作的。 回答是:一两天。
需要介绍下背景:
在我开始写 Python 之前,其实已经在用其他的语言开发项目了,Java、.Net、VB 6.0。
所以在这种情况下,需要学习的就是如何使用 Python 语言表达出来你想要实现的东西,这个跟学习英语或者其他语言差不多,你有想说的东西,只是需要尝试用另外一种方式表达出来。
所谓的一两天其实就是熟悉了 Python 的语法,当时是看了这本书——《简明 Python 教程》:
介绍 · 简明 Python 教程 https://bop.mol.uno/
这是刚搜索出来的最新的版本。
这本书很小,花一两天时间看完,以及写写书上代码就能熟悉了。
之后其实就是在工作中跟着别人写好的代码来写代码。
当你对一个语言不是很熟悉的时候,借鉴、模仿现成的代码可以比较快的实现某个实际的功能。
不过,实际上,单纯的读完 《简明 Python 教程》是远远不够的,这个在第二次换工作时能明显感受到。工作中能快速积累的是使用 Python 的经验,解决问题的经验,但对 Python 的基础库以及能力范围(也就是能做的事)掌握会不足。
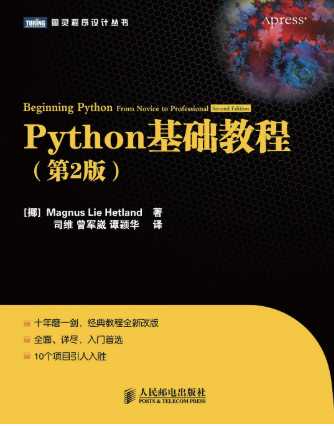
还是需要系统学习,所以之后又系统看了《Python 基础教程》

并且把里面对应的练习都实现了一遍:
《Python 基础教程》中的十个项目练习和代码
对于初学者来说,每次攻克一个练习,得到实际可运行的代码,可以操作的程序,还是可以达到正向反馈的。
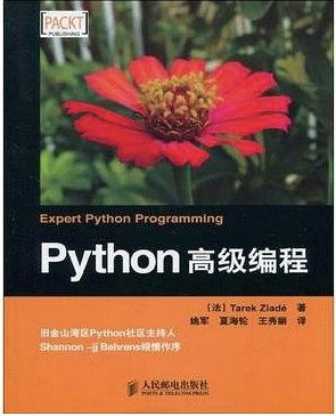
之后为了面试还看了 《Python 高级编程》:

理论上当你掌握了 《Python 基础教程》里面的内容,完成了所有练习后,开始干活是没问题了。但是高级编程确实能给面试提供帮助(逃
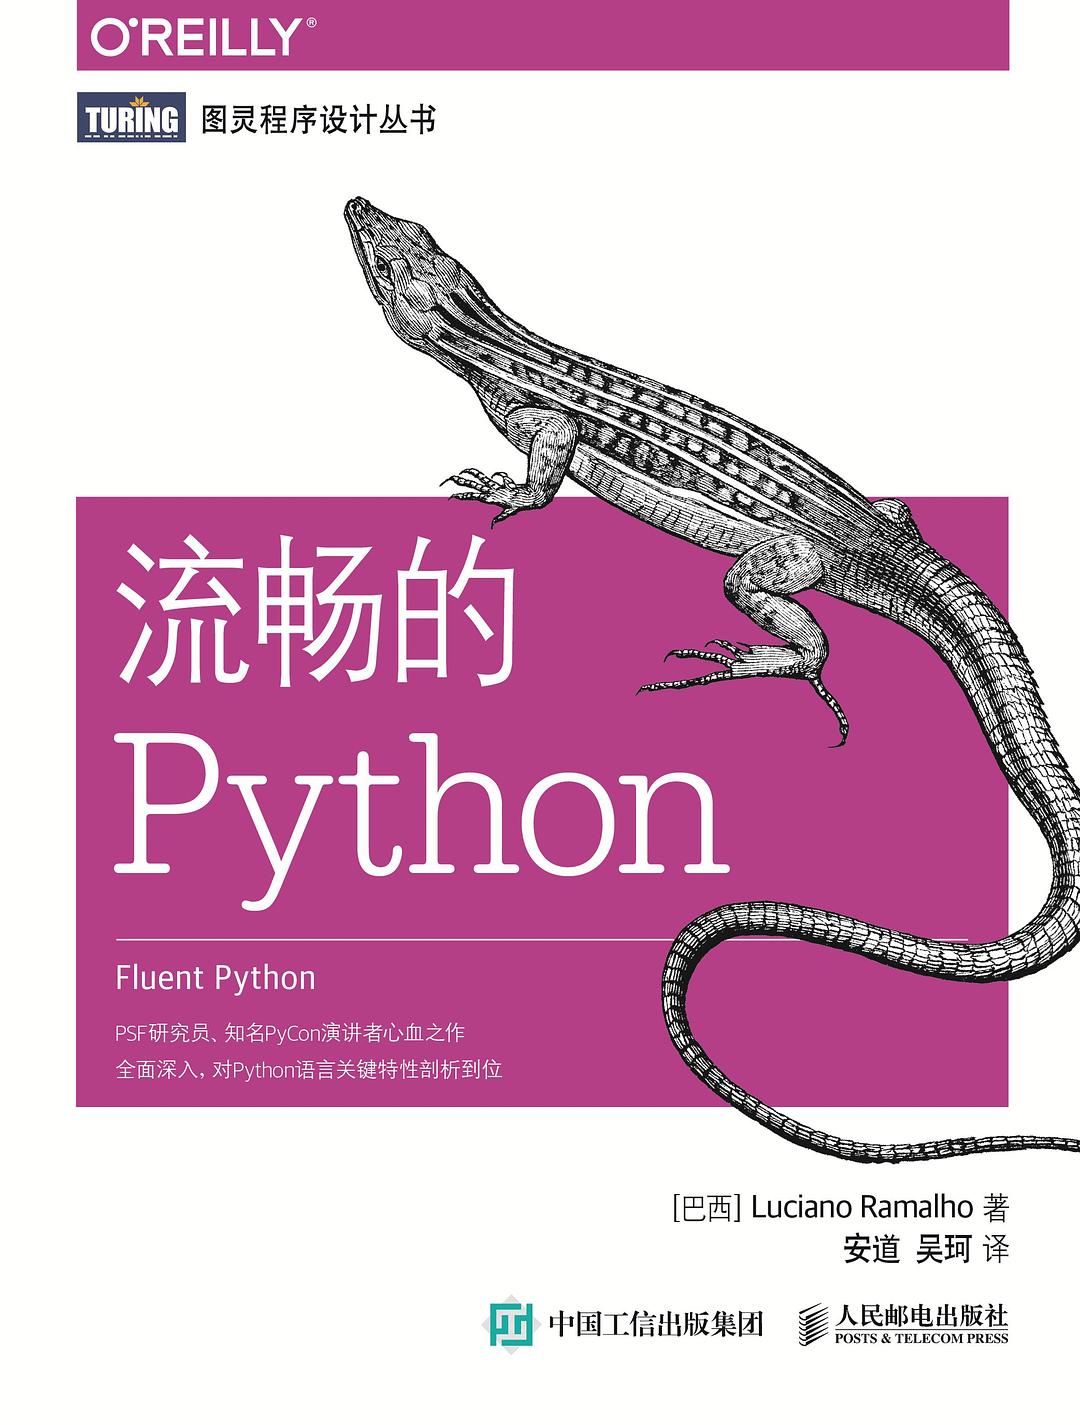
另外,最近两年出版的《流畅的 Python》也属于进阶以及应对面试准备的「弹药」,当然本质还是为了提升能力嘛。

最后总结一下: 书的话就是三本:
基本上就是一个阶段搞明白一本就行,看太多的基础类的书作用不大,低水平重复没有意义。
另外编程是一个实践性很强的事,不写代码是没有感觉的,不写完整的程序是没有成就感的。需要的就是在这个循环中「看书 - 实践 - 解决问题 - 总结」不断的重复。
知乎回答链接:https://www.zhihu.com/question/55493026/answer/687917097
阅读原文