Logo

site iconAxionL

Arch Linux,博客名:初等记忆体。
请复制 RSS 到你的阅读器,或快速订阅到 :

Inoreader Feedly Follow Feedbin Local Reader

AxionL RSS 预览

Photos

2022-11-23 08:00:00

About

2022-11-23 08:00:00

記憶體自述

直到一切都消失不见,才发现曾经近在眼前。

无法阻止,也无法释怀。

唯有记录,

在我身边。

其餘資訊

Maddy 自建邮件服务

2022-01-10 22:15:41

Featured image of post Maddy 自建邮件服务

从白嫖 Yandex 域名邮箱到 FastMail 付费托管邮箱,一直在找适合自己的域名邮件服务,传统的自建方式模块过于分散,上手难度较大,后在 NickCao 老师推荐下尝试了 Maddy。Maddy 目前只提供了命令行运行的 Linux 服务端,WebUI 或者本地客户端需自行选择,仅需手动配置一下 POP3/IMAP(收) 和 SMTP(发) 服务端地址即可。我目前使用的是 Thunderbird (电脑)和 K-9 Mail(Android)。

下载:Github | 上游服务器 文档:maddy.email

服务器

部分 VPS 提供商会为了防止广告等原因会禁用 25 号 TCP 端口的 SMTP 端口,但多数情况下(比如 Google Cloud 就不允许)也可以开工单说明邮箱用途和性质,对于个人性质的域名邮箱来说一般不会有太多限制。如果机器本身或者 VPS 提供商还配有防火墙,请打开对应端口(25,465,993)。

使用邮件服务需要关闭 CDN 代理,故存在机器 IP 暴露风险,在选择机器时候注意避开其它敏感数据服务

配置

可以从 docker 拉取,但这里以 binary + 自己配置方式为主。

maddy.conf

完整版配置

一般放在 /etc/maddy/maddy.conf

 1
 2
 3
 4
 5
 6
 7
 8
 9
 10
 11
 12
 13
 14
 15
 16
 17
 18
 19
 20
 21
 22
 23
 24
 25
 26
 27
 28
 29
 30
 31
 32
 33
 34
 35
 36
 37
 38
 39
 40
 41
 42
 43
 44
 45
 46
 47
 48
 49
 50
 51
 52
 53
 54
 55
 56
 57
 58
 59
 60
 61
 62
 63
 64
 65
 66
 67
 68
 69
 70
 71
 72
 73
 74
 75
 76
 77
 78
 79
 80
 81
 82
 83
 84
 85
 86
 87
 88
 89
 90
 91
 92
 93
 94
 95
 96
 97
 98
 99
100
101
102
103
104
105
106
107
108
109
110
111
112
113
114
115
116
117
118
119
120
121
122
123
124
125
126
127
128
129
130
131
132
133
134
135
136
137
138
139
140
141
142
143
144
145
146
147
148
149
150
151
152
153
154
# 预设了三个变量,方便后续使用
$(hostname) = mail.example.com
$(primary_domain) = example.com
$(local_domains) = $(primary_domain)

# 如果要使用 nginx 反代,这里可以选择 tls off,但如此一来没法生成 dkim 密钥对
# 在之后检查时日志内会有安全警告,故推荐直接用 maddy 管理
# tls off
tls file /etc/letsencrypt/live/$(local_domains)/fullchain.pem /etc/letsencrypt/live/$(local_domains)/privkey.pem

# 数据用 SQLite3 存储较为简单、轻量
auth.pass_table local_authdb {
 table sql_table {
 driver sqlite3
 dsn credentials.db
 table_name passwords
 }
}

storage.imapsql local_mailboxes {
 driver sqlite3
 dsn imapsql.db
}

# ----------------------------------------------------------------------------
# SMTP endpoints + message routing

hostname $(hostname)

table.chain local_rewrites {
 optional_step regexp "(.+)\+(.+)@(.+)" "$1@$3"
 optional_step static {
 entry postmaster postmaster@$(primary_domain)
 }
 optional_step file /etc/maddy/aliases
}

msgpipeline local_routing {
 destination postmaster $(local_domains) {
 modify {
 replace_rcpt &local_rewrites
 }

 deliver_to &local_mailboxes
 }

 default_destination {
 reject 550 5.1.1 "User doesn't exist"
 }
}

# smtp 使用 25 号端口发送邮件
smtp tcp://[::]:25 {
 # tls self_signed
 limits {
 # Up to 20 msgs/sec across max. 10 SMTP connections.
 all rate 20 1s
 all concurrency 10
 }

 dmarc yes
 check {
 require_mx_record
 dkim # 若无则不检查
 spf
 }

 source $(local_domains) {
 reject 501 5.1.8 "Use Submission for outgoing SMTP"
 }
 default_source {
 destination postmaster $(local_domains) {
 deliver_to &local_routing
 }
 default_destination {
 reject 550 5.1.1 "User doesn't exist"
 }
 }
}

# 如果使用 nginx 反代则这里监听到本地端口即可 tcp://127.0.0.1:587
# 不使用则邮件客户端以 SSL/TLS 方式直接访问该地址
submission tls://[::]:465 {
 limits {
 # Up to 50 msgs/sec across any amount of SMTP connections.
 all rate 50 1s
 }

 auth &local_authdb

 source $(local_domains) {
 check {
 authorize_sender {
 prepare_email &local_rewrites
 user_to_email identity
 }
 }

 destination postmaster $(local_domains) {
 deliver_to &local_routing
 }
 default_destination {
 modify {
 dkim $(primary_domain) $(local_domains) default
 }
 deliver_to &remote_queue
 }
 }
 default_source {
 reject 501 5.1.8 "Non-local sender domain"
 }
}

target.remote outbound_delivery {
 limits {
 # Up to 20 msgs/sec across max. 10 SMTP connections
 # for each recipient domain.
 destination rate 20 1s
 destination concurrency 10
 }
 mx_auth {
 dane
 mtasts {
 cache fs
 fs_dir mtasts_cache/
 }
 local_policy {
 min_tls_level encrypted
 min_mx_level none
 }
 }
}

target.queue remote_queue {
 target &outbound_delivery

 autogenerated_msg_domain $(primary_domain)
 bounce {
 destination postmaster $(local_domains) {
 deliver_to &local_routing
 }
 default_destination {
 reject 550 5.0.0 "Refusing to send DSNs to non-local addresses"
 }
 }
}

# ----------------------------------------------------------------------------
# IMAP endpoints
# 同上,使用 nginx 反代则改为监听本地端口 tcp://127.0.0.1:143
imap tls://[::]:993 {
 auth &local_authdb
 storage &local_mailboxes
}

Nginx Config(可选)

如果是由 Maddy 自身直接处理 TLS 则不需要该项配置

 1
 2
 3
 4
 5
 6
 7
 8
 9
10
11
12
13
14
15
16
17
18
19
20
21
22
23
24
25
26
27
28
29
30
31
upstream maddy_imaps {
 # 指向本地 Maddy IMAP 监听服务端口
 server 127.0.0.1:143;
}

upstream maddy_smtps {
 # 指向本地 Maddy SMTP 服务监听端口
 server 127.0.0.1:587;
}

server {
 listen 993 ssl;
 proxy_pass maddy_imaps;
 ssl_certificate /etc/letsencrypt/live/<example.com>/fullchain.pem; # 换成自己的域名证书
 ssl_certificate_key /etc/letsencrypt/live/<example.com>/privkey.pem; # 换成自己的域名证书
 ssl_protocols SSLv3 TLSv1.1 TLSv1.2 TLSv1.3;
 ssl_ciphers HIGH:!aNULL:!MD5;
 ssl_session_timeout 4h;
 ssl_handshake_timeout 30s;
}

server {
 listen 465 ssl;
 proxy_pass maddy_smtps;
 ssl_certificate /etc/letsencrypt/live/<example.com>/fullchain.pem; # managed by Certbot
 ssl_certificate_key /etc/letsencrypt/live/<example.com>/privkey.pem; # managed by Certbot
 ssl_protocols SSLv3 TLSv1.1 TLSv1.2 TLSv1.3;
 ssl_ciphers HIGH:!aNULL:!MD5;
 ssl_session_timeout 4h;
 ssl_handshake_timeout 30s;
}

注册账户

maddy 的 systemd service 正常启动后可以使用:

1
2
3
4
5
6
7
$ sudo -u maddy -s # 切换到 maddy 用户
$ maddyctl creds create <[email protected]> --password <YourPassword>
$ maddyctl creds list # 查看你刚创建的用户名
$ maddyctl imap-acct create <[email protected]> # 创建一个邮件储存账户
$ maddyctl imap-acct list # 查看刚创建的 imap 储存账户
$ maddyctl imap-mboxes list <[email protected]> # 可以看到该账户下有哪些分类
$ maddyctl imap-msgs list <[email protected]> <INBOX> # 可以查看当前账户对应分类接收到的邮件,一般收件在 INBOX 中

DNS 设置

这里以 Cloudflare 托管 DNS 服务为例,其它应该也能找到对应 DNS 设置面板。使用了子域名 mail.example.com 作为邮件服务专用。

类型 名称 内容 代理状态
A mail 服务器实际 IPv4 地址 仅限 DNS
AAAA mail 服务器实际 IPv6 地址(如果有) 仅限 DNS
MX @ mail.example.com 仅限 DNS
TXT mail v=spf1 mx ~all 仅限 DNS

spf 值这里推荐使用仅允许 mx,若有其他来源也可以添加。

Reverse DNS

为了避免拒收,进一步提高邮件投递率,需要配置 rDNS 以便收信方邮件服务商溯源。

以 Vultr 为例,其 Reverse DNS 页面在 机器详情 > Settings > IPv4 / IPv6 选项卡内,在 Reverse DNS 中填入自己的邮件服务域名即可,如 mail.example.com,如果存在多条公共 IP 地址,则都需要填写。

多域名配置 (如无可跳过)

  1. local_domains 后面加上新的域名
1
2
3
$(primary_domain) = example.com
$(secondary_domain) = example.org
$(local_domains) = $(primary_domain) $(secondary_domain)
  1. 在 tls file 后面添加对应的证书,如果用 nginx 反代的话则添加对应的 host 路由和域名。
1
tls file /etc/letsencrypt/live/$(primary_domain)/fullchain.pem /etc/letsencrypt/live/$(primary_domain)/privkey.pem /etc/letsencrypt/live/$(secondary_domain)/fullchain.pem /etc/letsencrypt/live/$(secondary_domain)/privkey.pem
  1. 将新域名的 dkim 密钥内容也添加到 DNS 的 TXT 记录中

  2. dmarc 和 rDNS 同理

客户端

客户端有诸多选择,不变的是手动设置方式:

  • IMAP 和 SMTP 服务器地址都设置为 mail.example.com,连接方式均为 SSL/TLS,用户名和密码均为先前所设置,认证方式均为 Normal Password
  • IMAP 端口为 993
  • SMTP 端口为 465

小结

Oh My Yandex

可以写一些稍微正经的内容,发送到 https://www.mail-tester.com 内所给的邮件地址,来测试自己的邮箱评分。

虽然说自建邮箱可能还是存在邮件投递到垃圾箱里的问题,但有了 Maddy 后搭建一个自己的域名邮箱确实变成了相对简单的工作。

[OhMyQt 系列] _00__搭建环境

2021-07-24 00:39:13

Featured image of post [OhMyQt 系列] _00__搭建环境

前言

项目地址: axionl/OhMyQt

  • 项目在 Windows 11 和 ArchLinux 下进行测试
  • Qt 版本: 5.15.2

本文是 OhMyQt 系列的第 00 章节,主要介绍在 Windows 11 和 ArchLinux 下如何搭建一个可用的 Qt 开发环境。

在 ArchLinux 上搭建

基本软件安装

首先你需要安装 qt5-base,同时推荐安装对应的文档包 qt5-doc

1
2
$ sudo pacman -S qt5-base
$ sudo pacman -S qt5-doc # 可选

然后安装一个合用的编辑器,这里推荐使用 qtcreator

1
$ sudo pacman -S qtcreator

因为本教程主要是介绍 QML 的开发,所以还需要安装 qt5-declarative

1
$ sudo pacman -S qt5-declarative

安装完成之后验证版本信息

 1
 2
 3
 4
 5
 6
 7
 8
 9
10
11
$ qmake -v
QMake version 3.1
Using Qt version 5.15.2 in /usr/lib

$ pacman -Qs qt5-declarative
local/qt5-declarative 5.15.2+kde+r29-1 (qt qt5)
 Classes for QML and JavaScript languages

$ qtcreator -version

Qt Creator 4.15.2 based on Qt 5.15.2

软件配置

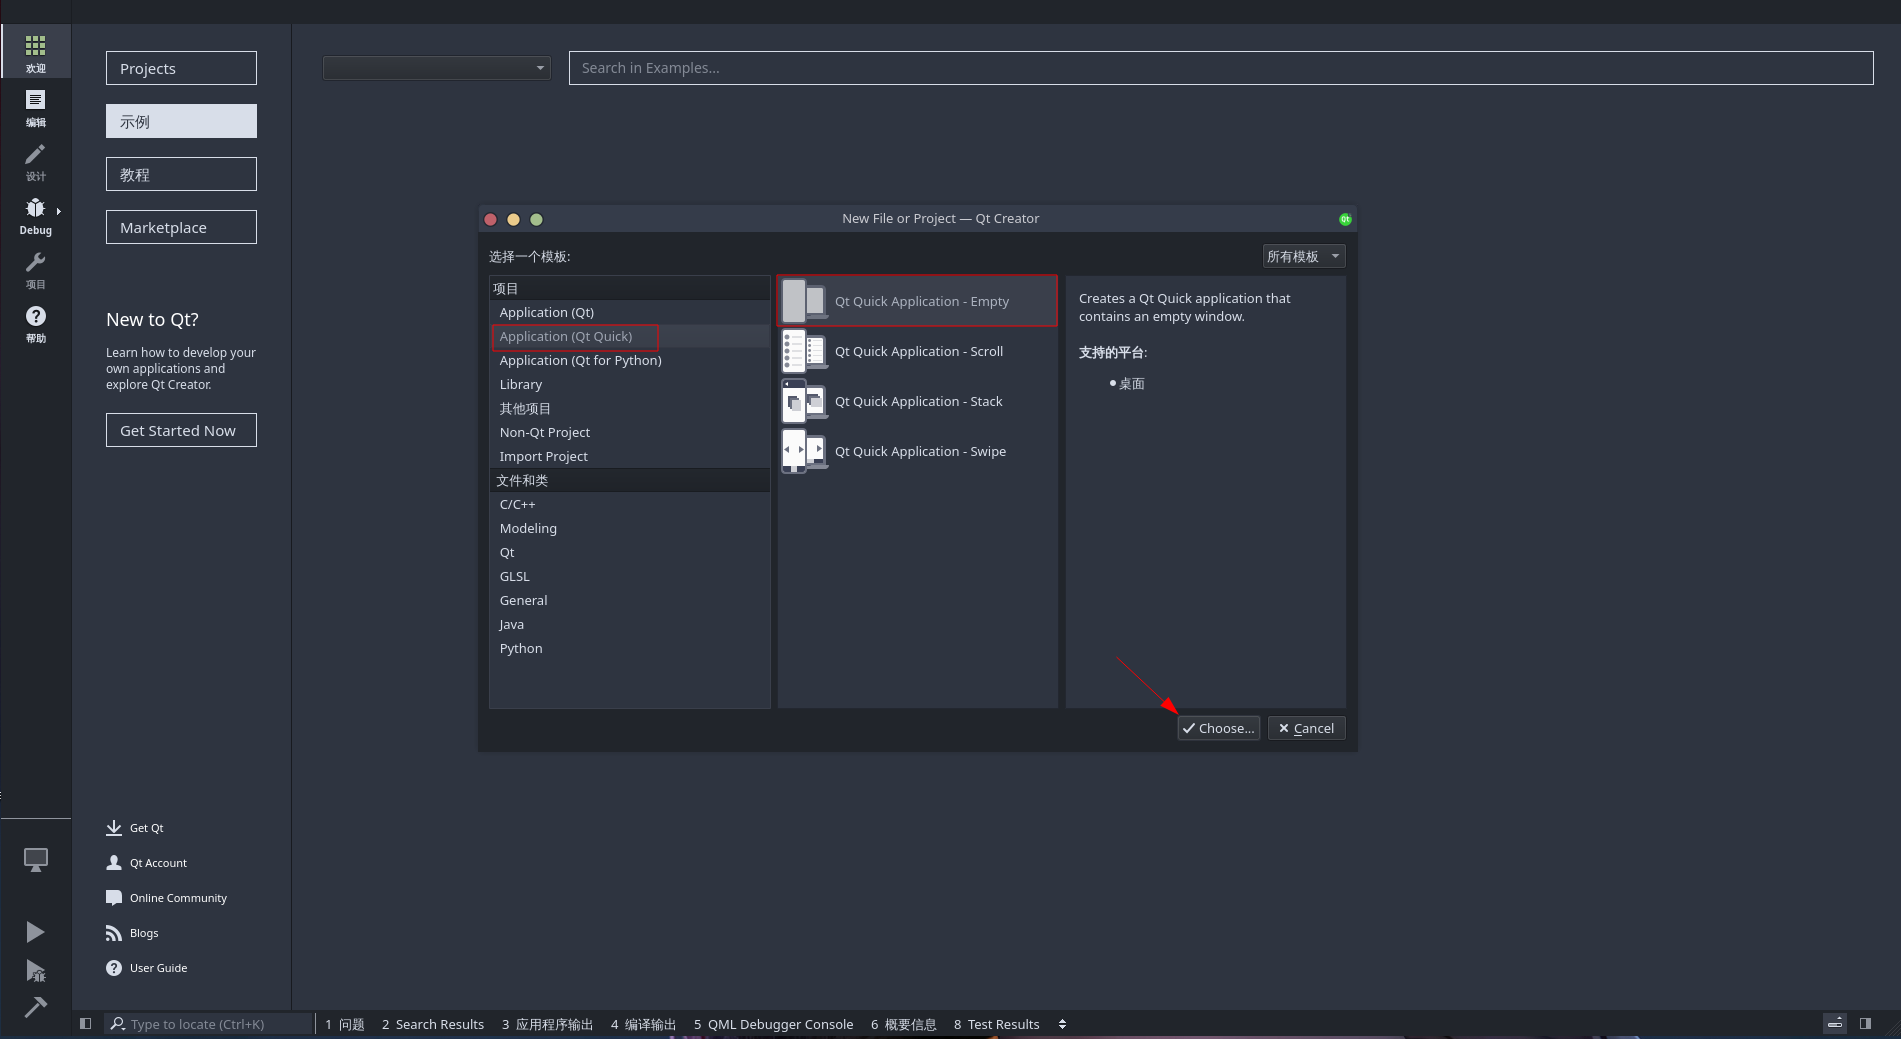
首先打开 qtcreator,新建一个 QtQuick 项目

新建项目

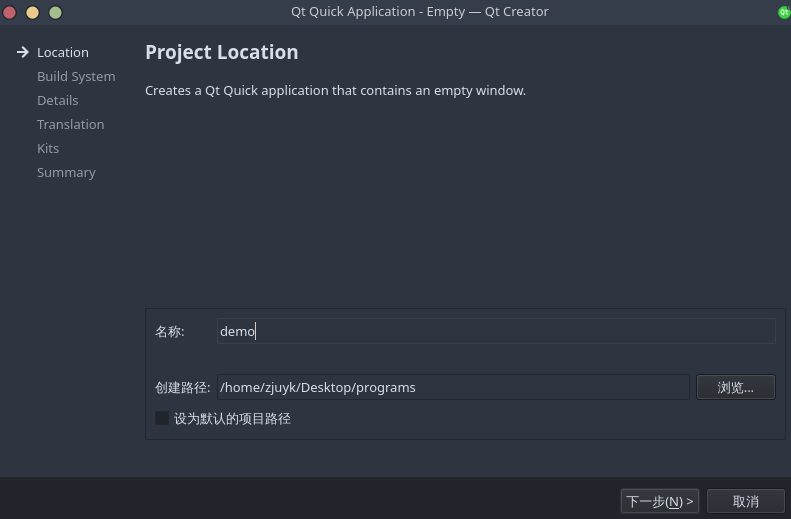
然后输入名称和路径

项目名和路径

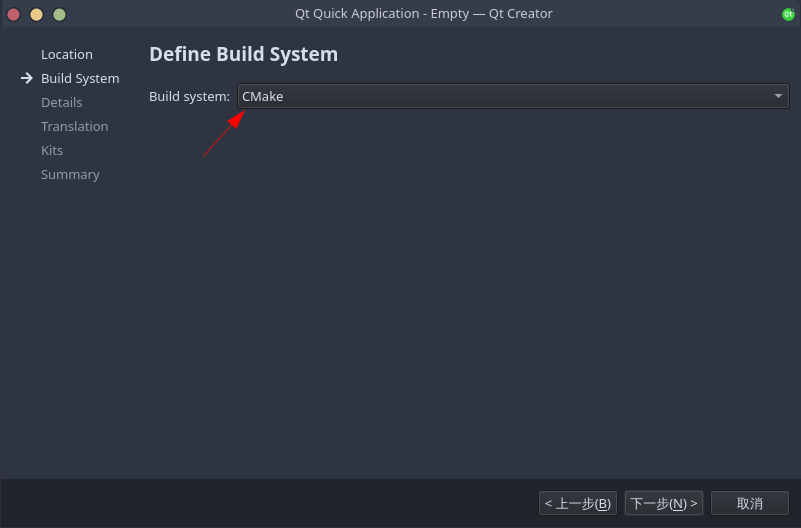
下一步编译系统建议选择 cmake

编译系统

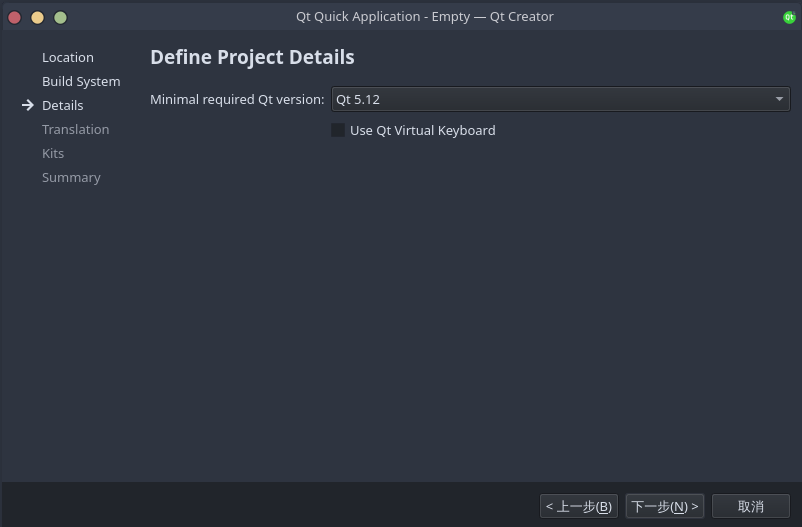
QT 版本保持默认

QT 版本

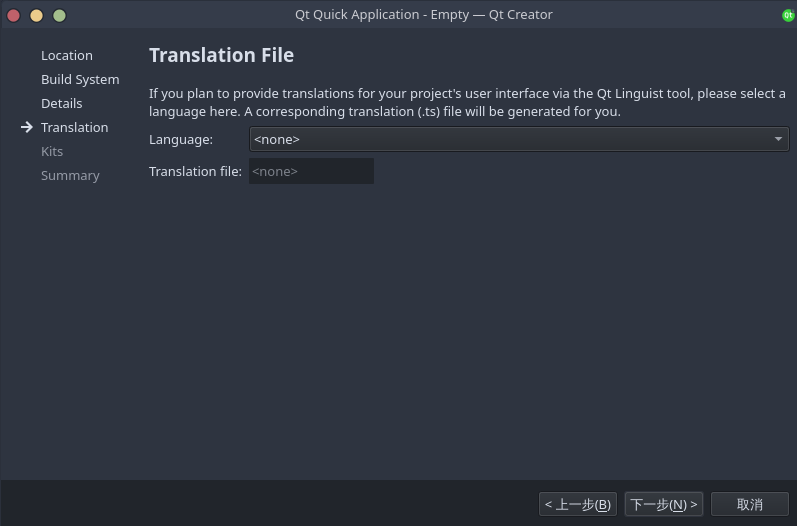
因为暂时是教学项目,暂时不添加语言文件

语言文件

kit 保持默认的 Desktop 就好,因为我们最终也是要做一个桌面应用
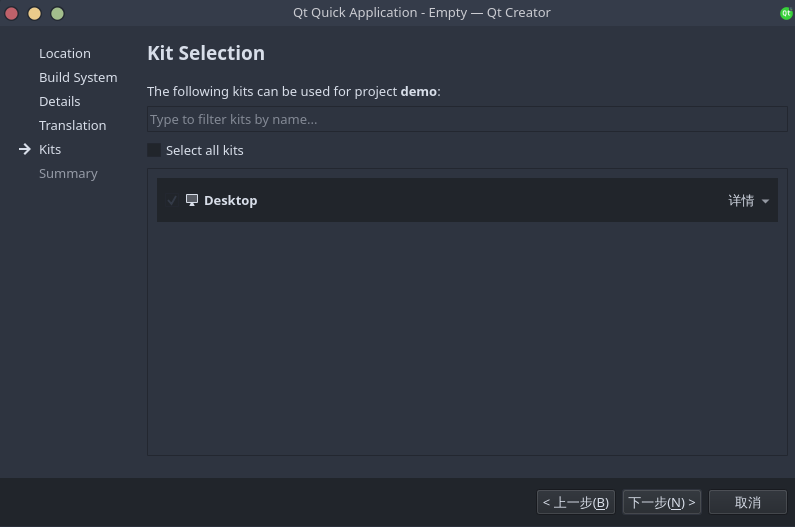
Kit

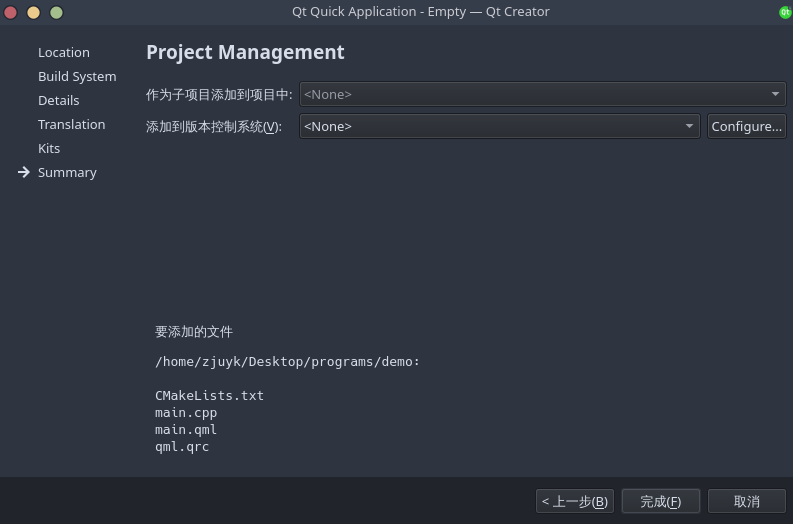
会创建的文件如下所示,你也可以选择加入 git 作为版本控制

summary

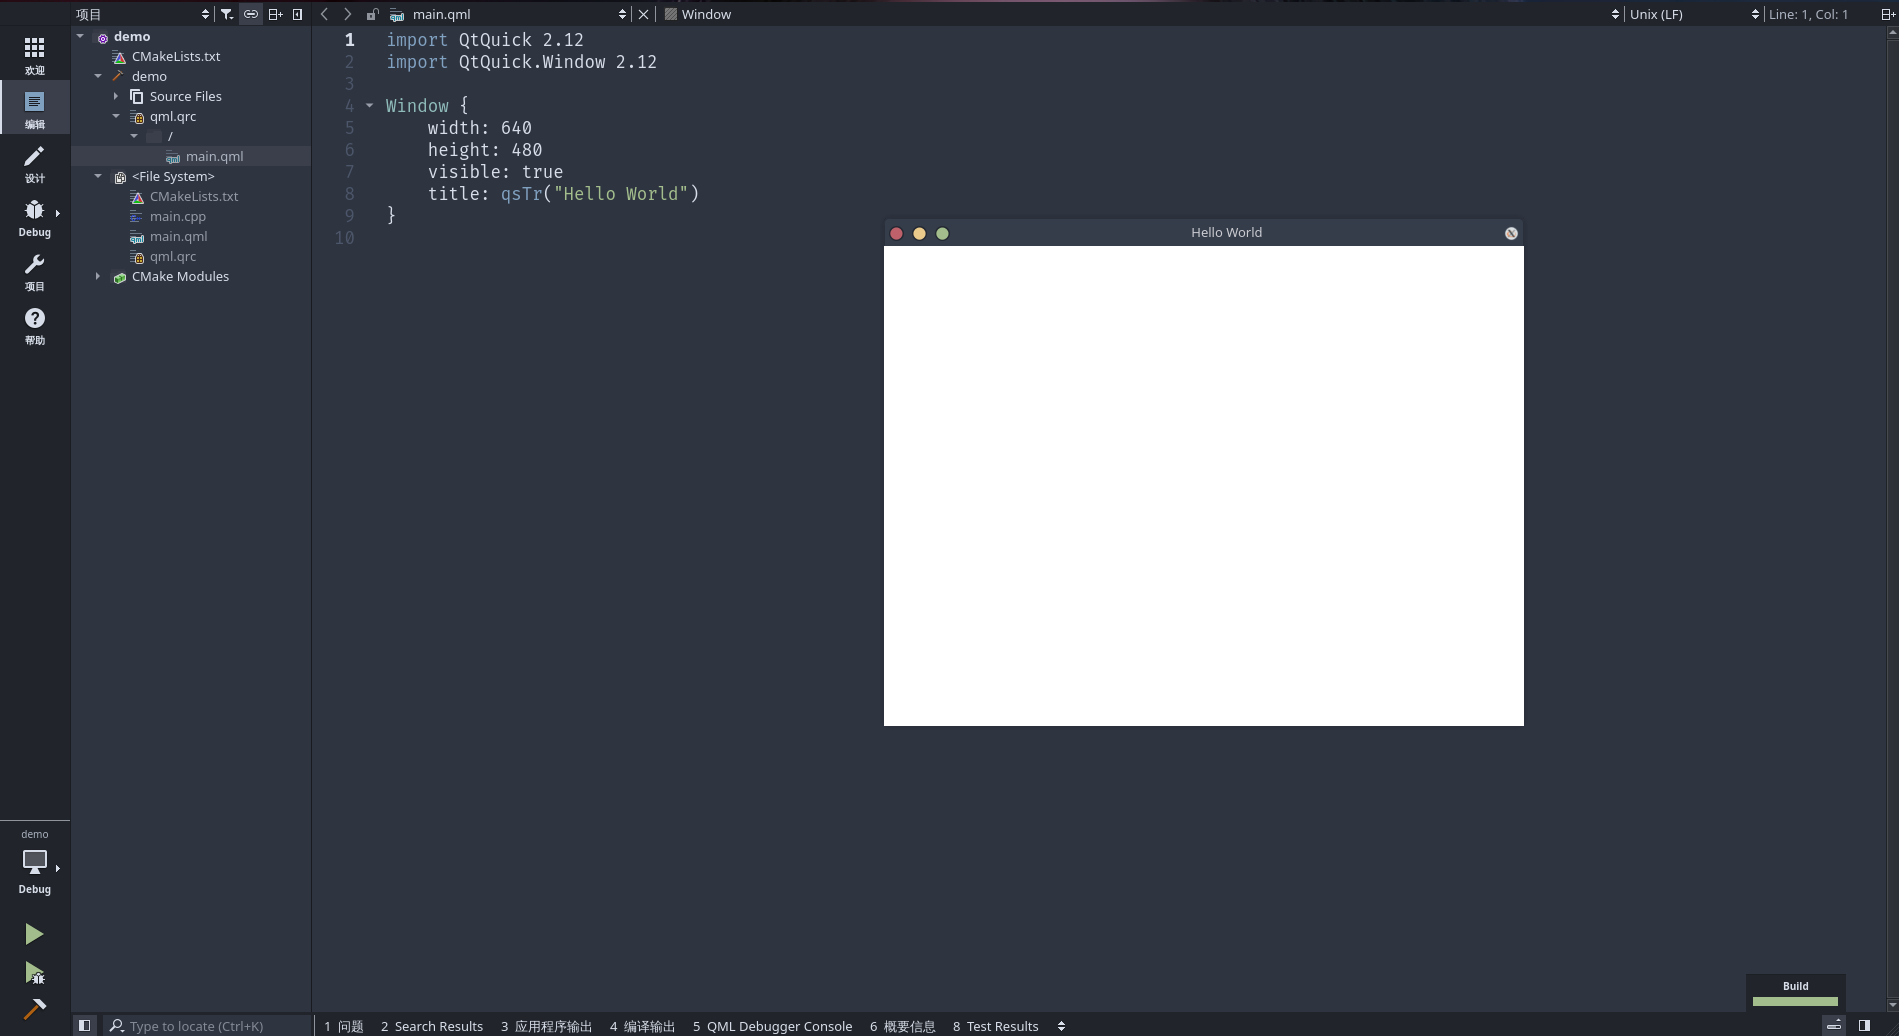
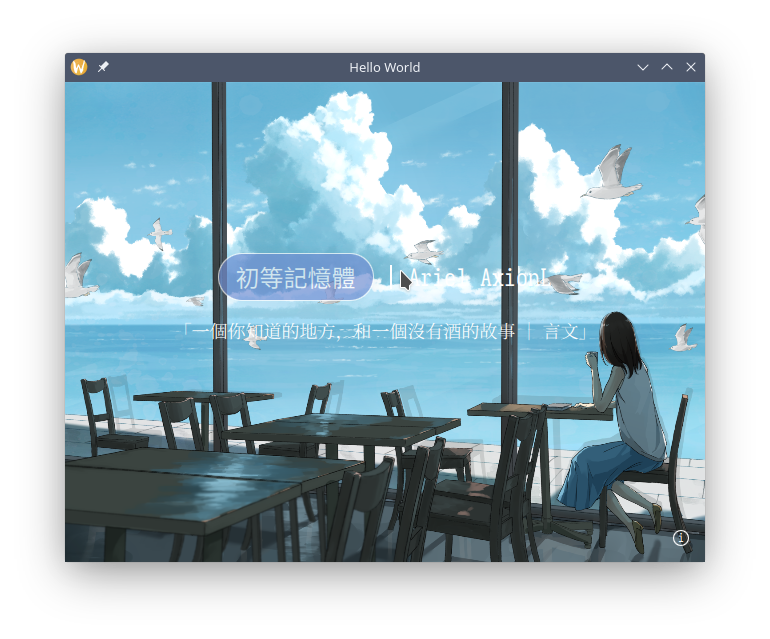
点击左下角的运行按钮,就可以看到运行的 HelloWorld 窗口了

HelloWorld

恭喜你,已经搭建好了本教程的开发环境!

在 Windows 11 上搭建

通过 Installer 安装

https://www.qt.io/download

注册账号并下载开源版本(需遵守 GPL 许可并限于个人使用)

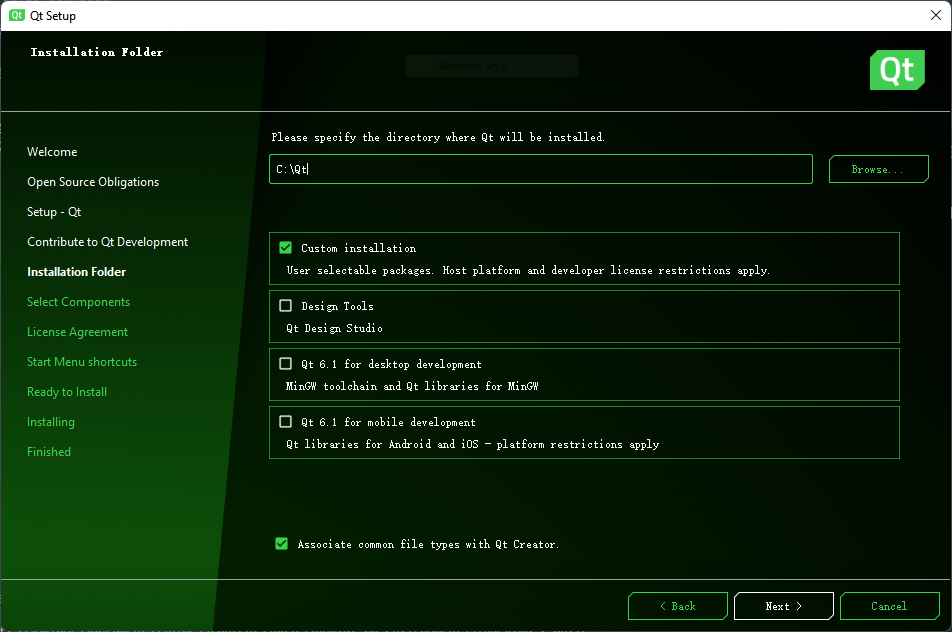
installation folder

此处安装路径至今未支持带空格,故不要选择常见的 C:\Program Files 等目录

手动最小化安装则选择 Custom Installation
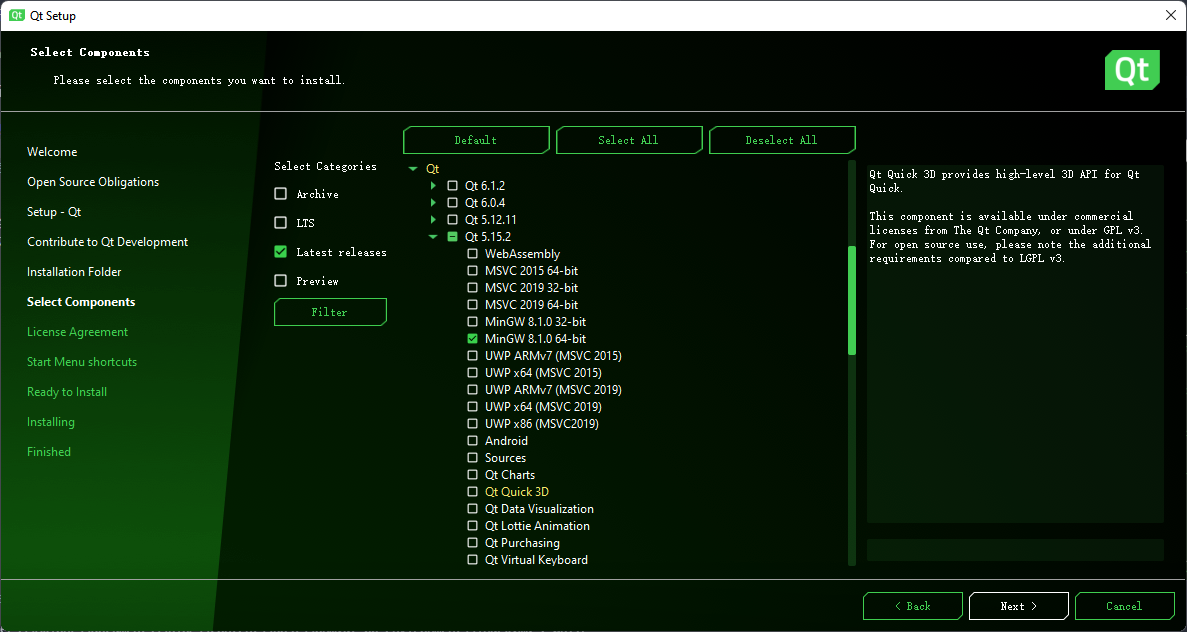
select components

至少需要选择一个版本的 Qt 支持(如 MinGW 8.1.0 64-bit 包含了 Qt 和其他所需的一些环境),而 QtCreator 作为 IDE 在下方已经被默认勾选了,还有 CMake 如果需要或是已经手动安装则可消去。等待联网装好后即可使用

通过第三方包管理器安装

chocolately 也提供了 QtCreator 的安装脚本和基本的 Qt5 SDK 环境

1
choco install -y qt5-default qtcreato

脚本会自动下载安装,默认路径为 C:\Qt

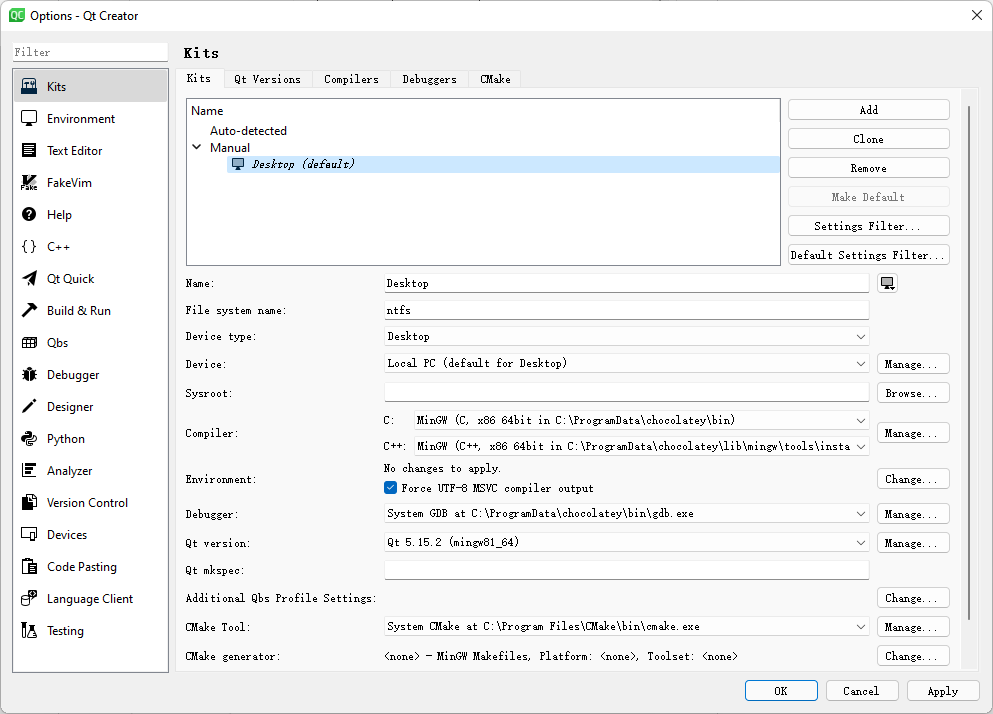
配置工具链

toolkits

QtCreator 左边 Projects 有配置工具链的地方,通常来说会自动检测是否已经安装对应工具并设置,如果需要自定义或者不在查找范围内的目录,则可以手动进行指定。

若在开发时终端需要运行 Qt 程序,则需要将库所在目录添加到环境变量 PATH 中(如 C:\Qt\5.15.2\mingw81_64\bin

environment

若是打包和分发的话则需要带上对应的动态链接库。

小结

Linux 平台上开发相对方便,而 Windows 平台上开发则受到没有合适包管理的限制,需要自己折腾一下。下一节将会正式开始教程中的第一个 Demo,一个用于展示自己内容的 Hello World 程序。

[OhMyQt 系列] 01_HelloWorld

2021-07-20 10:58:40

Featured image of post [OhMyQt 系列] 01_HelloWorld

前言

项目地址: axionl/OhMyQt

  • 项目在 Windows 11 和 ArchLinux 下进行测试
  • Qt 版本: 5.15.2

本文以项目构建的角度介绍一个简单 Qt 应用的开发,其余具体的环境安装和配置稍后会在第 0 节内容中放出。

从看见到设计

我们需要一个简单的展示页面作为上手的第一个项目:

  • 一个醒目的标题
  • 一段用于描述的文字
  • 还有一个好看的背景

假设我们已经做了出来,它长下面这个样子,你需要做的是把它保留在你的想象中,我们再回过头来考虑如何实现。

preview

布局

我们把窗口想象成一个盒子(而不是一个平面或者一张桌子,因为盒子横看有四壁,俯瞰有纵深),而所需要填入的内容当成另一个小些的盒子,套入到窗口这个大盒子中。结合我们多年糊 PPT 的水平,可以对界面有如下设计要求:

  • 内容整体居中
  • 标题和描述上下排布
  • 内容之间最好有一定的间距

layout

如上图所示,我们把这一些要求的集合称为 “布局” 也即 Layout,它决定了我们软件设计的基本框架。上面的每一项具体内容称为 “元素” 即 Element / Item。有的人设计 PPT 的时候会说:“应甲方要求,标题一定要大!”,那这属于元素的“属性”,即 Property。于是我们来抽象实现一下这个布局(注意不是直接能用的代码):

1
2
3
4
5
6
7
// 基本元素如下
Window { // 窗口一个大盒子
 Box { // 里面套个小盒子
 Title {} // 盒子里面有标题
 Description {} // 标题下面有描述
 }
}

进一步加上居中对齐和间距:

 1
 2
 3
 4
 5
 6
 7
 8
 9
10
11
12
13
Window {
 Box {
 anchors.centerIn: parent // 居中对齐大盒子

 Title {
 anchors.horizontalCenter: parent.horizontalCenter // 水平对齐小盒子
 }

 Description {
 anchors.horizontalCenter: parent.horizontalCenter // 水平对齐小盒子
 }
 }
}

可以看到,这里引用了一个 parent 的概念,实际上指代上一层父级元素,套娃套在里面的才是娃,文字和描述的父级元素是小盒子,小盒子的父级元素是大窗口。再补上元素的属性和间距:

 1
 2
 3
 4
 5
 6
 7
 8
 9
10
11
12
13
14
15
16
17
18
19
20
21
22
23
24
25
Window {
 width: 960 // 窗口宽度
 height: 720 // 窗口高度

 Box {
 anchors.centerIn: parent
 implicitWidth: 360 // 宽度 360 单位(多数情况下理解为像素)
 implicitHeight: 128 // 高度 128 单位

 Title {
 anchors.horizontalCenter: parent.horizontalCenter // 水平对齐小盒子
 font.pixelSize: 24 // 标题一定要大
 }

 Box {
 visible: false // 一个看不见的盒子
 implicitHeight: 16 // 用于拉开标题和描述的间距
 }

 Description {
 anchors.horizontalCenter: parent.horizontalCenter // 水平对齐小盒子
 font.pixelSize: 16 // 精致的描述用小字
 }
 }
}

这些具体元素我们以后会写到如何实现,现在需要用 QtQuick.Controls 提供的一些默认元素替代:

  • Box->Rectangle
  • Title / Description -> Text
 1
 2
 3
 4
 5
 6
 7
 8
 9
10
11
12
13
14
15
16
17
18
19
20
21
22
23
24
25
26
27
28
29
30
31
32
33
34
import QtQuick 2.12
import QtQuick.Window 2.12
import QtQuick.Controls 2.12

Window {
 width: 960
 height: 720

 Rectangle {
 anchors.centerIn: parent
 implicitWidth: 360
 implicitHeight: 128
 color: "#ef7e9ceb"

 Text {
 id: title
 anchors.horizontalCenter: parent.horizontalCenter
 text: "这是一个大标题"
 font.pixelSize: 48
 }

 Rectangle {
 color: "transparent"
 implicitHeight: 16
 }

 Text {
 id: description
 anchors.horizontalCenter: parent.horizontalCenter
 text: "我吞下玻璃会伤身体"
 font.pixelSize: 24
 }
 }
}

实现之后的效果可能长成了这个样子,对了,但没全对。因为我们这个 Rectangle 不太智能,是个“硬盒”,元素之间会挤在一起,而不是自动拉开保持社交距离。
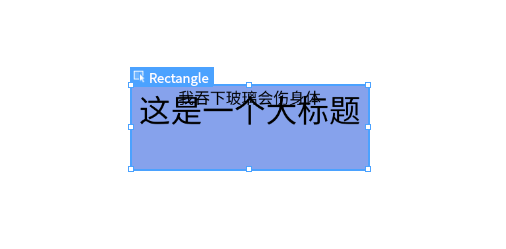
awesome_qml

 1
 2
 3
 4
 5
 6
 7
 8
 9
10
11
12
13
14
15
16
17
18
19
20
21
22
23
24
25
26
27
28
29
30
31
32
33
34
35
import QtQuick 2.12
import QtQuick.Window 2.12
import QtQuick.Controls 2.12
import QtQuick.Layouts 1.12

Window {
 width: 960
 height: 720

 Rectangle {
 anchors.centerIn: parent
 implicitWidth: 360
 implicitHeight: 128
 color: "#ef7e9ceb"

 ColumnLayout { // 一个上下布局的模板
 anchors.fill: parent // 沾满小盒子的空间
 spacing: 16 // 原先看不见的盒子用默认提供的间距属性实现

 Text {
 id: title
 Layout.alignment: Qt.AlignHCenter | Qt.AlignVCenter // 换成 Layout 下的居中对齐模式
 text: "这是一个大标题"
 font.pixelSize: 48
 }

 Text {
 id: description
 Layout.alignment: Qt.AlignHCenter | Qt.AlignVCenter
 text: "我吞下玻璃会伤身体"
 font.pixelSize: 24
 }
 }
 }
}

可以把 ColumnLayout 当作一个更加智能的盒子,它能够把挤在一起的元素上下依次排开。而与之相对的 RowLayout 则是将元素左右排开。
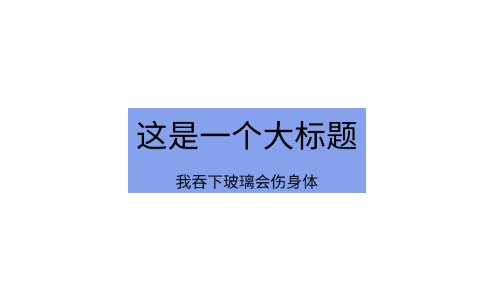
column_layout

对比原本想像中的布局要求,可以说是基本实现了(打个九折不过分吧)。

样式

基本的元素提供了默认的样式和属性,回顾想象图目前还缺少:

  • 按钮
  • 背景图

以一个基本的矩形为例,有如下常用属性(QtQuick-Rectangle

 1
 2
 3
 4
 5
 6
 7
 8
 9
10
import QtQuick.Controls 2.12

Rectangle {
 width: 16
 height: 16
 radius: 8 // 圆角半径
 color: "white" // 颜色
 border.width: 1 // 边框宽度
 border.color: "whitesmoke" // 边框颜色
}

带阴影的矩形可以这样实现:

 1
 2
 3
 4
 5
 6
 7
 8
 9
10
11
12
13
14
15
import QtQuick.Controls 2.12
import QtGraphicalEffects 1.0 // 包含 DropShadow 效果

Rectangle {
 // ...

 layer.enabled: true
 layer.effect: DropShadow {
 horizontalOffset: 1 // 横向偏移
 verticalOffset: 1 // 纵向偏移
 radius: 16 // 阴影半径
 samples: 17 // 采样率(越高效果越好,性能消耗也增大)
 color: "#10000000" // ARGB(透明度,红,绿,蓝)
 }
}

为矩形添加渐变色:

 1
 2
 3
 4
 5
 6
 7
 8
 9
10
11
12
13
14
15
16
17
18
Rectangle {
 // ...

 rotation: 0 // 渐变角度
 gradient: Gradient {
 GradientStop {
 position: 0
 color: "#ef7e9ceb" // 起始颜色
 }

 // 可以添加多段

 GradientStop {
 position: 1
 color: "#c5000000" // 结束颜色
 }
 }
}

qml.qrc 文件中管理所有的静态资源,可以右键在编辑器中打开,然后添加图片资源:
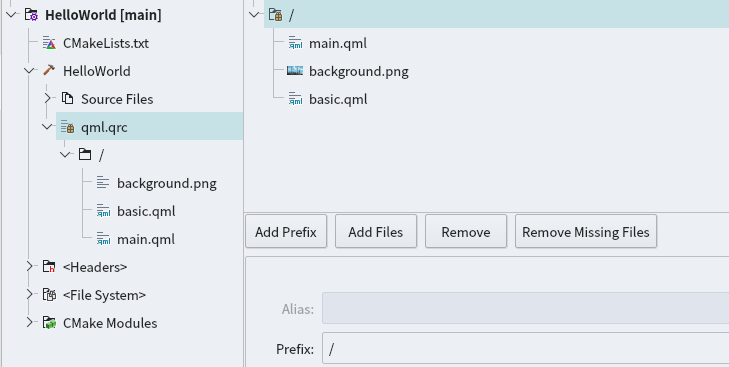
qml.qrc

 1
 2
 3
 4
 5
 6
 7
 8
 9
10
11
12
Rectangle {
 id: background

 // ...

 Image {
 anchors.fill: background // 填充背景矩形
 source: "qrc:/background.png" // 图片资源
 fillMode: Image.PreserveAspectCrop // 填充方式
 z:-1 // 由于需要将渐变色作为滤镜效果,所以图片的层级下调
 }
}

如果去掉 z 轴高度设置会发现渐变色在图片下层不可见:

no_z_index

事件和交互

事件触发

虽然 QtQuick.Controls 中提供了 Button 控件,但是我们仍然可以先为自己创立一个简单的按钮,通过鼠标点击这一事件理解其基本实现。

 1
 2
 3
 4
 5
 6
 7
 8
 9
10
11
12
13
14
15
16
17
18
19
20
21
22
23
24
25
26
27
28
29
30
31
32
33
34
35
36
37
Rectangle {
 id: button
 implicitHeight: 48
 implicitWidth: 156
 radius: implicitHeight / 2
 border.color: "white" // 边框颜色
 color: "#ef7e9ceb" // 背景颜色

 Text {
 anchors.verticalCenter: parent.verticalCenter // 居中对齐
 anchors.horizontalCenter: parent.horizontalCenter

 text: "初等記憶體" // 文字内容
 color: "white" // 文字颜色
 }

 // 大小和位置覆盖全按钮的鼠标动作区域
 MouseArea {
 anchors.fill: parent
 Layout.alignment: Qt.AlignHCenter | Qt.AlignVCenter
 hoverEnabled: true // 允许响应鼠标停留

 onEntered: {
 parent.color = Qt.lighter(button.color, 0.8); // 进入颜色变深
 parent.opacity = 1.0; // 不透明
 }

 onExited: {
 parent.color = Qt.lighter(button.color, 0.9); // 退出颜色变浅
 parent.opacity = 0.7;
 }

 onClicked: {
 parent.color = Qt.lighter(button.color, 1.1); // 点击颜色变亮
 }
 }
}

Qt.lighter()Qt.darker()color 属性内置的两个方法,用于相对调整颜色的深浅。运行时,鼠标放到按钮上方即可看见按钮颜色变化。

darker-method | lighter-method

这里有一个常见用法可以将需要设置的属性用 property 暴露出来,这样便于统一设置和更改,以及将来要写自己组件时便于外部设置,使用 state 可以提供若干个对象默认状态进行切换,这部分后面会见到。

1
2
3
4
5
6
7
Rectangle {
 // ...
 property string buttonColor: "#ef7e9ceb"
 property string buttonText

 color: buttonColor // 引用属性值
}

事件交互(响应)

那么如何使得按钮能够响应我需要的事件呢,比如说点击按钮后用系统默认浏览器打开一个网址:

1
2
3
4
5
6
7
8
9
Rectangle {
 property string url: "https://axionl.me"

 text: "ClickMe!"

 onClicked: {
 openURL(url); // 我们需要实现一个形如这样的方法
 }
}

好在作为一个常见功能,QML 已经将其置为默认对象的方法之一,点击后即可调用默认浏览器打开所设置的网址

openUrlExternally-method

1
2
3
4
5
6
7
8
9
Rectangle {
 property string url: "https://axionl.me"

 text: "ClickMe!"

 onClicked: {
 Qt.openUrlExternally(url); // 使用默认提供的方法
 }
}

自定义类型和方法

在 C++ 中先写一个基于 QObject 父类的类对象,并实现所需的方法。

 1
 2
 3
 4
 5
 6
 7
 8
 9
10
11
12
13
14
// my_button.hpp
class MyButton : public QObject
{
 Q_OBJECT
public:
 explicit MyButton(QObject *parent = nullptr) {};

 Q_INVOKABLE void openUrl(const QUrl& url) {
 bool err = QDesktopServices::openUrl(url);
 if (err) {
 qDebug() << "Failed to open url";
 }
 };
};

我们用 Q_INVOKABLE 宏声明了一个可以被外部调用(指 QML 中用 javascript 调用)的方法 void openUrl(const QUrl& url)

QDesktopServices | 该方法是对 QDesktopServices 类中打开链接方法的套用,其在不同平台下其会调用系统浏览器来打开链接。当然也可以自行实现,比如 Linux 平台如果装了 extra/xdg-utils 可以利用 xdg-open 来打开链接。

 1
 2
 3
 4
 5
 6
 7
 8
 9
10
11
12
13
14
15
16
17
18
// main.cpp
import "my_button.hpp"

int main(int argc, char *argv[])
{
 QGuiApplication app(argc, argv);

 // ...

 // 声明自定义对象
 qmlRegisterType<MyButton>("MyApp", 1, 0, "MyButton");

 // ...

 QQmlApplicationEngine engine;

 return app.exec();
}

简单注册如上,qmlRegisterType<类名>("包名", 主版本号, 次版本号, "对象名");,然后在所需的 qml 文件中引入。

 1
 2
 3
 4
 5
 6
 7
 8
 9
10
11
12
13
14
15
16
17
18
import MyApp 1.0

Item {
 // 以对象名为组件名
 MyButton {
 id: myButton // 实例化对象
 }

 Rectangle {
 property string url: "https://axionl.me"

 text: "ClickMe!"

 onClicked: {
 myButton.openUrl(url); // 使用自己实现的方法
 }
 }
}

也可以先在 C++ 中实例化一个对象,再传入对象引用。

 1
 2
 3
 4
 5
 6
 7
 8
 9
10
11
12
13
14
15
16
17
18
19
20
21
22
// main.cpp
import "my_button.hpp"

int main(int argc, char *argv[])
{
 QGuiApplication app(argc, argv);

 // ...


 // 实例化一个对象
 MyButton my_button;

 // ...

 QQmlApplicationEngine engine;

 // 传入对象引用
 engine.rootContext()->setContextProperty(QStringLiteral("myButtonObject"), &my_button); // 全局使用时,设置唯一名称

 return app.exec();
}

此时我们不再需要注册声明该对象,也无需在 QML 中引入和实例化,而是直接调用该对象的方法。

1
2
3
4
5
6
7
8
9
Rectangle {
 property string url: "https://axionl.me"

 text: "ClickMe!"

 onClicked: {
 myButtonObjecton.openUrl(url); // 直接调用对象方法
 }
}

小结

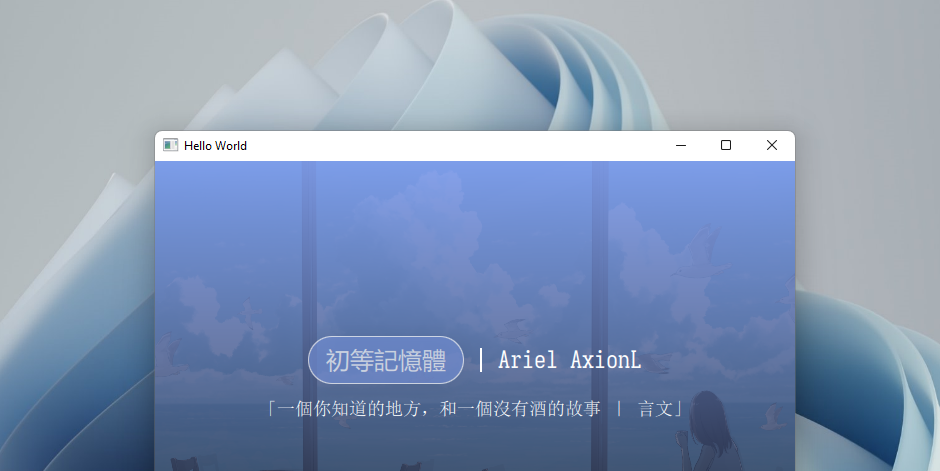
preview

至此已经实现了 Demo 的全部功能:

  • 一个用于展示的界面
  • 能用默认浏览器打开链接的按钮

本节基本介绍了 QML 的组织结构和简单事件交互的实现方法,下一节将以一个新的例子来介绍信号量和信号槽这一对重要的概念,以及 C++ 后端代码到 QML 的数据绑定实现。

另外还建立了个人讨论群方便大家互相交流: https://t.me/Qt_CN