


2026-10-23 05:16:52

This week, the invitations went out1 for an Apple “experience” next Wednesday in Los Angeles, which indicates a major set of product announcements. One of those rumored products is a new iPad mini with an OLED screen, A20 chip, and improved speakers.
The iPad mini is also in the zeitgeist more than ever right now, thanks to the release of the iPhone Duo, which numerous reviewers are comparing to an iPad mini when open. (The Duo is quite a bit smaller.)
In thinking about the iPad mini a bit this week, a thought occurred to me: Is the iPad mini the best iPad? Obviously, if you’re talking pure specs, it’s not—those iPad Pro models are amazing, and I’m writing this post on one right now. The base iPad is a better value and the iPad Air packs a punch, too.
But let’s think about this a little more broadly. Aren’t the best products the ones that know what they are, that have a purpose, that are well defined? One way to identify such a product is customer loyalty, and when I bring up the iPad mini, I frequently see hearts appear in the eyes of the people I’m talking to. People who like the iPad mini love it. That’s a sign.
The larger iPads fall into that neither-fish-nor-fowl twilight zone too often. Should my iPad Pro really just be a Mac that can also run in a tablet mode? It’s got an M5 in it, so probably.
Not the iPad mini. It’s powerful but small. The size means it’s less likely to be dragged into service as a productivity device, but it excels at lean-back tasks like reading and scrolling and even watching video. I love an E Ink reader, but so many people view the iPad mini as the perfect place to do their reading. And I get it. You can hold it in one hand. It’s so small, you can grip it in one hand. And yet, it will basically do everything an iPad does.
There’s something to be said for a product that’s great at filling its niche, and in this case it feels like there’s a really good niche that’s just the size of the iPad mini.
I don’t know what the new update will bring for fans of the iPad mini. They will undoubtedly be thrilled by getting an OLED screen and a faster processor. They will be less thrilled by the price, which might be as much as $799, according to Gurman. But what Apple product prices do thrill us these days, exactly?
Still, when I do get the new iPad mini in my hands, I will need to keep in mind its special place in the iPad line-up. It’s not frequently updated and (unlike this week) rarely the subject of a lot of conversation, but it’s beloved—and that means something.
 ↩
↩
2026-10-22 06:04:57
Lex Friedman has done a very nice job of summarizing the first wave of embargoed iPhone Duo reviews:
The iPhone Duo reviews landed, and I read a slew of them. Because I care about you. And because I’m curious about Apple’s new folding phone.
Lots of links and some good summaries. Even if you’ve been devouring reviews today, Lex may point you at some opinions you haven’t seen yet.
(For the record, I expect to get my iPhone Duo review unit tomorrow or Friday, depending on a wild series of chance events.)
2026-10-22 00:49:00
Our imaginary reviews of the iPhone Duo, how we stay open-minded and curious instead of becoming the “Old Man Yells at Cloud” meme, our current read-it-later methods, and pouring one out for the iPod and MP3 players.
2026-10-21 17:17:00

Guiding Apple through its comeback, Steve Jobs comes up with a clever strategy to make the Mac the center of everyone’s digital life. The problem is, he’s failed to integrate music into the mix—and Apple will have to scramble to catch up.
2026-10-21 15:00:00
The iPhone Duo reviews are in, the internet has problems and X still sucks.
2026-10-20 07:15:13
As the song goes, we all need a little help from our friends. And that applies to apps for our Macs and iPhones as well.
Fortunately, the apps in the spotlight this week all aim to lend a helping hand, whether it’s tracking down files to free up space on your devices, expanding text or storing clippings to save time or even doing things with the photos and screenshots you’ve accrued over the years.
Do you know of any helpful macOS and iOS offerings? Drop us a line at [email protected] with a brief description. We won’t be able to respond to every email we receive, but we will give any and all suggestions a helpful once-over.
I’m not as diligent about keeping my Mac free of detritus and cruft as I should be, to the point where gigabytes are often in short supply on my laptop’s drive. Crumb promises to do the hard work of freeing up space on your Mac, with some more sophisticated tools to help you track down the files that have outlived their usefulness.

At its most basic, Crumb clears out your caches, which can remove a surprising amount of filler if you’ve not used a cleaner app in a while. Running the app for the first time, I wound up with 2.4GB of cache and logs that could be safely jettisoned — I imagine that number won’t be as garish with more frequent cleanings, but anything that helps me keep my drive free of cruft is welcome.
Crumb has some other modes, like a Visualize tool that shows you what’s in different folders and how much space that folder takes up. An analysis tool can spot whether the content in the folder contains things you’ve created and, therefore, should be reviewed manually before deleting. You can also tap a shortcut button to head straight to a folder to review its contents.
I find Crumb’s Duplicate tool particularly useful, since I’m in the habit of downloading images, tweaking their sizes for stories and then keeping copies in multiple places. Duplicate tracks down the extras for purging, while an Uninstall feature helps you remove apps and any files they leave behind.
The free tier of Crumb entitles you to one full cleanup — a trial of the app, in essence. A one-time $9 payment unlocks unlimited cleanups as well as the Uninstall, Duplicates and Organize tools. (The latter feature sorts things into folders such as Images, Videos, Documents and more.) A Crumb license works on up to two Macs.
Klackey is a multipurpose text expander that works on both Windows machines and Macs, though it’s only the macOS version we’re concerned with here. And while some may find the extensive toolset to be overkill — Klackey brings a lot to the table — the text expansion features certainly impress.
![Screenshot of Klackey, a text-expansion app, with the Abbreviations list showing the "Email sign-off (try the abbreviation)" clipping, abbreviation ;sig, in the Welcome folder. Rich text editor reads "Best, [Your name]" and a hint to type ;sig then space.](https://i0.wp.com/sixcolors.com/wp-content/uploads/2026/10/klackey-noshadow-6c.png?ssl=1)
I get a lot of email submissions, as you might imagine, and I’ve been struggling with a way to send out a reply that doesn’t make responding to emails my full-time job. In Klackey, I can write a general reply and give it a simple code preceded by a semicolon — say ;reply — so that when I type that code into a Mac app that accepts text input like a mail client, my form letter shows up automatically. I can do that for any other frequently used text snippets I want to store in Klackey as well.
Klackey offers other features like a clipboard history for keeping everything you copy close at hand, a notes tool for organizing your thoughts and even an encrypted secure folder for storing items like passwords. I found the text expansion to be the real selling point, but you can decide for yourself with a free 14-day trial when you download Klackey. After that, a payment unlocks all the current features with a year of updates, with a cross-platform license covering up to two computers.
As I write this, Klackey is available for $35, a discount from the regular price of $49.
You’re not hurting for options when it comes to assembling your photos and videos into a movie that you can view or share with others. MemoryString is betting you’ll give this macOS offering a try for a couple of reasons, not the least of which is that it’s free.
That’s not “free” as in you get to assemble a video or two before you’re required to unlock the full app. MemoryString won’t cost you a dime to download — neither initially nor through any in-app purchases. Just grab the app, import some photos or videos and fiddle around with the transitions, titles and audio. (There’s a royalty-free library included with the app, or you can add your own music.) A MemoryString watermark does appear at the end of the finished video.
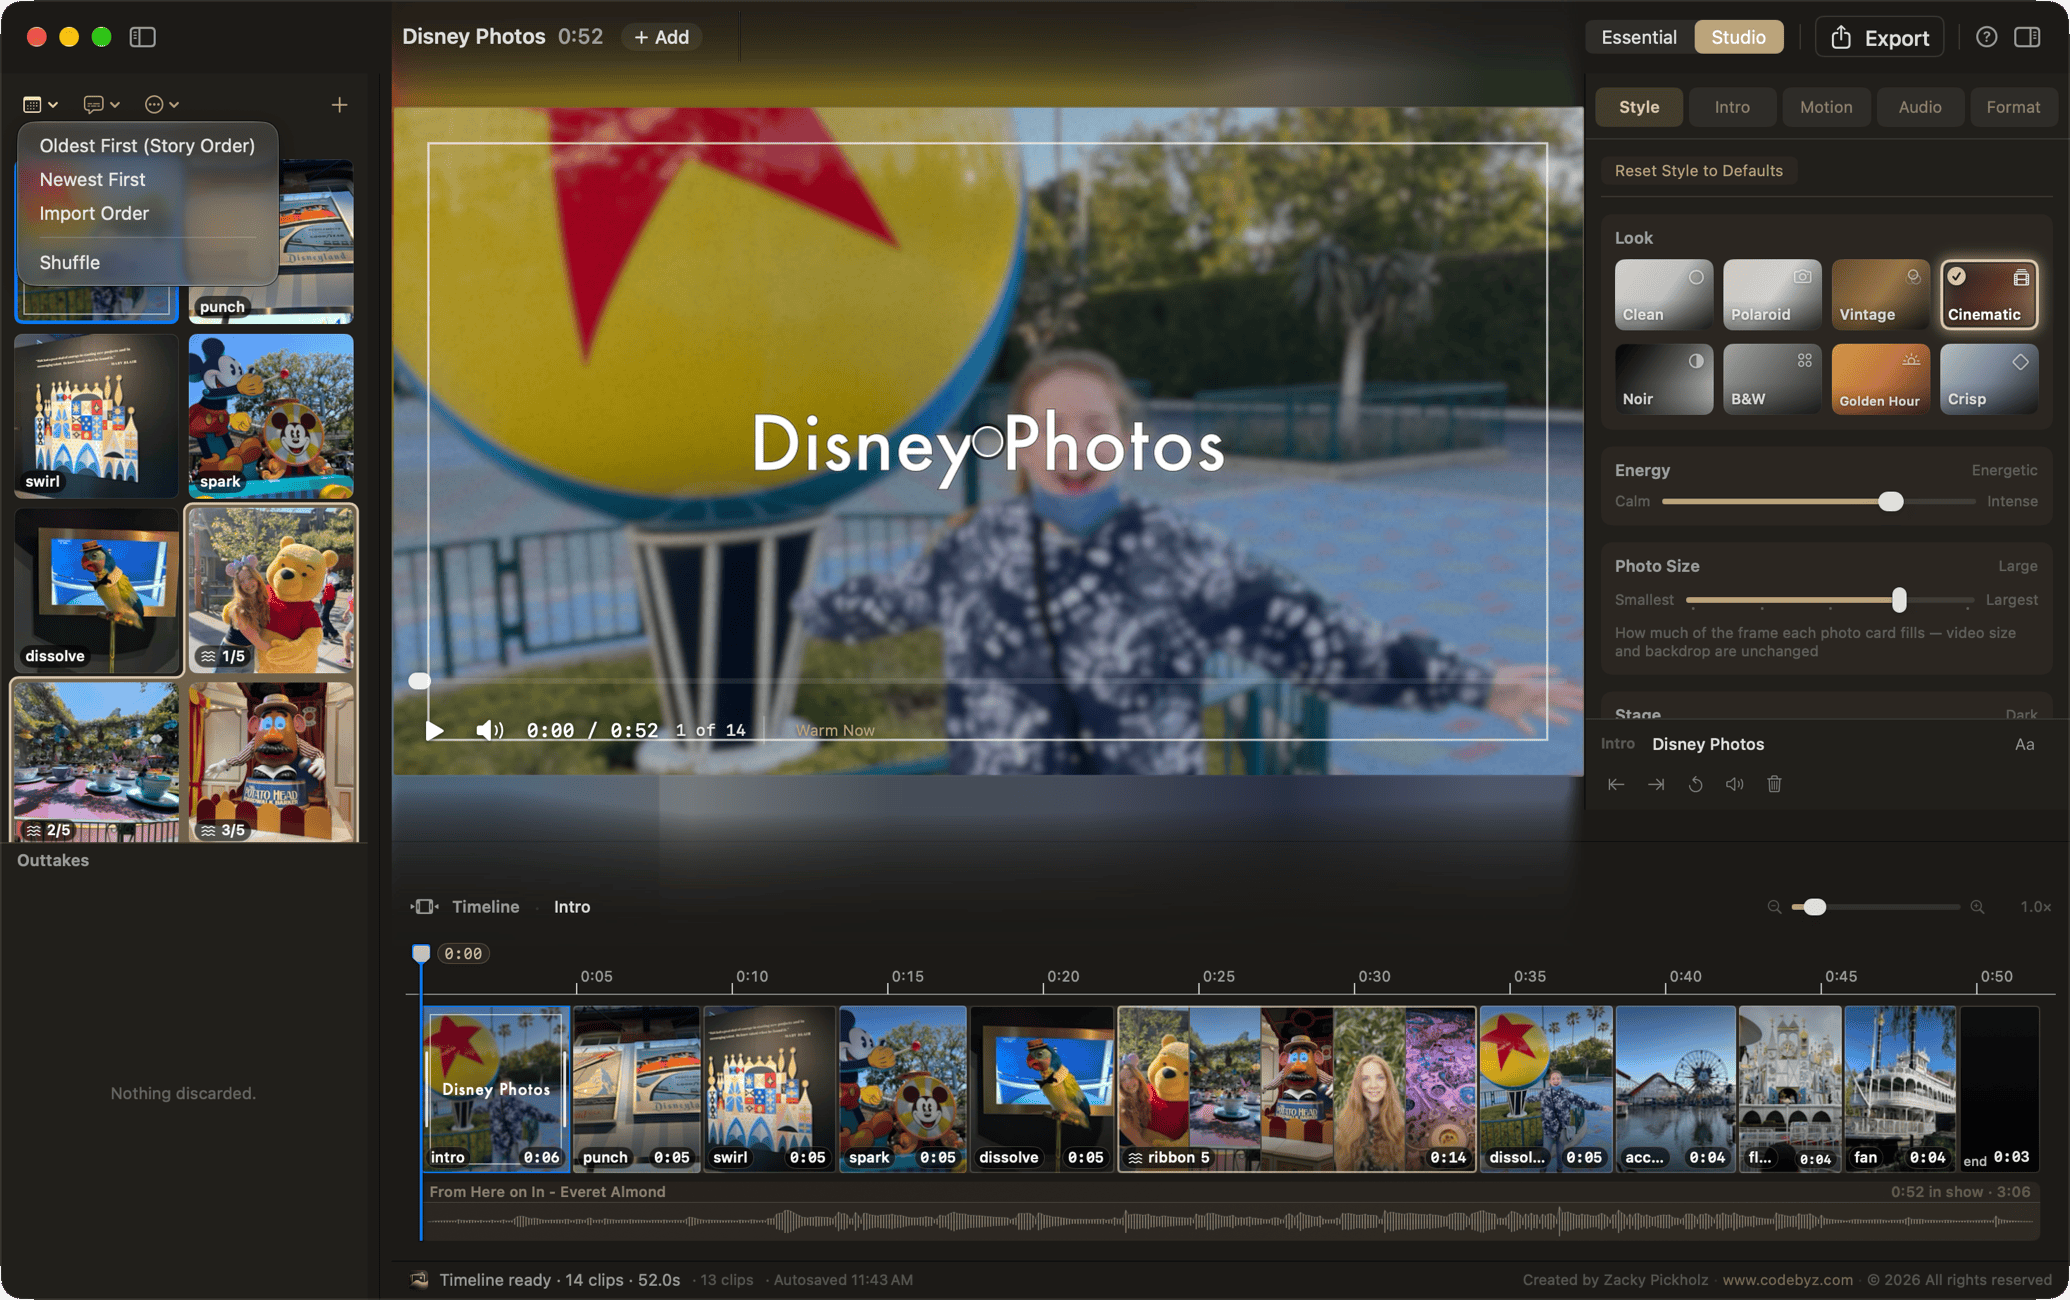
MemoryString looks to be an alternative to iMovie by getting you to the finished product faster, while also offering more control over your project than the Memory Movie feature included in Photos.
I found that the app works best when you import an image or folder, as MemoryString crashed when I tried dragging things directly from the Photos app on my Mac. However, MemoryString’s developer responded promptly to my bug report.
In other words, it’s a promising alternative if you’re looking for a tool that helps you turn the photos on your Mac and iPhone into moving pictures, and the free status means there’s no barrier to giving MemoryString a try.

Just as there are lots of ways to assemble your photos into a video or slideshow, you also have many options for managing all the things you save to your clipboard. So why turn to the $10 Pixph as a place to stash text, URLs or anything else you care to copy? Besides the convenience of having a storage space on the side of your display — or wherever you choose to position the Pixph window — there’s also the matter of organizing all those clips.
It’s easy to copy something over to Pixph: just highlight and tap your shift button twice to capture it in the app. But Pixph also lets you organize clippings into projects, so that if you’re researching something, all the related text strings, links and images you’ve saved are all in one place, ready to move back into the window that you’re working in. Pixph lives in the menu bar of your Mac, and it’s easy to pivot between projects when you find a relevant clip to save.
I found Pixph’s commitment to the Liquid Glass interface a little bit distracting, though it was easy enough to open up settings and switch to dark mode so that the app behind the Pixph window wasn’t as visible. Pixph also treats your clippings as a checklist, with buttons for marking off items when you have no further use for them. Some may appreciate that approach, but it really didn’t fit into my workflow.
Nevertheless, the ability to organize items and even add your own thoughts via a note feature makes Pixph a useful tool for people to add a little structure to their projects.
If you find yourself filling up your iPhone’s Photos app with screenshots — and then forgetting to delete those screenshots later on — DumpPixels can clean up your photo library without sacrificing the information you were looking to capture in the first place.

Anytime you capture a screenshot, it appears in DumpPixels, which also copies any text that appears within that screenshot. Say you capture an article in the News app because you spot an interesting snippet of text. Within DumpPixels, you can save a note containing that text to the app’s Notes tab. You can then delete the screenshot, freeing up space in your Photos library while retaining whatever information you wanted from the screenshot.
Or at least, DumpPixels will delete the screenshot after you’ve unlocked the app. The free download only lets you save copied text from screens, while a $20 in-app purchase unlocks the deletion feature.
If there’s a limitation to DumpPixels, it’s that it only works on screenshots. If you were to take a photo of a flyer with date and address info, that wouldn’t get copied into DumpPixels — unless you were to take a screenshot of the photo itself, of course. Still, if you find yourself snapping a lot of screenshots to collect data for later use, DumpPixels could be an effective way to better manage all the info and imagery you’ve collected.
