2026-05-23 10:00:00
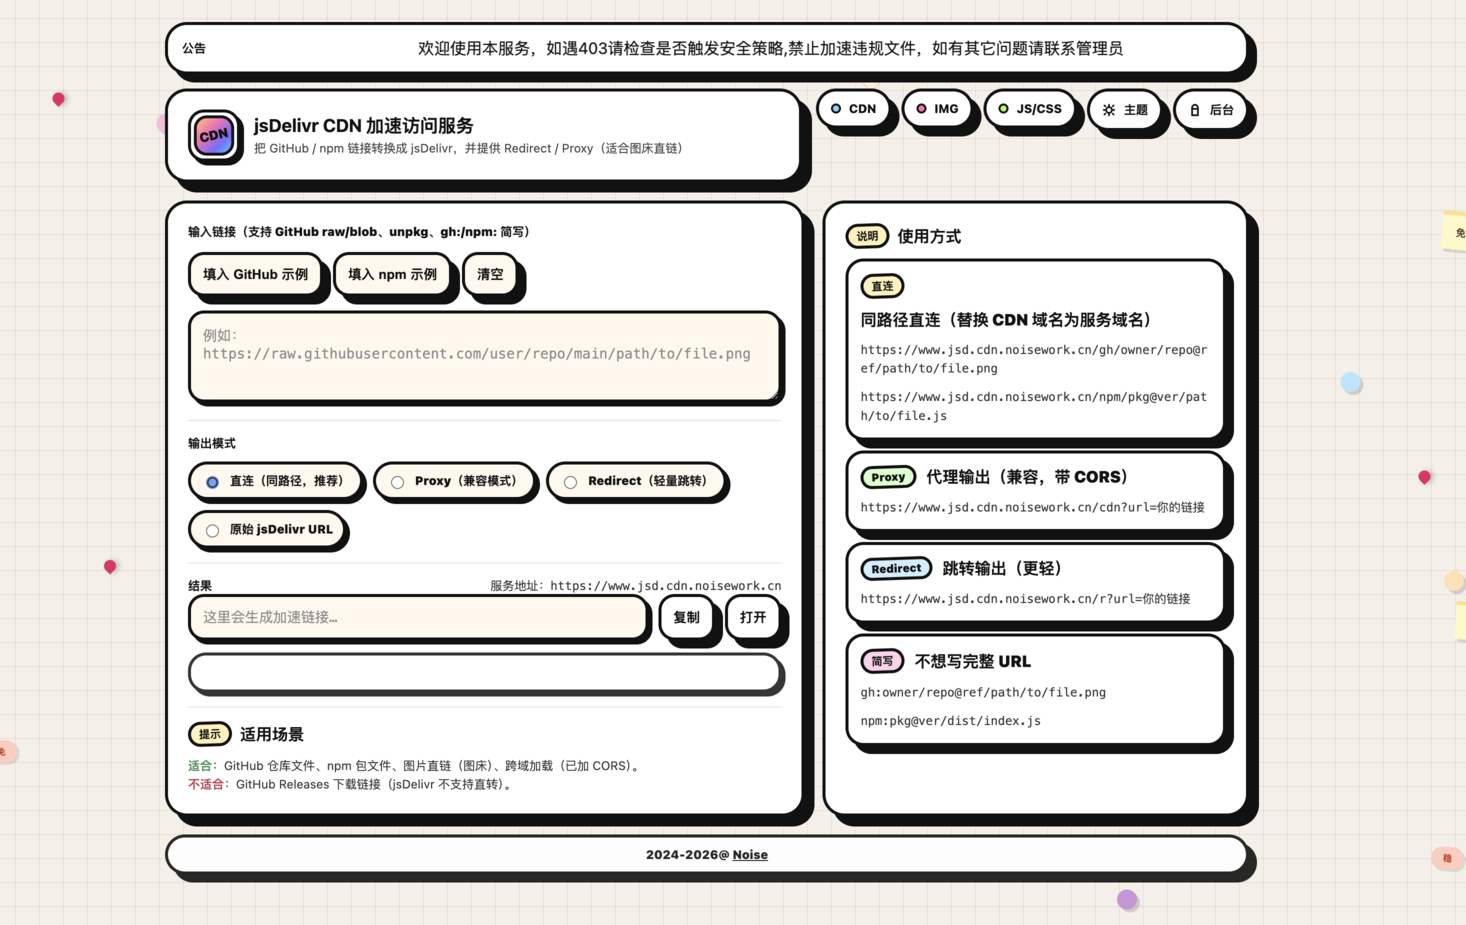
前言:这个服务本意是提供一些开发文件及图床的jsd代理加速,避免国内使用相关服务时无法访问或访问过慢,现提供两种高效使用该服务的部署方式,如果你在使用中有问题,也可以留言反馈
主要把常见的 GitHub / npm / unpkg 资源链接解析为 jsDelivr CDN 资源,并提供多种输出方式(直连/代理/跳转):
访问:https://jsd.cdn.noisework.cn
raw.githubusercontent.com / github.com/.../blob/... / github.com/.../raw/...
unpkg.com
cdn.jsdelivr.net/gh/... / cdn.jsdelivr.net/npm/...(可直接作为上游)gh:owner/repo@ref/path/to/file.extnpm:pkg@ver/path/to/file.ext(支持作用域包:npm:@scope/pkg@ver/path/to/file.ext)/gh/<owner>/<repo>@<ref>/<path>:同路径直连(服务端代理 jsDelivr 并返回内容;推荐图床/跨域)/npm/<pkg>@<ver>/<path>:同路径直连(服务端代理 jsDelivr 并返回内容;推荐图床/跨域)/cdn?url=...:代理输出(同样返回内容,适合”只能用 query 参数”的场景)/r?url=...:Redirect(302 跳转到 jsDelivr)/u?url=...:仅解析,返回 JSON(首页/前端页面使用)cdn.jsdelivr.net、fastly.jsdelivr.net
Access-Control-Allow-Origin: *,适合图片/静态资源跨域引用main/master/latest 等不稳定 ref,默认短缓存
1 |
docker pull noise233/jsd-noise:latest |
推荐按下面这样跑(首次会自动创建并初始化 /app/data/app.db;以后复用旧数据直接沿用该目录即可):
1 |
docker run -d \ |
默认首次注册的用户为管理员,如果你有旧数据如在/opt/jsd/文件夹中,则使用 -v /opt/jsd:/app/data \即可
你也可以一键部署在zeabur或fly.io等无服务器平台

适用于服务器轻量化使用,可直接在宝塔面板一键修改网站配置文件,将下面代码复制后修改必要的文件路径即可,已经配置了缓存时间及文件大小限制,可自行修改
网站首页文件:https://noise.lanzoul.com/iJdlt3q5tokd
功能同上述,但没有后台
配置文件代码:
1 |
server { |
使用时需要做的几件事:
cdn.example.com / www.cdn.example.com 替换为你自己的域名。/www/wwwroot/cdn.example.com 和证书路径替换为你实际的路径。http 块中添加 proxy_cache_path 定义(示例里是 cache_one),例如:1 |
proxy_cache_path /data/nginx/cache levels=1:2 keys_zone=cache_one:100m inactive=180d max_size=10g; |
如果你不想使用我的首页文件而自建的是 PHP 项目,把 index.html 改成 index.php。
2026-05-23 10:00:00
介绍
前言:如果你有网站或服务配置在cloudflare,一定免不了被扫描和恶意攻击,而配置Cloudflare的自定义安全规则可避免这些问题,
进入https://dash.cloudflare.com 官网,点击安全规则,选择创建规则,选择自定义规则,然后点击编辑表达式

下面是 3 套可直接复制粘贴配置 的 Cloudflare 自定义安全规则表达式
1 |
( |
in {...}) .env(密钥/配置)、/.git//.svn//.hg(源码与历史)、依赖锁文件(版本指纹)、phpinfo.php/server-status(环境指纹)、WP 关键入口(被大规模字典扫描)。 starts_with) /admin、/wp-admin、/phpmyadmin、/cgi-bin、/.git* 这类路径是扫描器的默认清单。 contains 运算符) 这套是“实战最常用”的:静态区严、API 区按协议约束、后台区挑战,整体误杀低。
1 |
( |
not cf.client.bot 的作用是让已识别的“好 Bot”不被挑战;其余访问后台触发挑战/拦截。 application/x-www-form-urlencoded 或 multipart/form-data,第三块会误杀;那就删掉第三块或加白名单路径。这套不靠正则,专打 WP 常见爆破/探测入口,配置后立即见效。
1 |
( |
wp-login/xmlrpc/wp-config) /wp-login.php:爆破入口核心命中点。 /xmlrpc.php:历史上被大量用于爆破与放大类调用(是否 Block 取决于你是否需要 Jetpack/APP)。 /wp-config.php:正常永远不该被访问到,命中几乎等同“明确恶意”。 2025-08-15 10:00:00
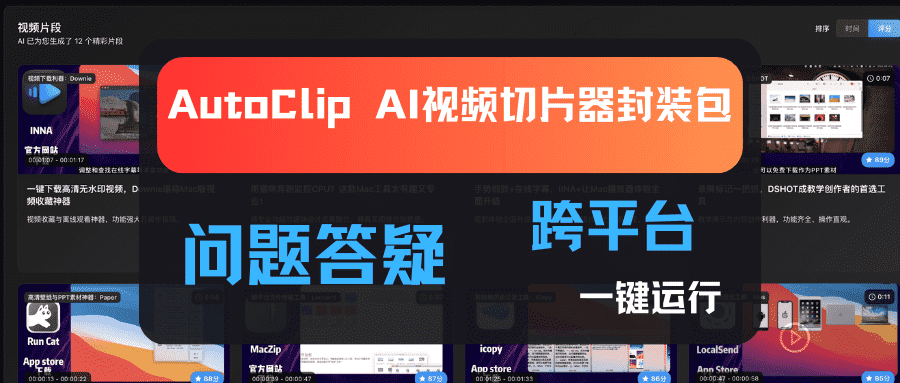
Auto clip桌面版,基于原项目编译封装,我没有过多改动,封装了Win、Mac版,原项目请查看剪辑神器-AutoClip智能视频切片器
编译包网盘下载:https://pan.quark.cn/s/b9b8928c311b
包含dmg、exe、zip绿色包,使用mac封装并编译了前后端为可执行文件,加入了自动创建uploads文件夹的逻辑。
以下为你可能遇到的问题及解答。
说明后端未运行,检查是否有杀毒软件或自己不小心删除了后端文件,win端在resources文件夹内,可手动启动检查。
检查安装包根目录是否缺少ffmpeg或电脑本地有没有安装ffmpeg,下载安装-https://ffmpeg.org/download.html
提供了arm-m1芯片版本和通用版本,如果是英特尔芯片选通用
检查是否有遗留的下载视频文件记录,删除记录。
能满足切片处理及字幕提示词处理的大模型少,如果你自定义的满足不了,你需要切换回默认可以使用的模型
使用命令python –version查看本地版本,我使用Python 3.13.5进行的编译,所以如果有冲突,原则上你需要下载不低于该版本的python

最后,声明虽然封装包是我编译的,但原项目作者不是我,关于源码及后续项目进展等的一些问题,你需要到github仓库去提
2025-08-10 10:00:00
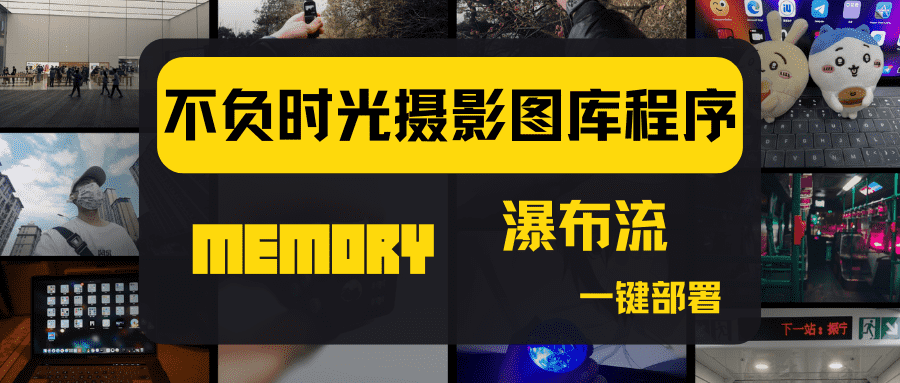
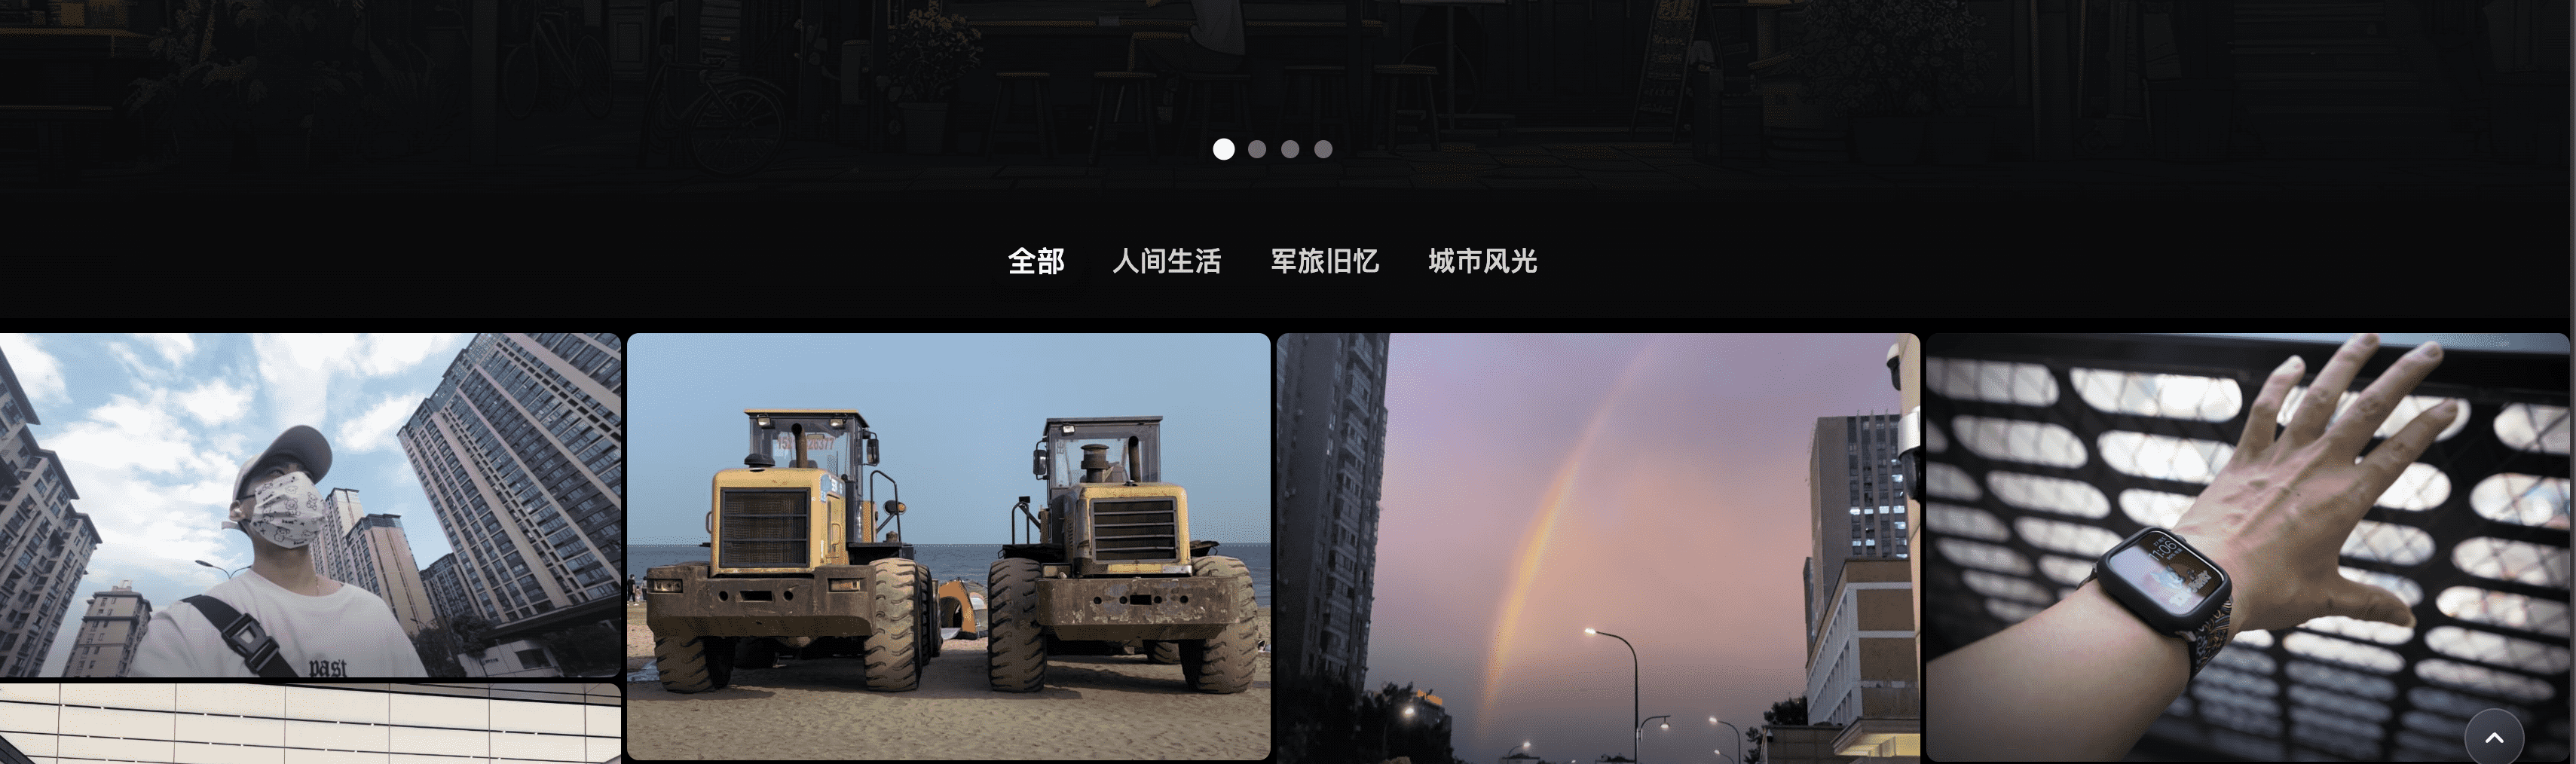
一个瀑布流摄影图库,也是专为摄影师做的独立网络相册程序,它是基于Moment二次开发的,提供前后端分离、docker部署方式,支持云端一键部署,加入了丰富个性化的一些功能,你可以本地使用或上传至oss存储,同样支持添加视频及一键备份等
演示:https://memory.noisework.cn
开源:https://github.com/rcy1314/Memory
桌面端下载:https://github.com/rcy1314/Memory/releases
网盘下载:https://pan.quark.cn/s/6477646cfa30
注意:我只有mac,m1芯片下运行正常,如果如果你运行后首页显示Network eroor的情况属于后端未运行,在最新版本的软件包内实际有后端文件,如果未自动运行,可手动运行解决报错,或者下载源码后执行后端命令,后端:python3 run.py
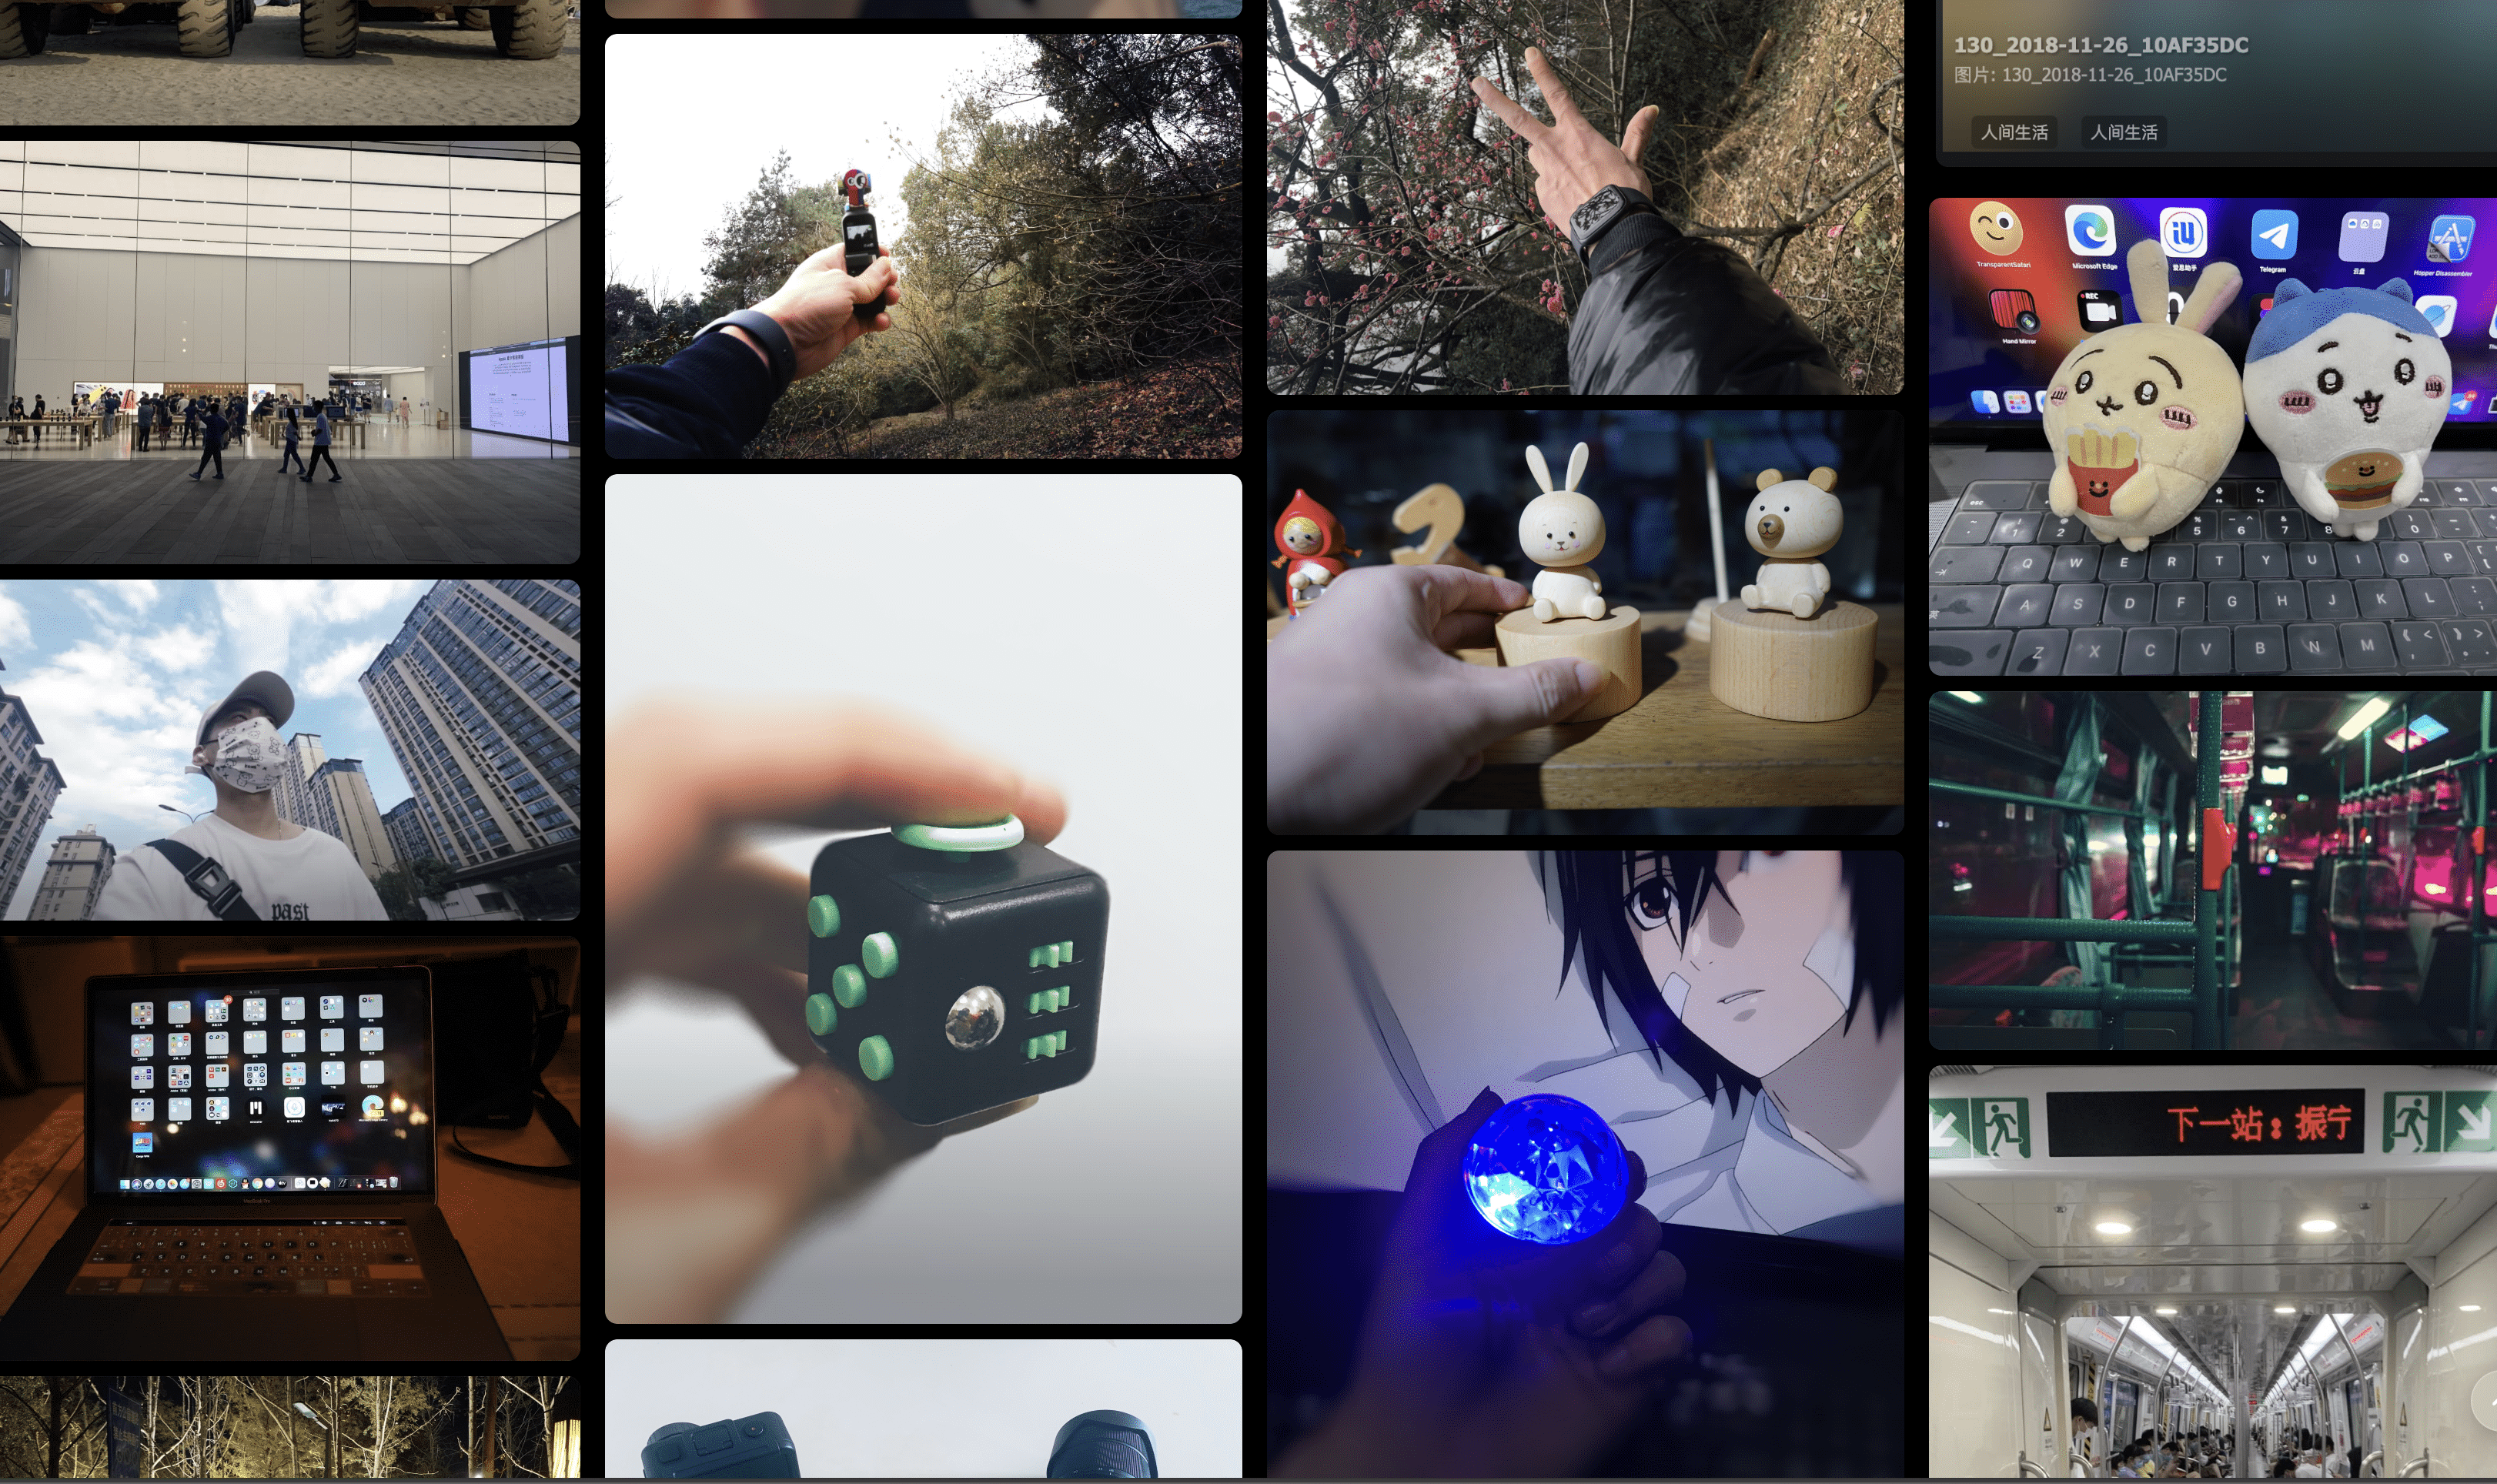
封面图片会根据设备类型和网络状况动态调整参数:
移动端优化:
尺寸:180×250像素
质量:慢网络30%,正常网络40%
URL参数: w=180&h=250&fit=crop&auto=compress,format&q=30-40
平板端优化:
尺寸:250×350像素
质量:慢网络35%,正常网络45%
URL参数: w=250&h=350&fit=crop&auto=compress,format&q=35-45
桌面端优化:
尺寸:200×280像素
质量:慢网络35%,正常网络45%
URL参数: w=200&h=280&fit=crop&auto=compress,format&q=35-45
前端:web目录下npm run dev
后端:python run.py
1 |
docker run -d \ |
如果你想挂载本地数据库文件,比如:
1 |
docker run -d \ |
连接 Neon 免费数据库的 Docker 运行命令
1 |
docker run -d \ |
由于桌面版和docker后端api有冲突,docker请使用/api/v1,如果你想自己构建docker:
web/.env.productuon请修改为
1 |
# 资源公共路径,需要以 /开头和结尾 |
web/.env.development请修改为
1 |
# Docker环境下的前端配置 |
然后运行
1 |
docker-compose up -d |
构建跨平台桌面端时
web/.env.productuon请修改为
1 |
# Tauri桌面端环境配置 |
web/.env.development请修改为
1 |
# Docker环境下的前端配置 |
1 |
# 使用一键部署脚本 |
我们支持多种云平台的一键部署,详细说明请查看:
📖 完整部署指南
支持的平台:
zeabur.json
fly.toml
railway.json
render.yaml
双平台构建发布
1 |
docker buildx build --platform linux/amd64,linux/arm64 -t noise233/memory:latest --push --no-cache . |
Podman(替代Docker)
1 |
podman manifest create noise233/memory:latest |
1 |
podman manifest create noise233/memory:dev |
<服务器IP地址>:4314或域名访问相册<服务器IP地址>:4314/admin/或<域名>/admin
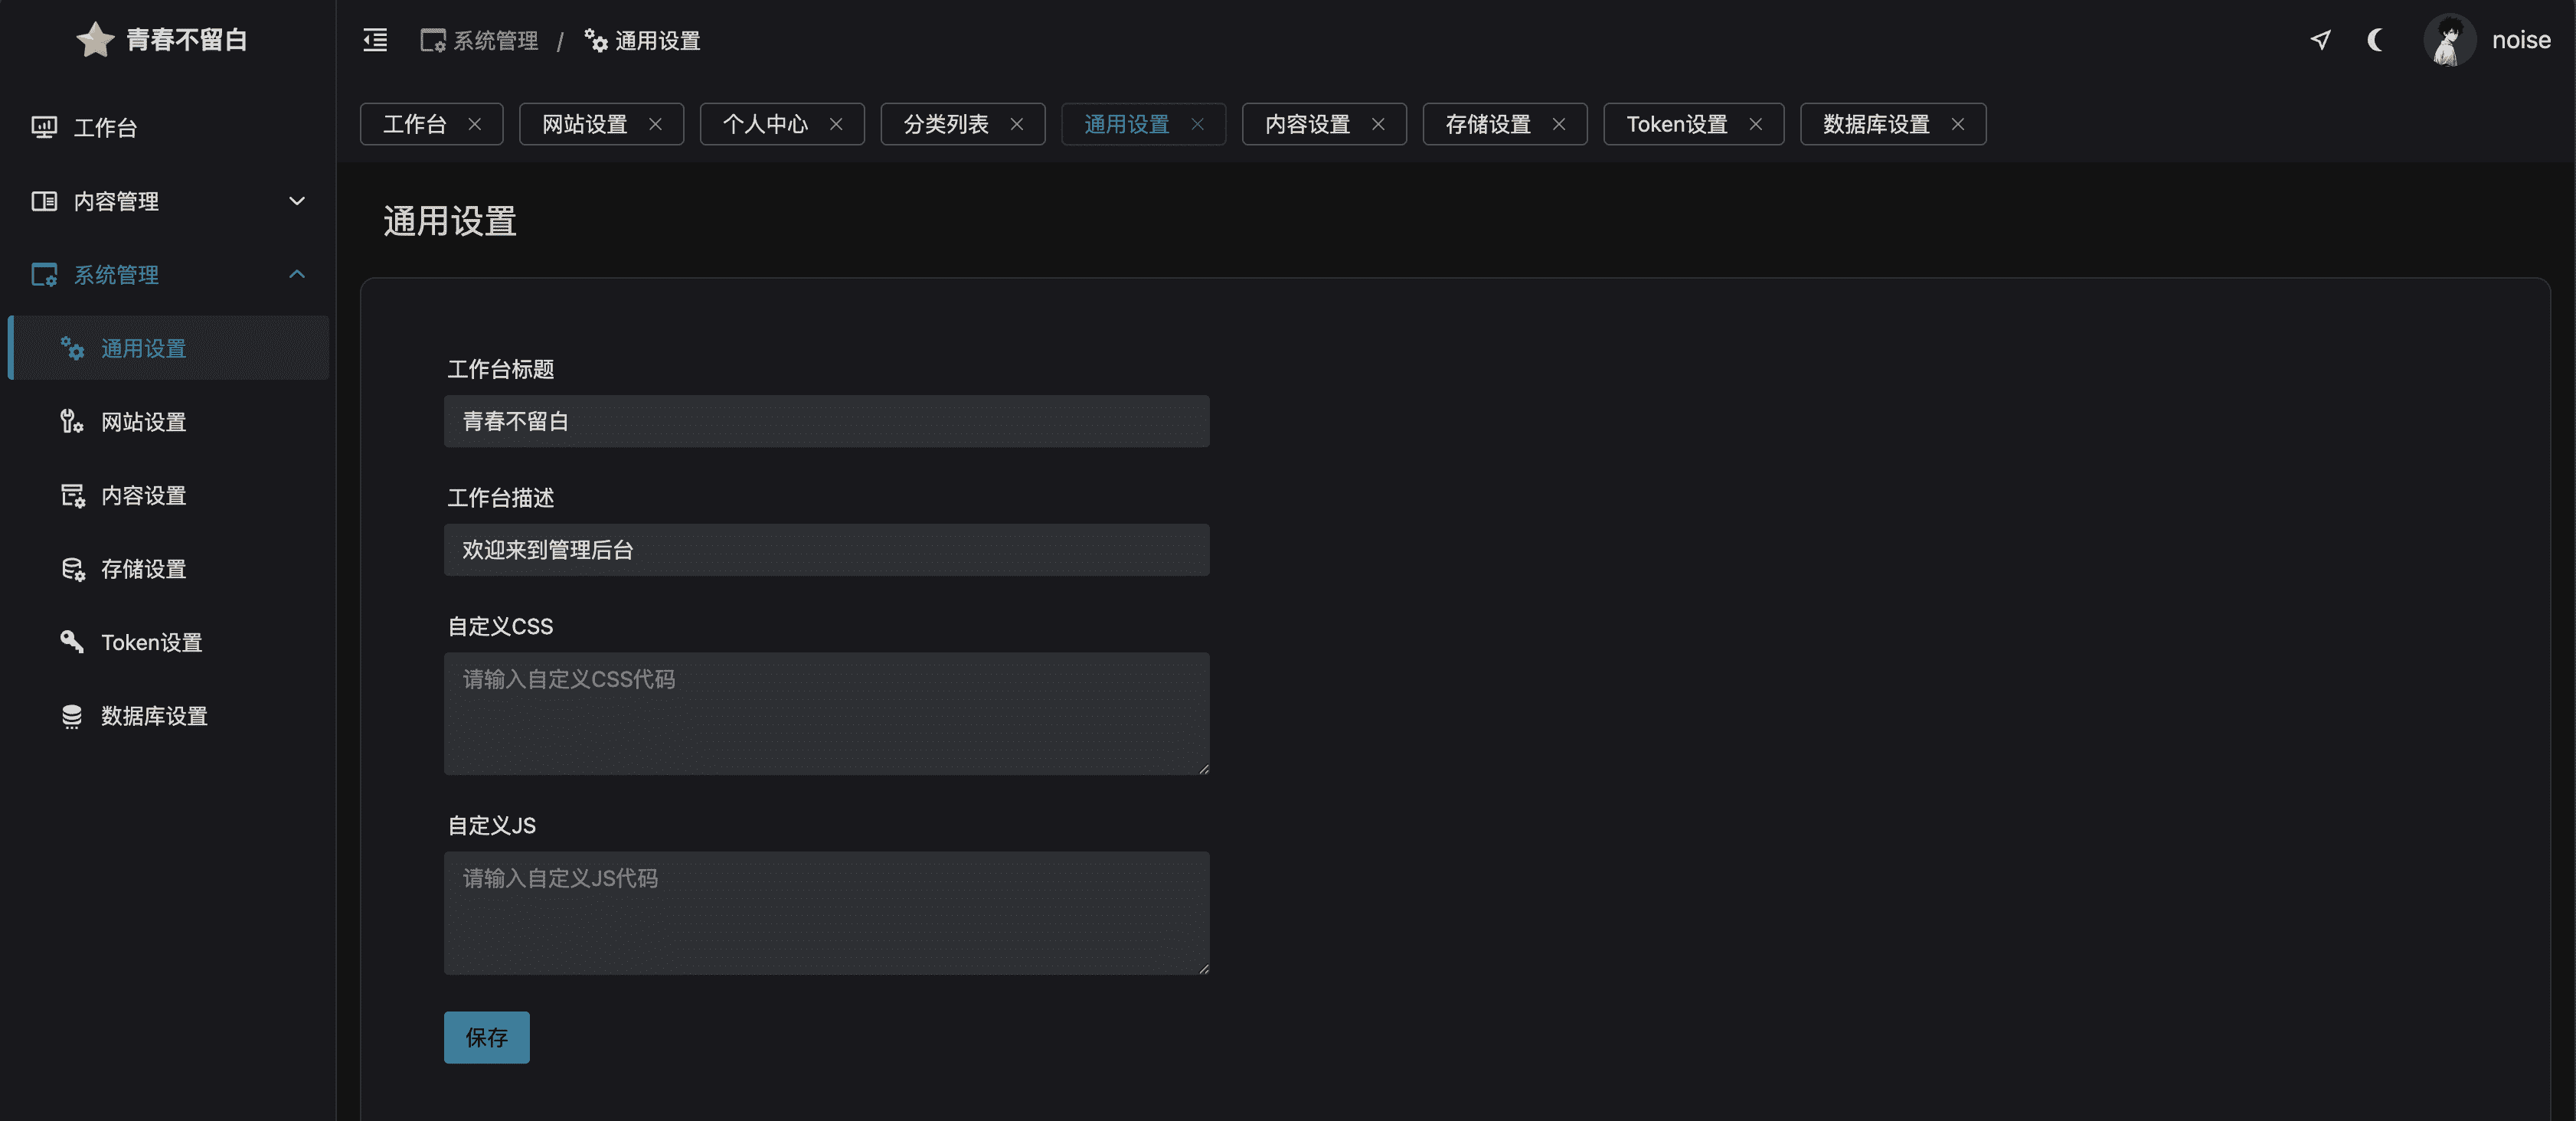
admin,密码:123456,请登录后及时修改用户名和密码通用设置为后台工作台显示设置
支持icon、logo、网站名称、封面自定义设置
首页每次加载图片数为每一页加载显示的图片数,支持略缩图的后缀,但不要轻易设置
允许上传-选项很重要,打开才支持图片的上传设置(包括批量上传也依赖这个开关)
本地存储-默认路径为程序内的images文件夹,不要轻易设置url前缀,因为程序自动识别上传链接,如果你有自定义网址,可以当cdn加速前缀使用
备份相册-检测并打包下载本地上传的所有图片,如果本地上传过多图片速度会慢
备份数据库-仅限本地存储模式,可一键下载程序的数据库文件
云端存储-支持cloudflareR2\S3及兼容oss存储,以cloudflarer2为例:
前往https://cloudflare.com注册,并在账户主页找到“R2对象存储”,点击“创建存储桶”并设置存储桶名称并点击api设置管理密钥,再点击将r2和api配合使用面板记录账户ID


点进新创建的存储桶,找到设置并点击可查看具体存储信息
回到后台页:
端点(Endpoint)-对应S3 API
区域-对应位置,只填写英文如APAC
访问ID-对应帐户ID,在api设置将r2和api配合使用面板中
访问密钥-API密钥
存储桶(Bucket)-存储桶名称
存储路径-默认按年月日路径:{year}/{month}/{timestamp}_{filename}
URL前缀-对应公共开发 URL或者自定义域名
URL后缀-非必要不用填写
是为外部链接相册使用的,是为未来做插件而准备的,目前未完善
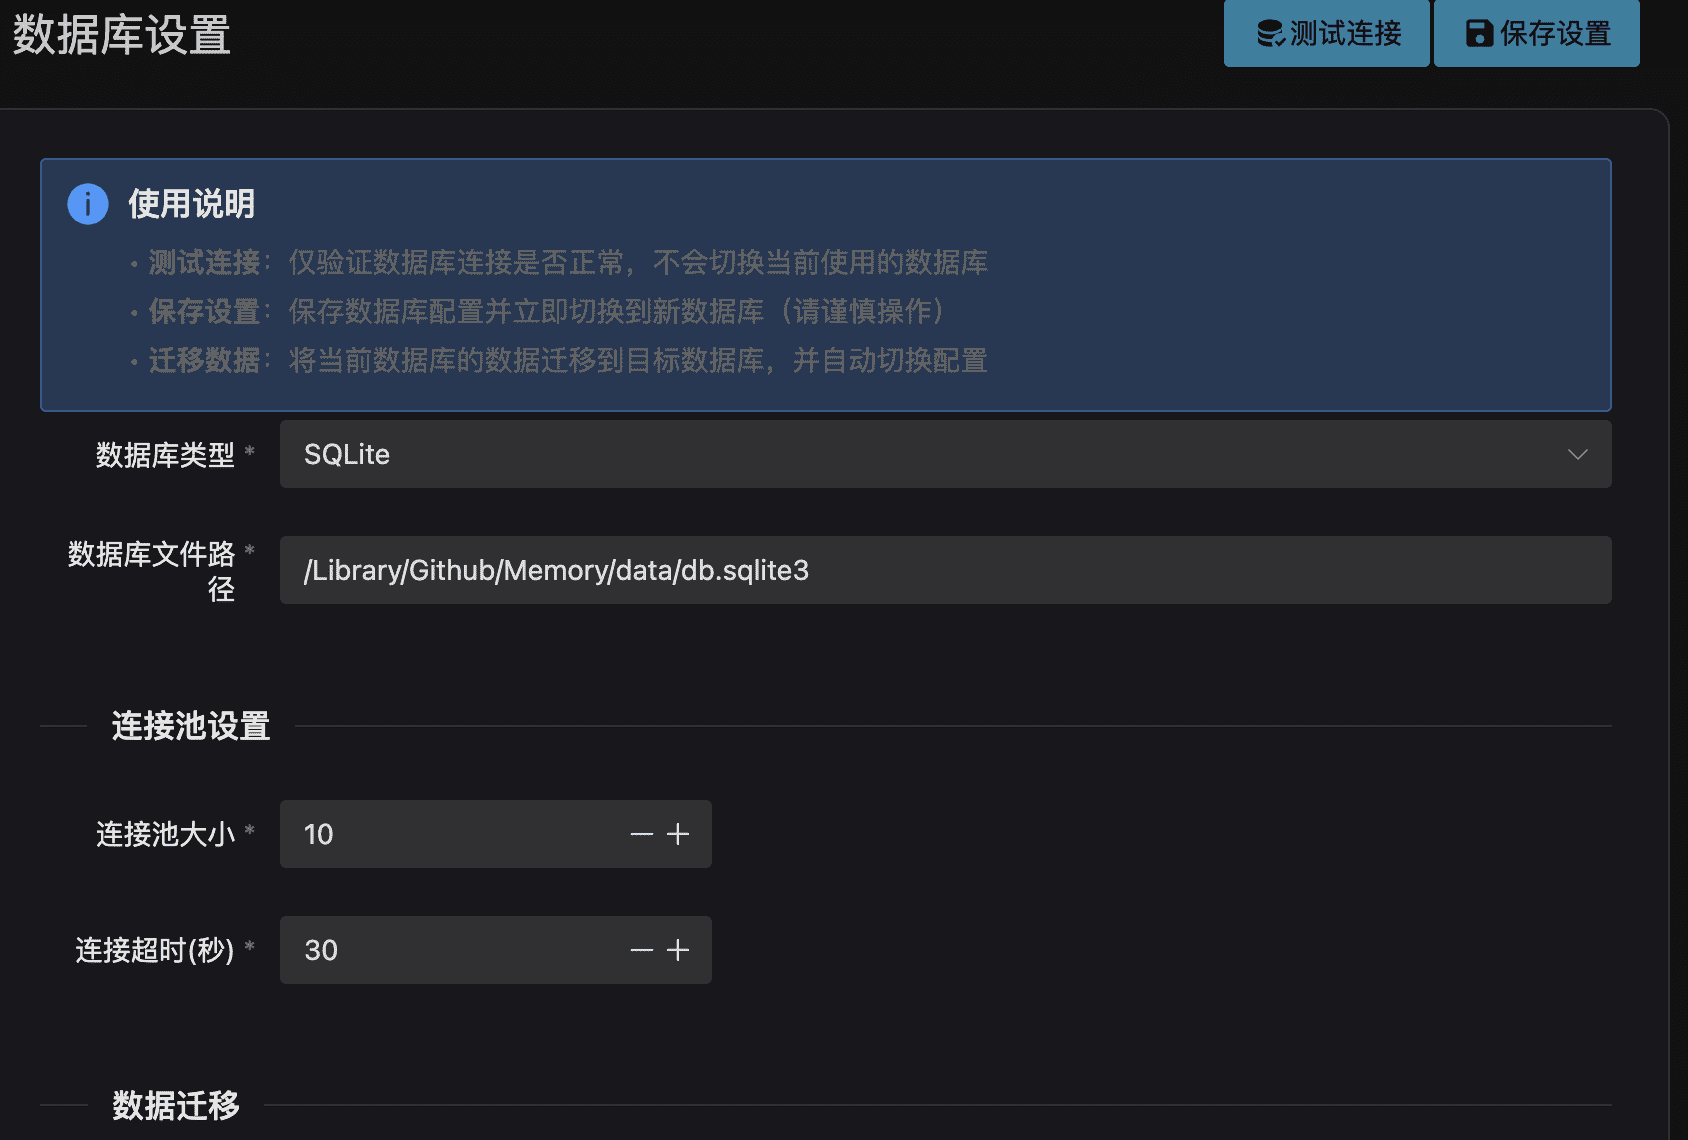
你可以选择不同的数据库连接类型,支持本地SQlite、postgreSQL、mysql
以Neon免费数据库为例进入网站面板,点击Connect to your database,查看链接信息
比如:postgresql://nedb_owner:[email protected]/neondb?sslmode=require&cha_binding=rire
主机地址-为@后的直到/的地址(ep-dark-wid-ae7n-pooler.c-2.us-est-2.aws.n.tech)
端口-5432
数据库名-Database选项下你创建的数据库名
用户名-Role选项下显示的同时也是//之后:之前的nedb_owne
密码-为@符合之前的n44g_fFkBjTxr6
注意:点击测试连接需要最后保存,迁移数据库是增量迁移,如果字段相同不会覆盖,数据过多时花费时间会久
如果是本地上传的图片在列表页面点击删除时会一同删除源文件,链接图片则不会
使用批量上传前请确保已开启“图片上传”选项并选择了本地还是云端存储

后台页
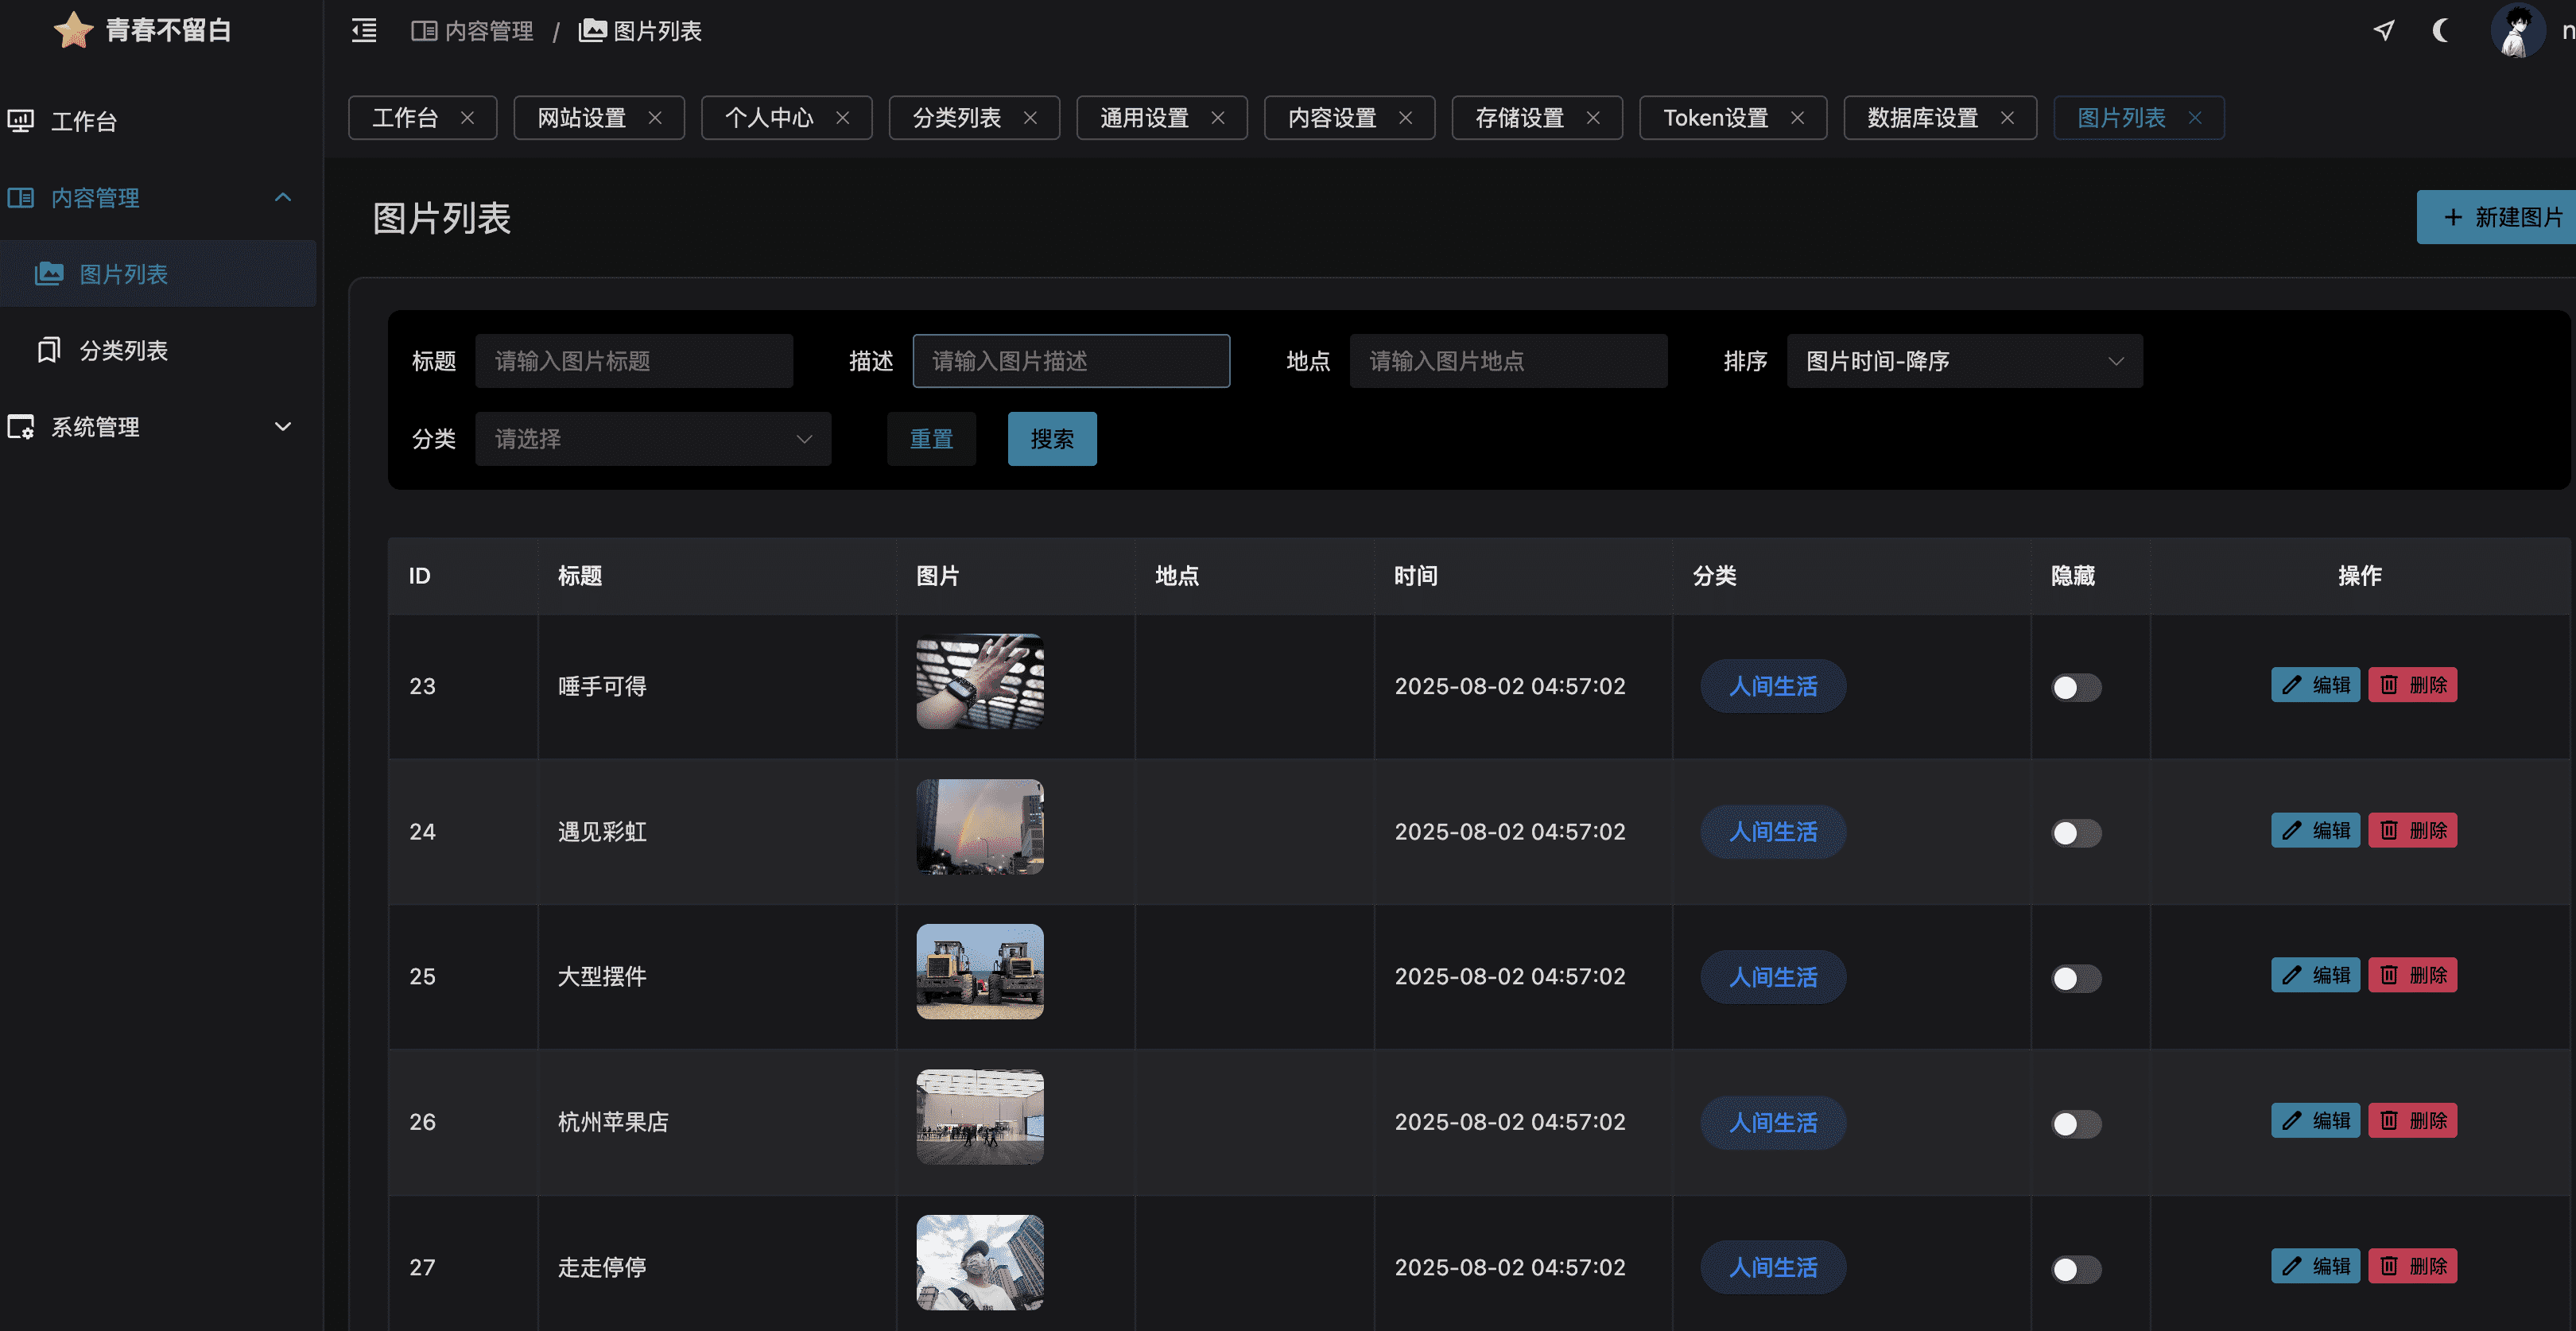
视频上传自动识别

点击图片查看

视频播放
本项目支持构建为桌面应用程序,基于 Tauri 框架开发。
通用要求:
Windows 构建要求:
macOS 构建要求:
Linux 构建要求:
安装依赖
1 |
# 进入前端目录 |
开发模式运行
1 |
# 启动开发服务器 |
生产构建
1 |
# 构建桌面应用 |
环境配置:
安装 Rust
1 |
# 下载并安装 Rust |
安装 Microsoft C++ Build Tools
1 |
# 使用 winget 安装 |
安装 Windows SDK
1 |
# 通过 Visual Studio Installer 安装 |
构建命令:
1 |
# 进入项目目录 |
输出文件位置:
web/src-tauri/target/release/memory-app.exe
web/src-tauri/target/release/bundle/msi/Memory-不负时光相册程序_1.0.0_x64_en-US.msi
web/src-tauri/target/release/bundle/nsis/Memory-不负时光相册程序_1.0.0_x64-setup.exe
1 |
# 进入项目目录 |
输出文件位置:
web/src-tauri/target/release/bundle/macos/Memory-不负时光相册程序.app
web/src-tauri/target/release/bundle/dmg/Memory-不负时光相册程序_1.0.0_aarch64.dmg
1 |
# 安装系统依赖(Ubuntu/Debian) |
输出文件位置:
web/src-tauri/target/release/memory-app
web/src-tauri/target/release/bundle/appimage/memory-app_1.0.0_amd64.AppImage
web/src-tauri/target/release/bundle/deb/memory-app_1.0.0_amd64.deb
如需在一个平台上构建多个平台的应用,可以使用 GitHub Actions 或其他 CI/CD 服务。
本项目已配置 GitHub Actions 工作流,支持自动构建多平台桌面应用:
工作流文件:
.github/workflows/build-windows.yml - 专门构建 Windows 平台.github/workflows/build-multiplatform.yml - 构建所有平台(Windows、macOS、Linux)触发方式:
1 |
# 1. 推送代码自动构建 |
构建产物:
配置要求:
在 GitHub 仓库设置中添加以下 Secrets(可选):
TAURI_PRIVATE_KEY: Tauri 应用签名私钥TAURI_KEY_PASSWORD: 私钥密码使用方法:
详细说明请查看:GitHub Actions 构建指南
手动构建示例:
1 |
# .github/workflows/build.yml 示例 |
构建配置文件位于 web/src-tauri/tauri.conf.json,可以自定义:
常见问题:
Rust 编译错误
1 |
# 更新 Rust 工具链 |
Windows 构建失败
依赖安装失败
1 |
# 清理 npm 缓存 |
二次开发时请注意该项目使用v-model:value语法编写
如果你运行后首页显示Network eroor的情况属于后端未运行,在最新版本的软件包内实际有后端文件,如果未自动运行,可手动运行解决报错,或者下载源码后执行后端命令,后端:python3 run.py
仓库根目录中有很多python脚本是我用来测试api的非必要可删除文件
如果云端使用请上传压缩或webp格式图片,避免加载慢
2025-08-10 10:00:00
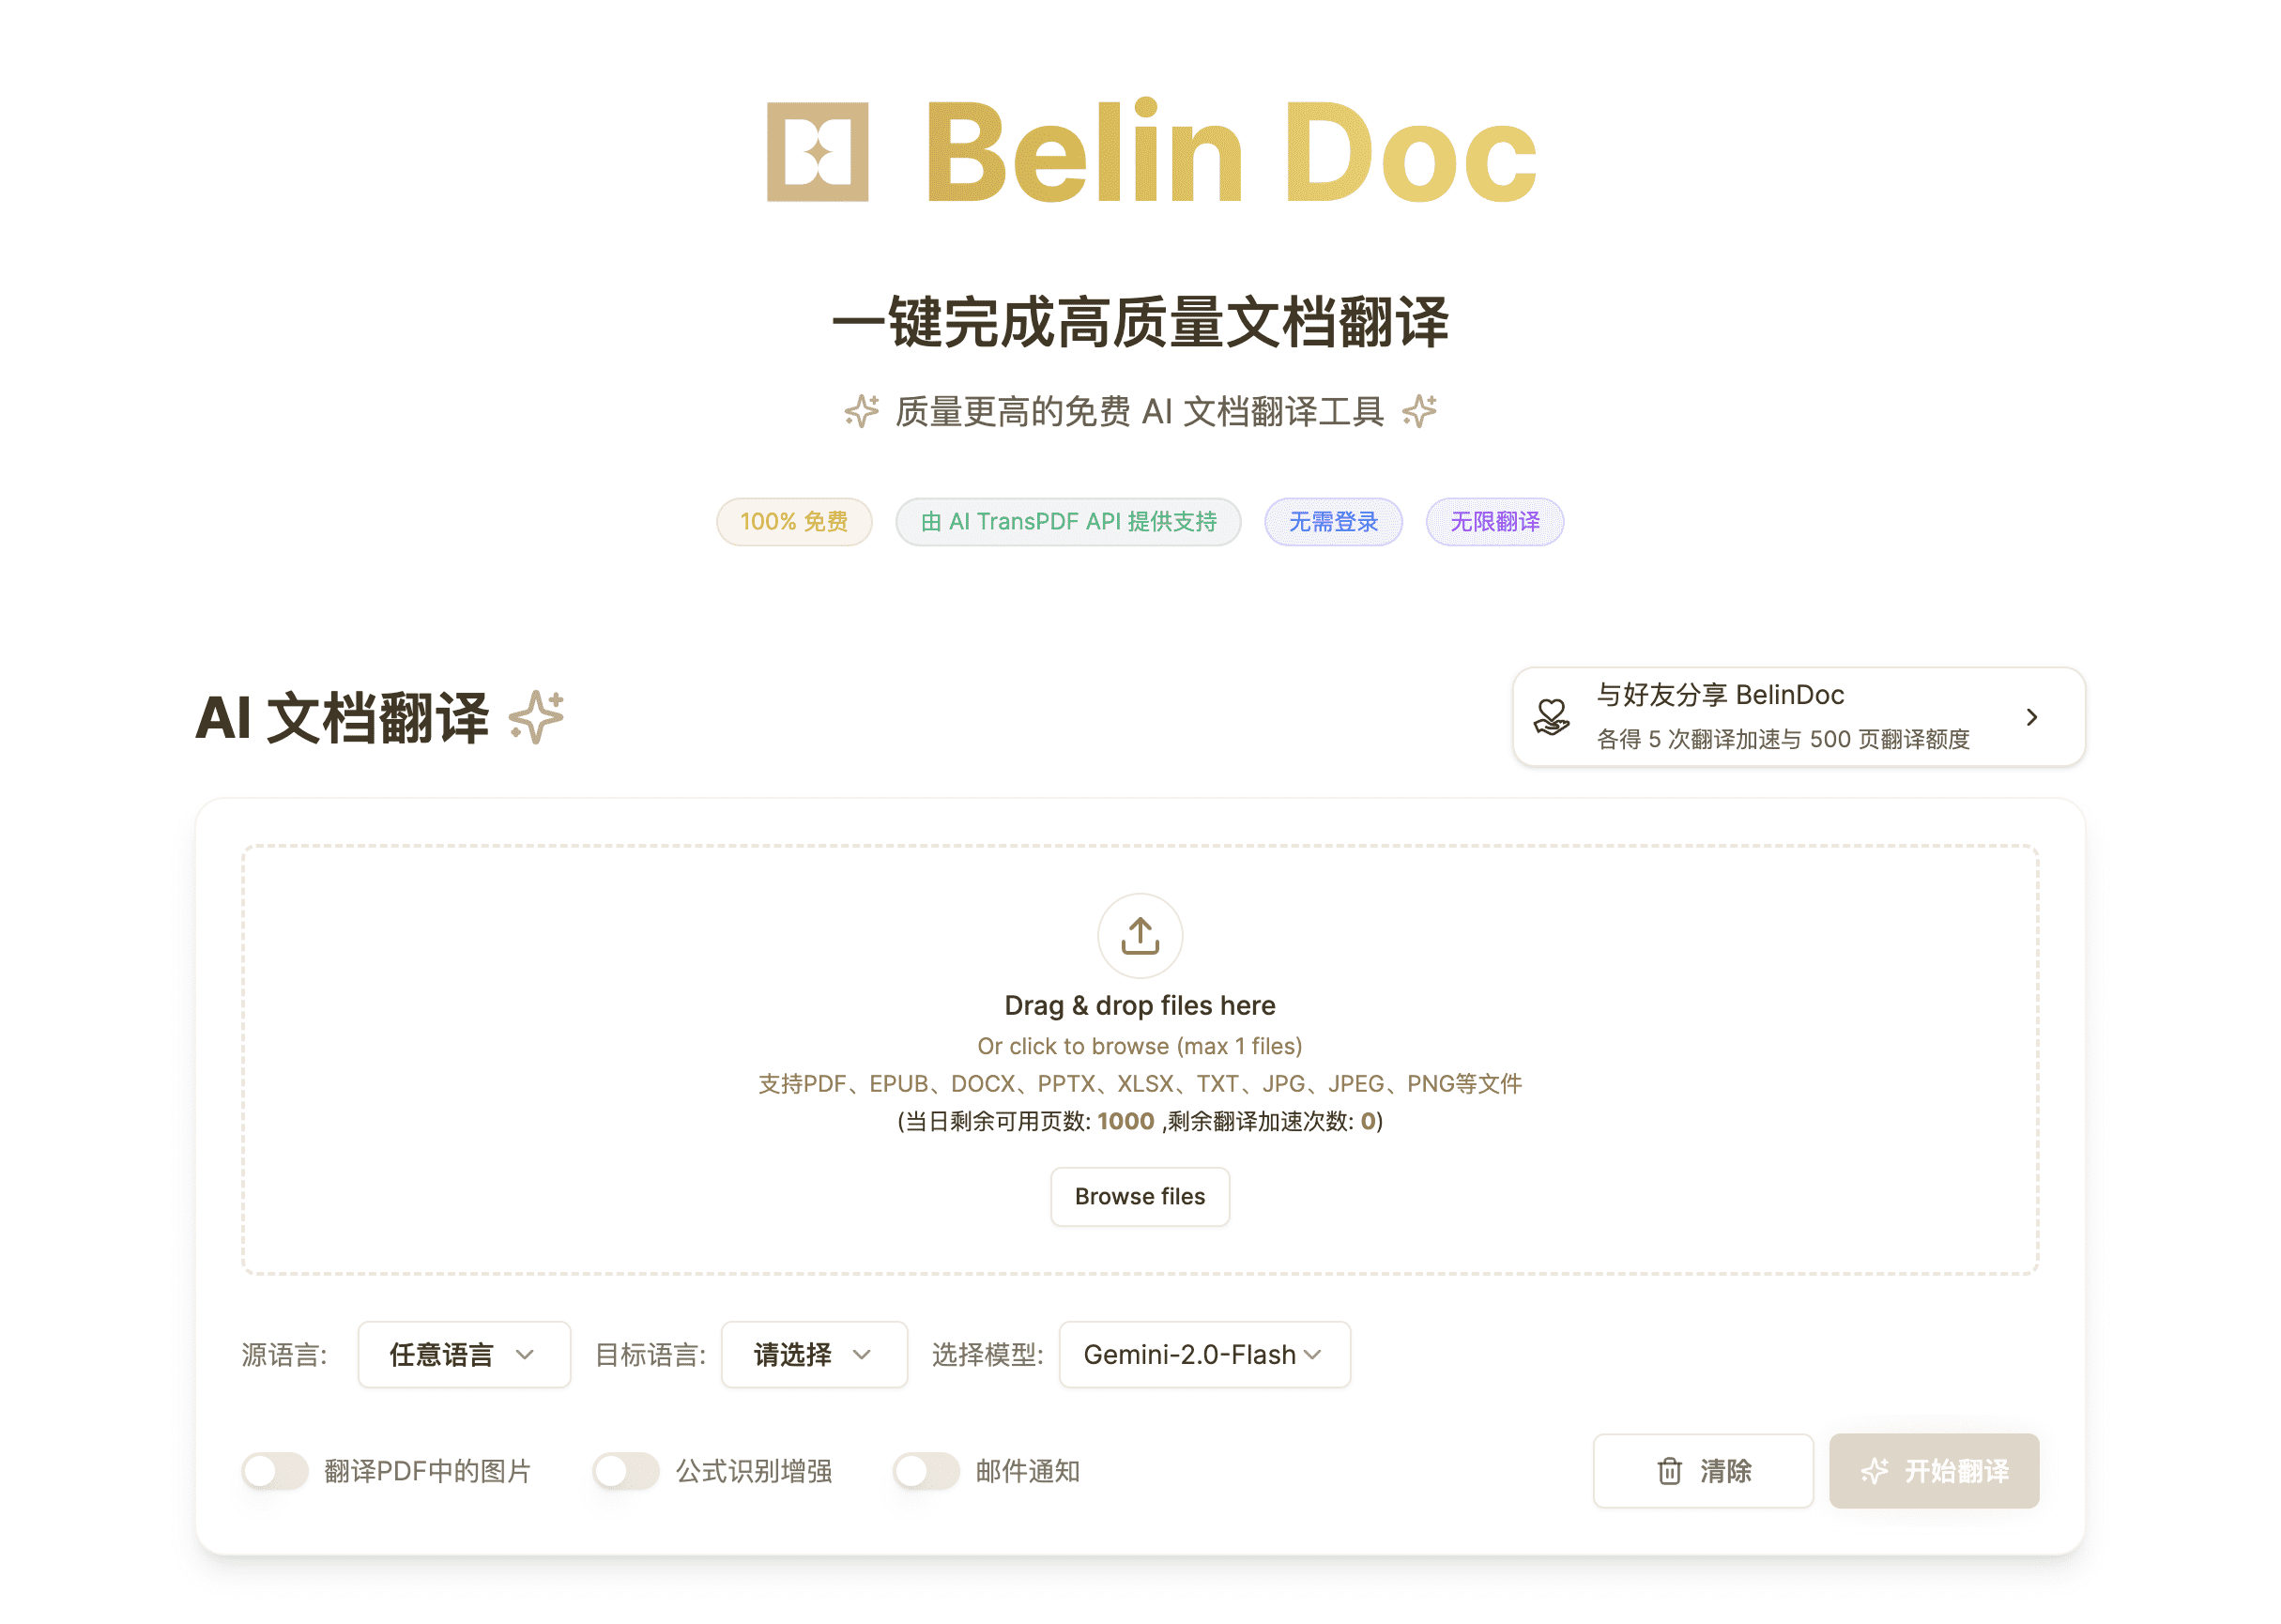
Belin Doc 是一款由 AI 驱动的免费、无限制 文档翻译工具。无需注册,没有限制。
截止发文,该产品属于新产品,未看到上架定价,未登录时可每日使用1000次,但任务有排队

2025-08-10 10:00:00
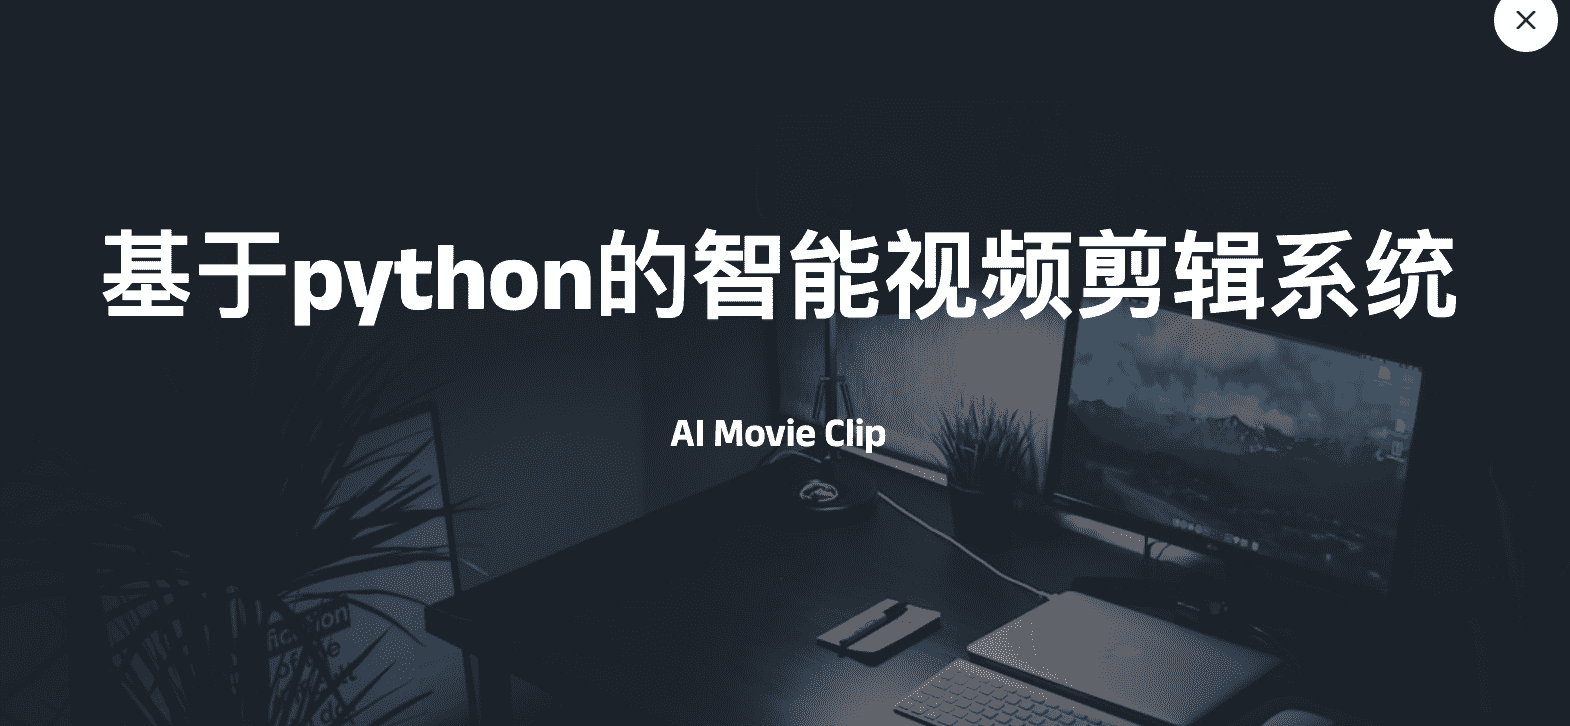
一个基于人工智能的自动视频剪辑系统,能够自动分析视频内容并根据用户需求生成编辑后的视频。该项目为视频剪辑mcp提供了一个新的研究方向,它使用python脚本来分析和处理视频,同时你可以编辑自己设定的模版进行一键创作。
开源:https://github.com/LumingMelody/Ai-movie-clip
1 |
git clone https://github.com/LumingMelody/Ai-movie-clip.git |
1 |
pip install -r requirements.txt |
复制环境变量模板并填写您的配置:
1 |
cp .env.example .env |
编辑 .env 文件,填入您的API密钥:
1 |
# AI Model API Keys |
1 |
# 分析视频 |
1 |
# 启动FastAPI服务器 |
1 |
import requests |
1 |
Ai-movie-clip/ |
在 templates/ 目录下创建新的模板文件:
1 |
# templates/custom/my_template.j2 |
在 core/ai/ai_model_caller.py 中添加新的模型:
1 |
def call_custom_model(prompt): |
该项目属于新的,还有很多不完善的地方,但提供的思路是好的,如将提示词精炼后给到大模型时ai执行指令调用工具剪辑的流程
1 |
你是一个智能视频剪辑助手。现在我给你以下信息: |
| 函数名 | 参数 | 功能 |
|---|---|---|
| cut(start, end) | 开始时间、结束时间 | 裁剪片段 |
| add_transition(type, start, duration) | 类型、开始时间、持续时间 | 添加转场 |
| speedup(start, end, factor) | 区间、加速倍数 | 加速播放 |
| apply_filter(filter_name, start, end) | 滤镜名称、区间 | 应用滤镜 |
| concatenate(clips) | 片段列表 | 合并多个片段 |
1 |
import subprocess |
通过完善不同的工作流就有了初步的mcp化功能,你可以拿这个项目作进一步的完善和研究