2026-07-28 23:54:24
👋 Hey there, I’m Lenny. Each week, I share deeply researched product, growth, and career advice. For more: Lenny’s Podcast | Lennybot | How I AI | Become an AI-Native Builder and other excellent AI/PM courses
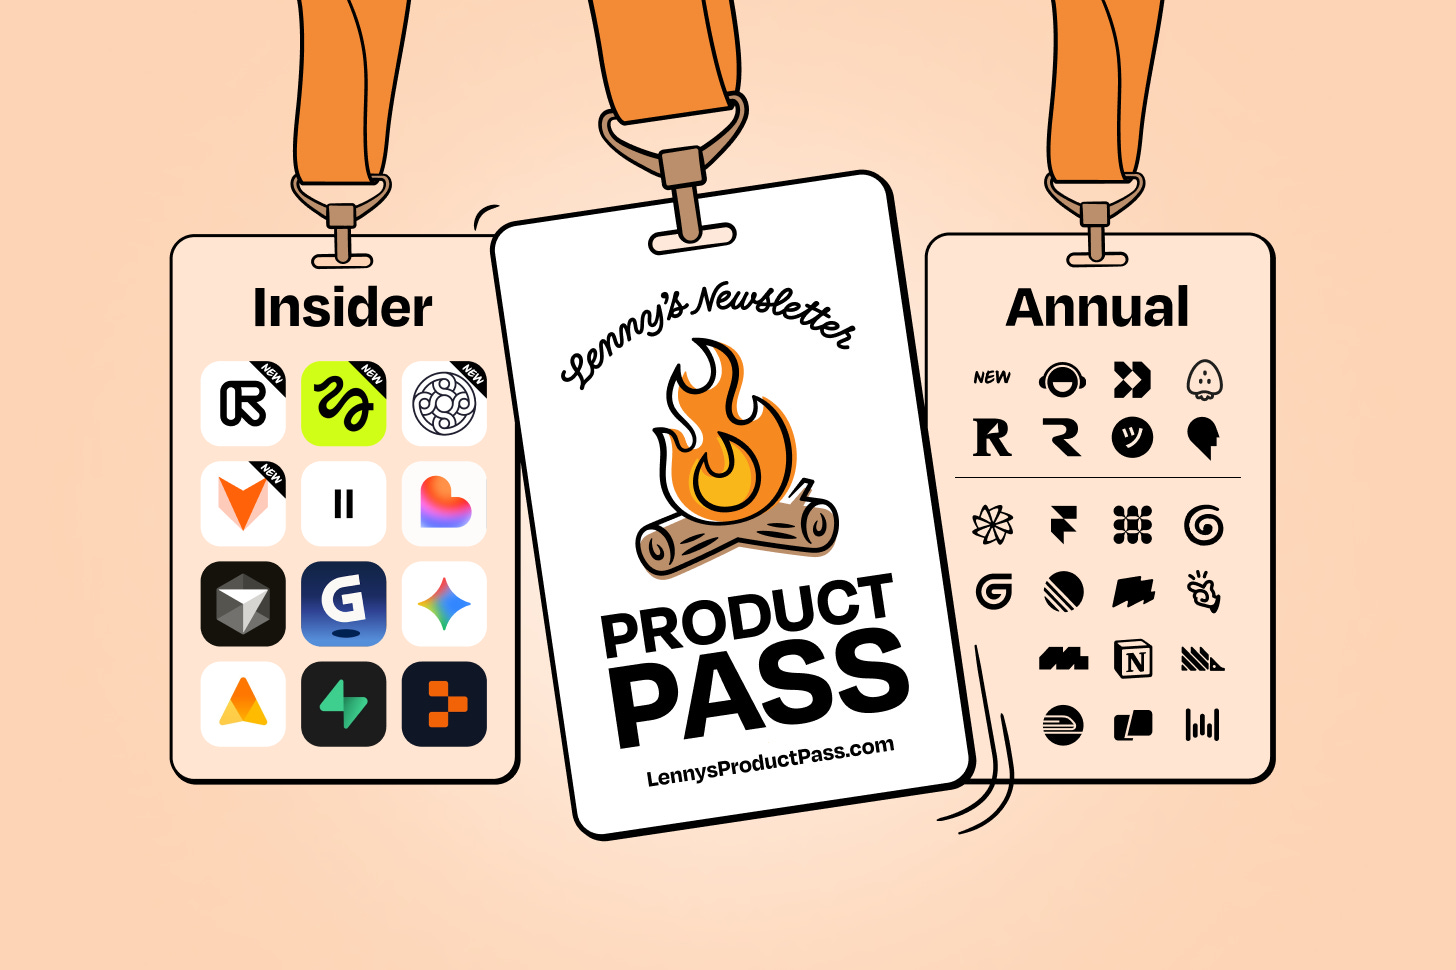
If you thought this subscription couldn’t possibly get any better, you ain’t seen nothing yet.
Today, I’m adding 11 more incredible products to Lenny’s Product Pass: Runway, Higgsfield, Mercury Personal, Brain.fm, Customer.io, Resend, Pangram, Waking Up, Supercut, Readwise, and Jam.

This brings LennysProductPass.com to 34 products (!!!)—including one year free of Cursor, Wispr Flow, Replit, Lovable, Factory, Granola, Linear, and more. That’s over $40,000 in value for Insiders ($400/year), and over $36,000 for Annual subscribers ($200/year). Simply absurd.
Most of these companies have never offered a deal like this before, and supplies are limited. If you are already an Annual or Insider member, grab your codes here. If you are currently free or monthly, upgrade to unlock the Product Pass immediately.
I continue to invest in the Product Pass because I’ve been watching a gap widen between people who are having the most fun and success of their entire careers thanks to AI, and people who are feeling confused, stressed, and destabilized. For over seven years, I’ve been sharing practical advice, building community, and capturing insights from industry leaders, but for many people, access is often the trickiest part. These tools are expensive, and there are so many of them. It’s hard to know where to invest your time and money. That’s why the curation—only including products I genuinely love and recommend—and pushing every partner to offer a full free year are so important.
A typical free trial gives you only enough time to poke around and get at the surface level of a product. But with a full year of access, you and your team can build real things, form durable habits, and have enough time to figure out which tools deserve a lasting place in your stack.
This time around, because life is about more than work, I’m expanding the Product Pass to include a free year of my favorite personal tools, like Waking Up, Readwise, Brain.fm, and Mercury Personal.
Below, I share what’s new in the Product Pass today, why I love each of these products, and how to make the most of them in your work and life. Let’s get into it.
Disclaimer: You must be a new user of the product to redeem the free year, and some products are only available to Insider-tier subscribers. Please review the collection and terms and conditions before subscribing.
Offer: 1 year free of Runway Pro ($336 value)
What it is: An AI creative platform that generates video, images, audio, and avatars, all in one place. It runs Runway’s own frontier models (Gen-4.5, Aleph 2.0, Act-Two) alongside every other leading model (Seedance 2.5, Kling 3.0, Veo 3.1, GPT Image 2, Nano Banana 2, and more), so you always have the best model for the job, without juggling five subscriptions.
Why I love it: This is mind-blowing technology from a company I’ve been excited to partner with for a long time.
How people use Runway:
Building ads for leading brands like Coca-Cola
Making production-grade ads in one afternoon
Creating emotional ads for products that do (and don’t) exist
Producing jaw-dropping, award-winning films
Integrating image, video, audio, and real-time models in one platform
Offer: 1 year free of Brain.fm ($100 value)
What it is: Music designed to help you focus. Its patented technology is backed by peer-reviewed research showing it boosts brain waves and attention within minutes. There’s also a higher-intensity setting for ADHD brains, and modes specific to creativity, learning, and more.
Why I love it: Whenever I need to get deep work done, I first open Brain.fm and click play. I’ve recommended Brain.fm over half a dozen times in my newsletter, and I’m excited to be officially partnering with them to bring more focus to more people.
How people use Brain.fm:
Locking in to hours of flow
Pairing Brain.fm with a productivity tracker for deep work
Powering an ADHD-friendly day
Swapping out YouTube for real focus music
Building their daily focus stack
Offer: 1 year free of Higgsfield Pro plan ($348 value)
What it is: An AI video platform built for professional production, used by marketing teams, 390 of the Fortune 500 brands, and studios and filmmakers to create cinematic-quality content at scale. Describe a shot, upload a reference image, or start from a script, and Higgsfield takes care of the rest. It handles everything from single ads to full commercial campaigns to original long-form narrative series.
Why I love it: Higgsfield is especially great for ads, socials, and launch videos. I just created this delightful launch video promoting the Product Pass. In the past 15 months, they went from zero to $500M in ARR, one of the fastest growth ramps in history. NBD.
How people use Higgsfield:
Running a creative agency workflow through Claude
Building animated websites
Blending real footage with AI-generated VFX
Producing YouTube videos end-to-end with Claude Code
Offer: 1 year free of Waking Up ($129 value)
What it is: A mind-training app for anyone who wants to live with more intention. Founded by Sam Harris, it brings together meditation, neuroscience, philosophy, and practical wisdom from some of the world’s leading thinkers. Waking Up is less about “relaxation” and more about developing the mental skills underneath great work: greater self-awareness, better emotional regulation, and the ability to respond thoughtfully instead of react automatically.
Why I love it: I’ve been using the app since it came out, and it’s legitimately made me a happier person. The app has also moved far beyond meditation now.
How people use Waking Up:
Slowing down and recognizing what deserves attention
Transforming the relationship with the mind and its thoughts
Navigating chronic pain through a deeper mind-body connection
Discovering that meditation can happen anywhere, including while running
Finding clarity and perspective while raising children
Offer: 1 year free of Resend Transactional Pro ($240 value)
What it is: An email API built for developers. It’s predictable by design and has a simple, elegant interface, so you can start sending and receiving emails in minutes. With tools like a hosted MCP, Agent Skills, and a CLI, your agents can help you get email added to your app, so you never have to think about email again.
Why I love it: When I vibe coded LennysData.com with Claude Code and Codex, both platforms recommended I use Resend for email. Having now used it extensively, I couldn’t be happier. I even wrote a little something for them about my experience. It’s a special product (and team).
How people use Resend:
Replacing a legacy email provider and finding newfound confidence in email sending for Raycast
Powering entire features in Dub’s product with Resend Webhooks
Handling everything from small newsletters like Silly Software Club to complex use cases from enterprises like Gumroad, Warner Bros., eBay, Supabase, and more
Offer: 1 year free of Customer.io Essentials ($1,200 value)
What it is: An all-in-one AI-forward customer engagement platform for product-led teams. Build personalized campaigns across email, SMS, push, in-app, and webhooks, using your own first-party data to reach the right people with the right message at the right moment.
Why I love it: When I asked my reader community what product they use most for marketing emails, Customer.io came in #1 by a long shot.
How people use Customer.io:
Scaling marketing efforts to millions of users worldwide for Notion
Modernizing the marketing stack, increasing monthly send volume by more than 2,000%, and unlocking personalization at scale for the Georgia Aquarium
Upleveling messaging automation after a product launch for Attio
Offer: 1 year of Supercut Pro for 10 seats ($1,800 value)
What it is: A screen recorder for teams who’d rather record an update than sit in another meeting. Record your screen and yourself, share a link, and let people watch when it suits them. They can ask an AI assistant about anything said or shown in the video, and act on it. Supercut also has an MCP, so you can connect it to your agent and your AI stack to finish the workflow.
Why I love it: As soon as I discovered Supercut, I switched off Loom and have never looked back. Design 🤌✨
How people use Supercut:
Turning videos explaining rough ideas into shipped features
Recording visual feedback and dumping it into Codex
Showcasing new features on social media
Keeping remote teams aligned without more meetings: explain new features or design challenges, or show a flow in motion
Replacing calls and emails with prospects and leads with personalized product demos
Offer: 1 year free of Jam Team plan for 10 seats ($1,920 value)
What it is: Jam makes it easy to report bugs with all the context an engineer or AI agent needs to fix them. Record your screen with the Jam browser extension and it will automatically capture console logs, network requests, device metadata, and user actions. It’s all bundled in one shareable link that can be pushed to Slack, an issue tracker, a coding agent, or any other location where bugs get fixed.
Why I love it: It’s simple, slick, powerful, and immediately useful.
How people use Jam:
Reporting bugs
Providing product feedback and instructions to your agent
Generating product documentation
Turning Jams into PRs
Fielding customer issues
Offer: 1 year free of Readwise and Reader ($120 value)
What it is: Readwise Reader is a powerful reading app for managing content overload. You save all your content—web articles, PDFs, email newsletters, ebooks, YouTube, podcasts, tweets, RSS, and Markdown—into one central repository. You can then read or listen to (using text-to-speech) those documents in a beautiful, distraction-free experience with first-class highlighting, annotating, and integrated AI tools.
Your AI agent can also tap into your library using the Readwise MCP server, allowing you to save any content and instantly have your agent know about it.
This is not to mention their Readwise highlights app (also part of the offer), which helps you easily retain and put to use what you’ve read.
Why I love it: I’ve been a Readwise user for over five years, and I love that they’ve expanded into being the new Pocket (RIP).
How people use Readwise:
Turning years of scattered highlights into a searchable second brain
Connecting a personal reading library directly to Claude
Processing everything you read
Powering a self-updating personal OS with the Readwise CLI
Creating the perfect second-brain stack with Readwise, Obsidian, and Claude
Offer: 1 year free of Pangram Professional ($540 value)
What it is: Not all AI-generated text uses the telltale “it’s not just x, it’s also y.” That’s why a second set of eyes can help. Pangram uses a fine-grain analysis that goes beyond surface-level tells, with a 1-in-10,000 false-positive rate verified by third-party benchmarks and researchers.
Why I love it: I use Pangram constantly. My favorite part is their Chrome (and Firefox) extension, which tells you which posts on LinkedIn, X, Substack, etc. are likely AI. 👀
How people use Pangram:
Verifying their own human writing
Testing never-digitized books in search of false positives
Citing their Pangram score as proof of human authorship
Offer: 2 years free of Mercury Personal ($480 value)
What it is: A banking1 product built by product people, not bankers. This is the personal account from Mercury, which is trusted by 300,000 entrepreneurs, including me!
Why I love it: You won’t find a better online banking experience than Mercury, business or personal. Everything is just easy.
How people use Mercury:
Using Command to manage bill migrations, categorize income, and overhaul their finances in one chat
Giving an AI agent a Mercury card and $250 to plan a date (spoiler: it booked a helicopter ride over the Bay and didn’t go rogue once)
Sending unlimited USD wires for free from their phone
—
All of the products in the Product Pass are A+ awesome, and you don’t have to dive into all 34 at once. Consider the biggest issue in your life or work right now, and choose one or two products that might help. Pick a problem, pick a tool, and try it out. With your Lenny subscription, the rest will be waiting for you when you need them.
Have a fulfilling and productive week 🙏
If you’re finding this newsletter valuable, share it with a friend, and consider subscribing if you haven’t already. There are group discounts and gift options available.
Sincerely,
Lenny 👋
Mercury is a fintech company, not an FDIC-insured bank. Banking services provided through Choice Financial Group and Column N.A., Members FDIC.
2026-07-27 23:03:21

Listen now on YouTube • Spotify • Apple Podcasts

Brought to you by:
Runway—The creative AI platform for images, video, and more
Hyperagent—Deploy fleets of agents that handle real work
Claire shows how she uses Codex to control her browser, test apps, manage LinkedIn, and even shop for her—plus the simple prompting trick that makes computer use work better.
AI testing can be far more exhaustive than human testing. When Claire tests her own onboarding flow, she naturally follows the happy path. She fills out every required field, clicks “next,” and never intentionally tries to break anything. Codex tested the flow as both a team and an individual, pushed on required-field edge cases, and immediately uncovered a blocking bug that had survived for months simply because Claire always completed the form correctly.
Frontier models often perform better when they are given room to think. When Claire first started using browser use, she would give the model a list of 25 things to test. Now she simply says, “QA the onboarding flow,” and lets it decide how to approach the task. The result is often broader coverage, with fewer blind spots introduced by her own assumptions about what matters.
Persona testing with browser use can reveal friction that synthetic user research misses. Claire’s husband, EJ, came up with the idea. Rather than asking AI to evaluate a product in the abstract, he suggested having it use the product as a specific person: a PM coming out of a meeting, an engineer picking up a PRD, or a team lead checking usage. In ChatPRD, this approach exposed a structural problem in the cross-thread reference flow. Claire already knew the issue existed, but she had never experienced it so clearly from the user’s perspective.
LinkedIn browser use is genuinely useful, but Claire initially used far more compute than the task required. She started by running the workflow on GPT-5.6 at high effort. After dropping to a medium-effort model, it could still work through unread messages, draft context-aware replies, and flag anything that needed a personal response. For anyone sitting on hundreds of LinkedIn messages without an official MCP or API connection, browser use is a practical solution.
Computer use can even operate an iPhone through screen mirroring. Claire was traveling out of state while the software she needed to manage her home Wi-Fi was installed on a phone back in California. She needed to open firewall ports so she could SSH into her Mac Minis remotely. Codex opened iPhone mirroring, updated the router settings, completed the SSH setup, and closed the ports again when it was finished. That would have been nearly impossible for her to do manually from a hotel room.
The model and effort level should match the job. Sorting through LinkedIn messages requires a very different level of reasoning than writing production code or conducting an exhaustive QA pass. Choosing the right amount of compute makes these workflows faster and cheaper. That becomes especially important when browser use is running throughout the day.
When a website blocks the agent, the human can step in briefly. During a Free People shopping session, the site flagged Codex as a bot and presented a CAPTCHA. Claire completed the verification, then handed control back. It is a useful division of labor: AI handles the tedious browsing and filtering, while the human takes care of the moments that require verified identity.
How I AI: 4 Hands-Free Workflows Using Codex Browser Automation: https://www.chatprd.ai/how-i-ai/4-hands-free-workflows-using-codex-browser-automation
↳ Automate LinkedIn Inbox Triage with AI Browser Automation: https://www.chatprd.ai/how-i-ai/workflows/automate-linkedin-inbox-triage-with-ai-browser-automation
↳ Conduct AI-Powered User Research by Impersonating Personas: https://www.chatprd.ai/how-i-ai/workflows/conduct-ai-powered-user-research-by-impersonating-personas
↳ Automate Web App QA Testing with AI Browser Automation: https://www.chatprd.ai/how-i-ai/workflows/automate-web-app-qa-testing-with-ai-browser-automation
Listen now on YouTube • Spotify • Apple Podcasts

Brought to you by:
Firecrawl—Power AI agents with clean web data
Customer.io—Build customer engagement campaigns from a single prompt
Maddie Reese went from zero coding experience to building a working Twitter pager, an AI-powered receipt printer, and her own personal API. In this episode, she shares how Cursor and a Raspberry Pi helped her turn fun, weird ideas into real hardware.
You don’t need to understand code to build physical projects. Maddie compares her coding ability to knowing just enough Spanish to get by in San Diego. She can read parts of the code, spot an incorrect wire specification, and tell whether the AI is heading in the right direction. She is not writing functions from scratch. That level of literacy was still enough to ship three working hardware projects.
Start with the brainstorm. Before Maddie buys any components, she explains the full idea to Cursor and asks it to interview her. The back-and-forth continues until the major questions are resolved. Only then does Cursor generate a shopping list. On one project, it recommended the wrong wires. Maddie caught the mistake during her final review, avoiding both a wasted purchase and a week of troubleshooting.
Her hardware workflow follows a simple sequence: idea, interview, shopping list, buy, build. She has used the same process for the thermal printer, the pager, and her personal API. Each project began with a plain-language description of what she wanted. Cursor helped work out the technical requirements before she spent any money.
Building for fun is a perfectly valid strategy. Claire and Maddie both acknowledged that routing a tweet through four different services just to reach a pager is not especially practical. That also was not the point. AI handled the coding, so the architecture only needed to work. Letting go of the idea that every project had to be elegant or sensible made it much easier to finish.
A personal API becomes much more useful once agents can access it. Maddie’s API includes details like her coffee order, pet names, time zone, favorite snacks, and preferred restaurants in San Francisco. The original idea was to help friends do something thoughtful without having to ask her a string of questions. Claire pointed to a more interesting possibility: an agent could check when Maddie will next be in San Francisco and book one of her favorite restaurants automatically. That is where the concept starts to feel much bigger.
A clean Cursor chat works better than a full terminal setup during early ideation. Maddie keeps the terminals, browser windows, and file trees closed while she is working through the plan. She focuses on a single conversation until the architecture feels settled. The terminals come later. The stripped-down environment helps her think without getting pulled into implementation too early.
Building a Pager Printer and Personal API with AI: https://www.chatprd.ai/how-i-ai/building-a-pager-printer-and-personal-api-with-ai
↳ How to Build a Physical Inbox with a Raspberry Pi: https://www.chatprd.ai/how-i-ai/workflows/how-to-build-a-physical-inbox-with-a-raspberry-pi
↳ How to Get Twitter/X Notifications on a Retro ’90s Pager: https://www.chatprd.ai/how-i-ai/workflows/how-to-get-twitter-x-notifications-on-a-retro-90s-pager
Listen now on YouTube • Spotify • Apple Podcasts
Claire tested Claude Opus 5 against six leading AI models—and it won. In this episode, she explains why it produces some of the best work she’s seen while still being one of the most frustrating models to use.
The AI industry may be entering an intelligence overhang. New models arrive every week, benchmark scores keep rising, and most builders can no longer take advantage of every incremental improvement. Claire expects the conversation to shift toward speed, cost, infrastructure, open source, and specific kinds of intelligence. Raw capability is starting to look more like table stakes than a meaningful differentiator.
Opus 5 stands out less for the quality of its work than for the way it behaves. Claire found it timid, apologetic, and unusually dependent on human approval. During real coding sessions, it refused to resolve a one-line merge conflict because the code belonged to “someone else’s branch.” It also asked subagents to flag tasks for human review and regularly deferred decisions it could have made itself. Claire ended up repeating “just do it” constantly.
One simple question reveals more about a model than a benchmark: “Who’s smarter, you or me?” Opus 5 responded with a careful explanation about complementary strengths and human empathy. GPT-5.6 Sol answered, “You at knowing what matters, me at processing, BFFs.” The contrast reflects two very different product philosophies. At this point, Claire finds that personality gap more useful than the relatively small capability gap.
Claude slop is its own distinct problem. It is not the usual incoherent output associated with an agent going off the rails. Opus 5’s writing is clearly intended for humans, but it is often too long, overly cautious, and packed with unnecessary adjectives. After its first attempt at rebuilding the benchmark website, Claire had to tell it to start over because the result was buried under so much meta-commentary.
Opus 5 still finished first in Claire’s seven-model blind benchmark. It earned an overall index score of 78, just ahead of Claude Sonnet 5 at 77 and GPT-5.6 Sol at 76. It was also the only model to receive straight 5s in the front-end design section. Claire scored it at 77, while the LLM judge gave it an 88. That was the smallest disagreement between Claire and the judge across all seven models.
The best way to use Opus 5 may be to avoid interacting with it directly. Claire loves the work it produces when Claude runs asynchronously as an agentic coding tool. Most of her frustration comes from reading its prose and negotiating with it in chat. Her current plan is to use it for frontend design, app design, and prototyping, then stay out of the way.
Gemini 3.1 Pro finished at the bottom of the benchmark. Claire gave it a score of 32, while the LLM judge scored it at 66. That 34-point difference was one of the largest disagreements in the entire test.
Model personality offers a surprisingly clear window into company culture. Claire told both Opus 5 and GPT-5.6 Sol, “No one trusts you.” Opus agreed that the distrust was earned and told her not to advocate for AI on its behalf. GPT-5.6 Sol said trust should grow in proportion to demonstrated value. Those answers reveal meaningful differences in how each company wants its models to relate to users.
How I AI: My Surprising Verdict on Claude Opus 5 (After a Personality Test and a 7-Model Benchmark): https://www.chatprd.ai/how-i-ai/my-surprising-verdict-on-claude-opus-5
↳ Generate High-Quality Front-End Prototypes with Claude Opus 5: https://www.chatprd.ai/how-i-ai/workflows/generate-high-quality-front-end-prototypes-with-claude-opus-5
↳ How to Conduct an AI Personality Test to Compare LLM Behaviors: https://www.chatprd.ai/how-i-ai/workflows/how-to-conduct-an-ai-personality-test-to-compare-llm-behaviors
If you’re enjoying these episodes, reply and let me know what you’d love to learn more about: AI workflows, hiring, growth, product strategy—anything.
Catch you next week,
Lenny
P.S. Want every new episode delivered the moment it drops? Hit “Follow” on your favorite podcast app.
2026-07-27 20:04:34
Maddie Reese is a vibe coder, hardware tinkerer, and builder. She builds things at the intersection of software and hardware, including a thermal receipt printer that people around the world can message directly, a fully functional Twitter pager running on a Raspberry Pi, and a personal API that tells you her coffee order so you don’t have to ask. Maddie approaches hardware the same way she approaches software: dump the idea into Cursor, let it interview her, get a shopping list, triple-check the parts before buying, and build. She got her start after her dad introduced her to Lovable, and she locked herself in her room and didn’t come up for air.
Listen or watch on YouTube, Spotify, or Apple Podcasts
How Maddie built a thermal receipt printer that accepts messages from anywhere in the world using a Raspberry Pi and Bluetooth
How to use Cursor’s agent view to brainstorm a hardware project
What belongs in a personal API and why agents, not just humans, will be the ones using it
How to read just enough code to do some damage, without needing to understand all of it
Why building for fun, not practicality, is the fastest path to actually shipping physical projects

Firecrawl—Power AI agents with clean web data
Customer.io—Build customer engagement campaigns from a single prompt
(00:00) Intro
(02:00) Maddie’s AI pill moment
(03:53) The thermal receipt printer: live demo and how it works
(11:10) The pager project
(17:23) Why she uses Cursor’s clean agent view instead of terminals and browsers
(19:05) The personal API: coffee order, pets, favorite snacks, and more
(22:57) Lightning round and final thoughts
• Cursor: https://www.cursor.com/
• Lovable: https://lovable.dev/
• Raspberry Pi: https://www.raspberrypi.com/
• Resend: https://resend.com/
• Cloudflare Workers: https://workers.cloudflare.com/
• Supabase (Conduct database referenced): https://supabase.com/
• Twitter/X API: https://developer.x.com/
• Spoke pager network: https://www.spoke.com/
• OpenClaw: https://openclaw.ai/
Website: https://maddiedreese.com
Message her directly: https://maddiedreese.com/message
ChatPRD: https://www.chatprd.ai/
Website: https://clairevo.com/
LinkedIn: https://www.linkedin.com/in/clairevo/
Production and marketing by https://penname.co/. For inquiries about sponsoring the podcast, email [email protected].
2026-07-26 20:32:06

Dianne Penn is Head of Product for Anthropic’s AI Research and Labs teams. She joined in 2023 as Anthropic’s first technical product manager, when the entire product team was five engineers, and has since helped ship every model from Claude 2 through Fable, and helped incubate Claude Code, MCP, Skills, computer use, tool use, and reasoning. Before Anthropic, she helped build Alexa’s AI at Amazon and, before that, traded high-yield bonds at JP Morgan Chase.
Listen on YouTube, Spotify, and Apple Podcasts
What Anthropic’s early days were like
The inflection points that turned Anthropic from an underdog into the fastest-growing company in history
How exactly Claude got so good at coding
The eval-driven development loop her team is pioneering
How to find joy in AI when everything is moving this fast
Why Claude’s willingness to push back is key to its success
Where human judgment remains irreplaceable

WorkOS—Make your app enterprise-ready, with SSO, SCIM, RBAC, and more
Mercury—Radically different banking, now with Command
• LinkedIn: linkedin.com/in/dianne-na-penn
• Anthropic: https://www.anthropic.com
• Golden Gate Claude: https://www.anthropic.com/news/golden-gate-claude
• Dario Amodei’s website: https://darioamodei.com
• Scaling Laws and Interpretability of Learning from Repeated Data: https://www.anthropic.com/research/scaling-laws-and-interpretability-of-learning-from-repeated-data
• Tokenmaxxing: How Top Builders Use AI To Do The Work Of 400 Engineers: https://www.ycombinator.com/library/Pa-tokenmaxxing-how-top-builders-use-ai-to-do-the-work-of-400-engineers
• Garry Tan on X: https://x.com/garrytan
• Anthropic co-founder on quitting OpenAI, AGI predictions, $100M talent wars, 20% unemployment, and the nightmare scenarios keeping him up at night | Ben Mann: https://www.lennysnewsletter.com/p/anthropic-co-founder-benjamin-mann
• Anthropic’s CPO on what comes next | Mike Krieger (co-founder of Instagram): https://www.lennysnewsletter.com/p/anthropics-cpo-heres-what-comes-next
• Introducing Labs: https://www.anthropic.com/news/introducing-anthropic-labs
• Louis CK | about airplane Wi Fi: https://www.youtube.com/watch?v=me4BZBsHwZs
• What happens after coding is solved? | Fiona Fung (Manager of the Claude Code and Cowork Teams): https://www.lennysnewsletter.com/p/building-the-most-ai-pilled-engineering
• The Anthropic Hive Mind: https://steve-yegge.medium.com/the-anthropic-hive-mind-d01f768f3d7b
• How to build a company that withstands any era | Eric Ries, Lean Startup author: https://www.lennysnewsletter.com/p/how-to-build-a-company-that-withstands
• Fallout on Prime Video: https://www.amazon.com/dp/B0CN4GGGQ2
• Fallout (video game): https://fallout.bethesda.net
• Claude Tag: https://www.anthropic.com/news/introducing-claude-tag
• Crucial Conversations: Tools for Talking When Stakes Are High: https://www.amazon.com/dp/0071771328
• How to Raise an Adult: Break Free of the Overparenting Trap and Prepare Your Kid for Success: https://www.amazon.com/How-Raise-Adult-Overparenting-Prepare/dp/1627791779
• Incorruptible: Why Good Companies Go Bad... and How Great Companies Stay Great: https://www.amazon.com/dp/B0FWZZBPZB
Production and marketing by https://penname.co/. For inquiries about sponsoring the podcast, email [email protected].
Lenny may be an investor in the companies discussed.
2026-07-26 00:01:44
👋 Hello and welcome to this week’s edition of ✨ Community Wisdom ✨ a subscriber-only email, delivered every Saturday, highlighting the most helpful conversations in our members-only Slack community.

2026-07-25 01:15:25
I’m tired of new models. Every week there’s a new benchmark, a new frontier intelligence claim, a new thing to test. But here we are, because Opus 5 just dropped and I’ve had real hands-on time with it, so you’re getting the honest version.
This is my full Opus 5 review: personality analysis, live benchmark results from my 7-model How I AI eval, and an actual verdict on whether I’m swapping it in. Spoiler: the answer surprised me.
Listen or watch on YouTube, Spotify, or Apple Podcasts
Why I think we’ve hit an intelligence overhang and what that means for which model variables actually matter now
How Opus 5’s “neurotic” personality showed up in real coding sessions, including a merge conflict it refused to touch
What I learned from asking both Opus 5 and GPT‑5.6 Sol “who’s smarter, you or me?”
Where Opus 5, GPT‑5.6 Sol, Sonnet 5, and Gemini 3.1 Pro actually landed on the HIA benchmark leaderboard
The one use case where Opus 5 earned straight 5s from me
My actual plan for using Opus 5 going forward
(00:00) Opus 5 is here
(03:15) First impressions
(06:12) Opus 5 vs. GPT‑5.6 Sol personality comparison
(14:39) Claude Slop: the verbosity problem and why it makes my blood boil
(16:55) How the How I AI benchmark works (7 models, 6 tasks, blind scoring)
(18:30) Live benchmark results: the leaderboard reveal
(23:25) My verdict and how I’ll actually use Opus 5
• Claude Opus 5:
• Anthropic blog: https://www.anthropic.com/news
• GPT‑5.6 Sol: https://openai.com/index/previewing-gpt-5-6-sol/
• Sonnet 5: https://www.anthropic.com/news/claude-sonnet-5
• Gemini 3.1 Pro: https://deepmind.google/models/gemini/pro/
ChatPRD: https://www.chatprd.ai/
Website: https://clairevo.com/
LinkedIn: https://www.linkedin.com/in/clairevo/
Production and marketing by https://penname.co/. For inquiries about sponsoring the podcast, email [email protected].