2024-05-24 19:10:22
我是一个 HR,碰到疑似“外星人 ”,居然让我帮他修理星际飞船?!
本来我想拒绝,但是他大手一挥,我飞出了三米远。更没想到的是,四千年前的金字塔居然也和他有关!

就在两天前,一个普通的工作日午后,我结束了一上午繁忙的人事工作,关上屏幕,准备好好睡个午觉。
眼前的世界逐渐昏暗,窗外时不时传来汽车行驶和空调的运转声音,我的大脑慢慢降低频率,进入了睡眠模式 。
奇怪,我的身体仿佛在下沉,还没来及细想,下沉的速度变得越来越快,伴随着刺眼的光芒和巨大的轰鸣声,还没来及反应过来,身体就被一股强大的力量拉了下去,我失去了知觉。
等再次醒来时,我还在办公室的工位上,但奇怪的是同事们都不见了。
一个身躯高大、外形丑陋、浑身好像包裹着金属石板的奇怪生物走了出来,它的眼睛闪烁着的蓝光。
我惊恐地向后退了两步,“你是?”
“�* � ”
“我听不懂” 难道碰到了外星人?
“锟斤拷打锟锟” 怪物检索着语言,“呵呵 小虫虫,又和小虫虫见面了”
“你是?” 我脑中有一百万个问题,但现在只能吐出这两个字。
“小虫虫,TL;DR ,我是迩迓,从隔壁星系团过来的,路上遇到点状况,跃迁机出了毛病…”
“隔壁星系团?跃迁机?” 我满脸疑惑,只听懂他似乎叫二牙。
“害 小虫虫,就你们隔壁不远。我需要几位维修工程师修理我的跃迁机,也就是…交通工具,飞船。”
“本来是不需要你们小虫虫的,但是我的同伴们都牺牲了,只能…” 二牙丑陋的面孔上划过一丝悲伤,看向了我。
“我…我是一个 HR ,不会维修飞船。” 我尽量让自己的声音听起来镇定。
“HR 不是会找人吗,赶紧找人!立刻马上!” 二牙把巨头猛一凑近,一股气流撞到我身上,我连连退了几米远。
“好好好!我…我马上找!马上找!” 我扶着墙一阵头晕目眩,盘算着去哪找会维修飞船的人。
“还在等什么!耽误我的大事,小虫虫会付出代价!” 二牙看我还呆在原地,不耐烦地咧着大嘴,又把头猛地一凑。
呯!办公室的桌子椅子连带着桌上的东西都飞了起来,然后重重砸在墙上。
我赶紧爬起来打开电脑,在招聘网站上搜索“维修工”,但几乎都是些水管、空调维修,一无所获。
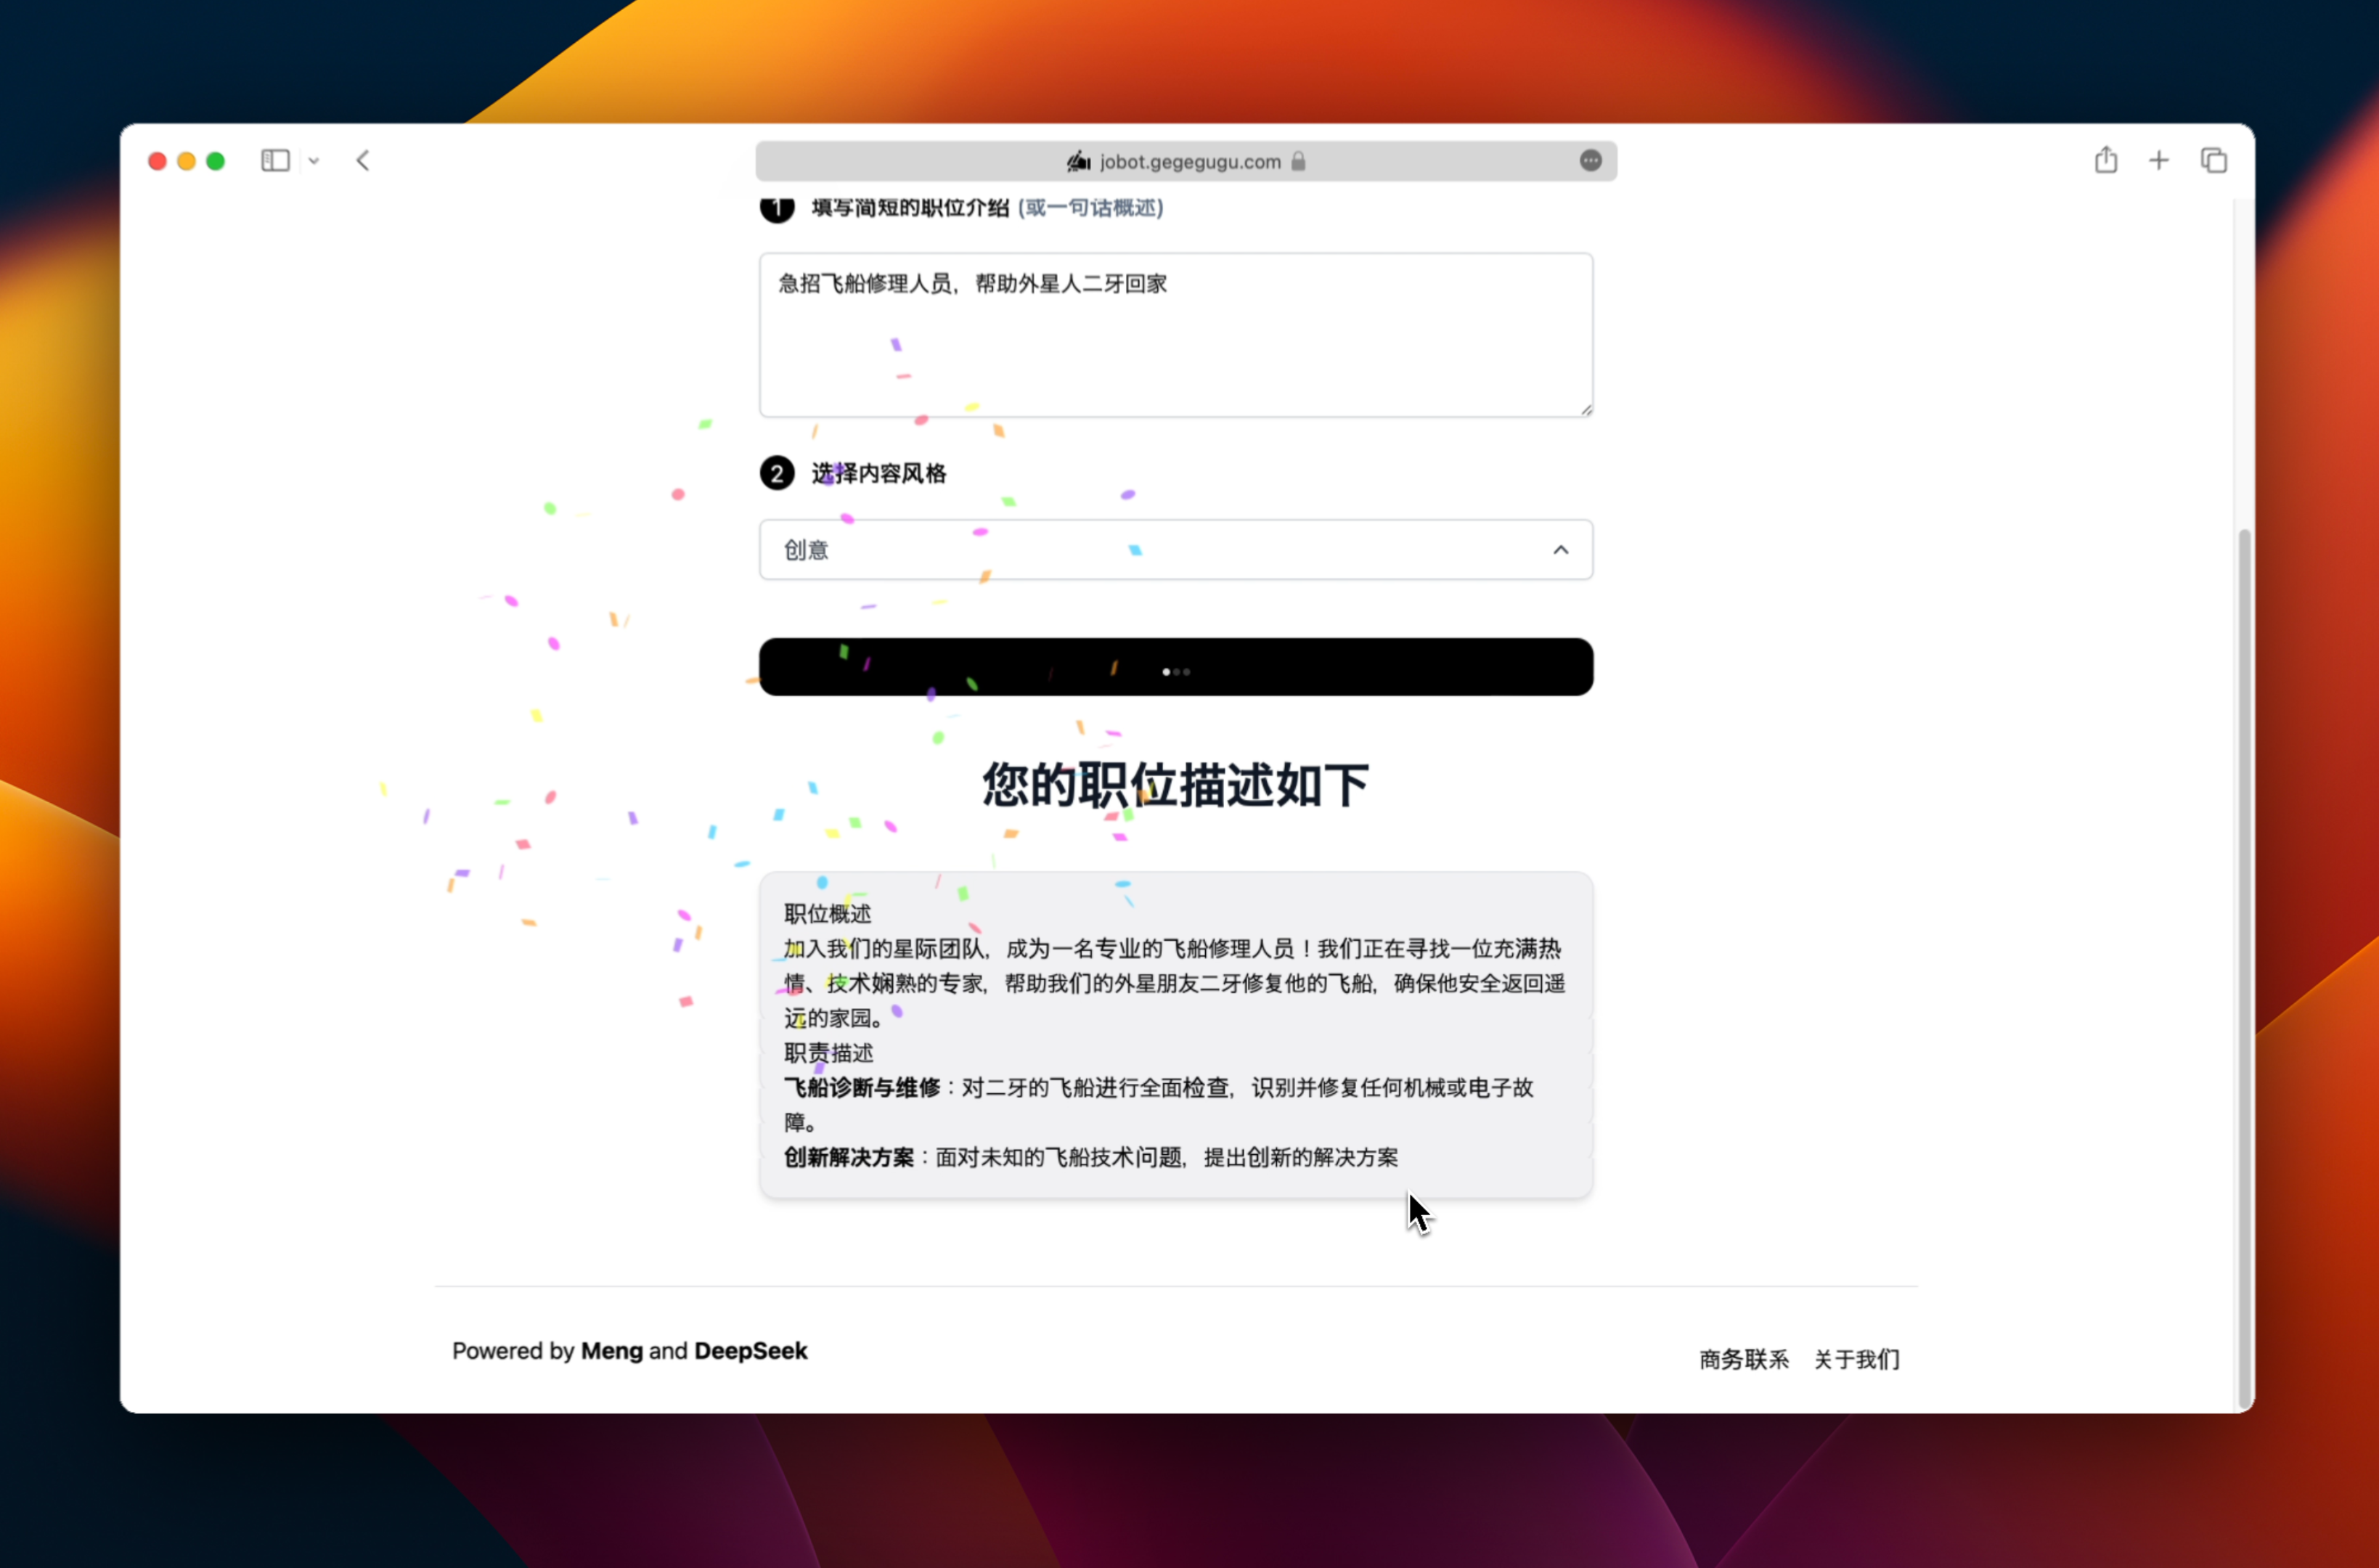
突然,我瞥见之前群里有人分享的一个职位描述自动生成工具:职生机
职生机 Jobot - 职位描述生成机器, 专注智能招聘jobot.gegegugu.com
职生机职生机,能不能有有一丝生机只能靠你了!
我飞快输入“急招飞船修理人员,帮助外星人二牙回家”,点击生成按钮,
哗啦啦~职位描述内容几秒种就生成出来了!嘿嘿嘿,这下应该能侥幸捡回一条命了。
正欣喜时,我一回头看到站在身后的二牙。
”这就是你们小虫虫的智能吗?“ 二牙显得有些惊讶。
”是的,这是我们最新的智能工具,能大大提高招聘和工作效率“
”呵呵,小虫虫“ 二牙仰头笑了起来,好像从地狱深渊传来了几丝干笑”,”你们的智能,就是用在这种琐碎的事情上吗?“
我注视着他,无言以对。
“几千年前我来过这里,那时候你们这些小虫虫喜欢盖房子,几千年过去了,小虫虫的智能还是这么低级” 二牙不屑地看着我。
“几千年前…你来过这里?什么盖房子?” 我更加疑惑了。
“用石头盖房子,后来我看的着急,只好帮他们也盖了几个小房子,顺便,把他们也盖在里面了…”。
二牙说话间随手一指,空中出现一团光芒,接着几座金字塔的模型显现了出来。
“金字塔?金字塔是你建的???”我震惊地看向他。
“没错。” 二牙似乎在描述一件微不足道的事情。
叮~叮~叮~ 是求职者们发的招呼提醒,我赶紧回到电脑前查看。
几天后,我再次看到了二牙,他的身形看起来比上次更加高大,更有力量。
“谢谢你们,小虫虫。” 他的语气缓和了些。
“不客气,我们还会再见面吗?“
”也许吧 哈哈,几千年前你们也问过我同样的问题…“
“是吗?” 我脑海里想象金字塔下的苦工们面对这个可怕的怪物,问出这个问题。
“哈哈哈哈,朝菌不知晦朔,蟪蛄不知春秋,可悲啊…“
二牙长长地叹息了一声,扭头进入飞船,很快就消失在天空中。
飞船巨大的轰鸣声和刺眼的白光,让我醒了过来。
我抬头看到自己还在工位上,办公室一切如常,同事们都刚午睡醒来,伸着懒腰。
只是电脑屏幕上,还打开着 职生机的网页 jobot.gegegugu.com
上面清楚地写着:急招飞船修理人员,帮助外星人二牙回家

2024-05-23 18:23:22
当我们发布一款产品时,通常会制作一个演示视频来展示我们产品的功能和特性。如今,很多 GitHub 仓库也是如此。
但是,如何在GitHub README 中插入视频呢?
在此之前,我们尝试将视频文件添加到代码仓库中,但由于平台的限制,视频文件显示为URL。我们还尝试使用 Markdown 或 HTML 来嵌入视频,但根本不起作用。
好消息是,如今将本地视频插入到 GitHub README中 非常简单!
只需如下几步即可:
编辑页面的链接类似: https://github.com/xumeng/ai-careers/edit/master/README.md

GitHub 会自动上传视频文件,然后展示一个资源文件的链接地址,类似: https://github.com/xumeng/ai-careers/assets/2187660/7362e4b8-6318-4cfc-af63-b8921455e434


GitHub README 示例: https://github.com/xumeng/ai-careers
https://stackoverflow.com/a/78521560/3090339
https://amonxu.medium.com/how-to-embed-a-video-into-github-readme-so-easy-c298ca92d537
2024-05-23 18:03:22
When we launch a product, we usually make a video to show our product’s functions and features. We also do this for our GitHub repository now.
However, how can we embed a video into a GitHub README?
In the past, we tried to add a video file to the repository, but the video file showed as a URL given the limitations of the platform. We also tried using markdown or HTML to embed a video, but it did not work at all.
Good news: Embedding a local video into a GitHub README is very easy now!
Just follow these steps:
The edit page url likes https://github.com/xumeng/ai-careers/edit/master/README.md

GitHub will uploading the file automatically, then it will showing a video asset url likes https://github.com/xumeng/ai-careers/assets/2187660/7362e4b8-6318-4cfc-af63-b8921455e434


GitHub README Demo: https://github.com/xumeng/ai-careers
https://stackoverflow.com/a/78521560/3090339
https://amonxu.medium.com/how-to-embed-a-video-into-github-readme-so-easy-c298ca92d537
2024-05-14 23:00:55
现在很有意思,凡事讲究个敏捷、迭代、快。稍微一个不留神,就会发现自己被时代远远甩在后面。
我的 Blog 托管在 GitHub Pages + Hexo,有段时间没更新 Blog 程序了。这两天心血来潮想试下更新,发现程序落后好几个大版本(当前使用 3.x,最新版本 7.x)。
今天头铁,备份 Blog 后果断上手开干,先报下总结:
好消息:升级过程意外的顺利
坏消息:升级后没感觉到明显变化 (可能是我期望太高了🤔️)
升级后的程序版本信息:
1 |
❯ hexo version |
Blog 最早大概是 2011、2012 年大学期间随便买了个域名,用 WordPress 搭建。https://amonxu.com/2012/05/21/zh-CN/2012-05-21-hello-world/
2013 年接触了 GitHub Pages,觉得 WordPress 实在太不 Geek 了,马上把 Blog 迁移到 GitHub Pages + Jekyll。 https://amonxu.com/2013/04/18/zh-CN/2013-04-18-wordpress-to-github/
2015 年时,看到 Hexo 的几个主题很有意思,瞬间又感觉 Jekyll 不够酷了,用 Hexo + Node.js 替代了 Jekyll + Ruby。https://amonxu.com/2013/05/23/zh-CN/2013-05-22-hello--my-blog/ 。又换了现在这个域名 https://amonxu.com
后面除了更新文章,换过几个主题,暂时没再继续折腾 Blog,直到今天。
折腾时看到很多程序停止维护,更新时间动不动就是 8, 9 years ago,感叹光阴易逝。
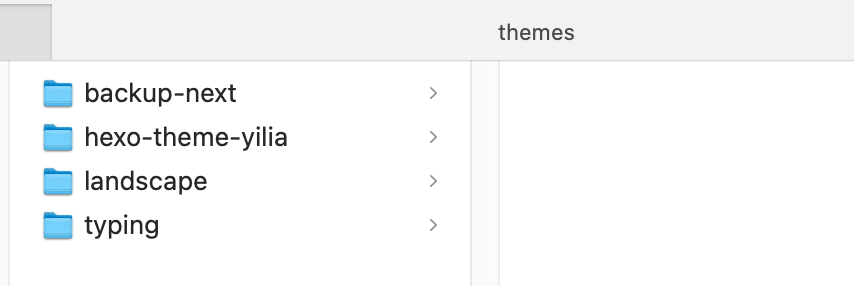
使用过的的Hexo主题列表

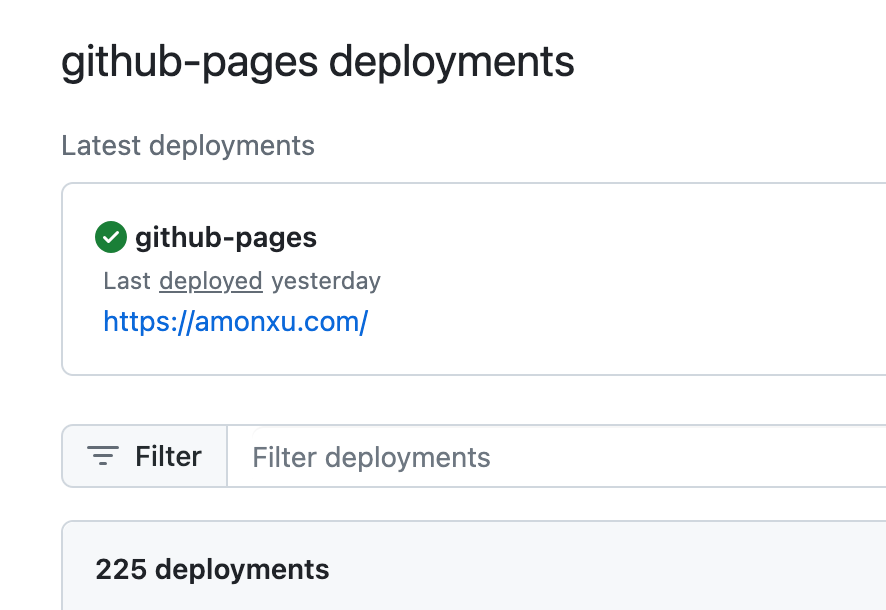
GitHub Pages 部署记录

升级参考资料:
2024-04-10 11:03:22
本文介绍了在 Next.js 14 (基于App Router) 中实现 i18n 国际化多语言功能,并考虑在真实的场景中,一步步优化将功能完善。通过阅读完本文,你将立即掌握如何在 Next.js 中实现 i18n。
在互联网世界越来越扁平化的时代,产品的多语言显得越来越重要。幸运的在 Next.js 中通过简单的配置和代码即可快速支持多语言。但是,当我们在互联网上搜索 Next.js 如何支持多语言时,可能会看到各种实现方式、鱼龙混杂和奇技淫巧的方案,于是我们一头雾水,不禁怀疑人生:到底哪里出了问题?
今天,让我们从 0 到 1 在 Next.js 中实现一个多语言,揭开多语言的神秘面纱。
我们查看 Next.js 官方文档中的 i18n 介绍, https://nextjs.org/docs/app/building-your-application/routing/internationalization,比较清晰详细了,本文也将基于此篇文档制作。
开始之前,先看看最终运行效果:https://next-i18n-demo-two.vercel.app/
首先,我们初始化一个 Next.js app,
1 |
npx create-next-app@latest |
请注意选择 App Router,此处我使用的是 TypeScript。
1 |
❯ npx create-next-app@latest |
本地启动,
1 |
npm run dev |
打开 http://localhost:3000 看到程序运行正常。
在正式开始之前,我们先简单介绍一下国际化,国际化 internationalization,简称 i18n,也即在产品中支持多国语言文化和环境风俗,主要包括语言/时间/货币符号等。这篇文章中将只专注于语言部分。
在国际化的具体呈现上,常见的方式是网站默认进入某个语言的官网(通常是英文),并支持选择语言或地区,进行切换网站的不同语言版本。
具体实现方式上,有的网站以语言简称为前缀,如 en.wikipedia.org, zh.wikipedia.org;有的网站以语言简称作为路径后缀,如 aws.amazon.com/cn, aws.amazon.com/jp,也有以国家地区域名为区分的,如以前的 apple.cn, apple.jp。
其中诸如 en, zh, cn, jp ,也即语言编码,在不同版本的语言编码版本中略有不同,具体可参考文章下方参考资料。
在本文案例中,将以 ISO_3166 中的 en 和 zh 编码分别代表英文和中文。
项目之前的文件结构:
1 |
├── package.json |
我们在 app 目录新建一个文件夹 [lang],然后将 app 目录的 laytout.tsx 和 page.tsx 移入 [locales]中,
移动后的文件结构如下:
1 |
├── package.json |
Tips:
注意同步修改 layout.tsx 中 globals.css 的引用位置。
接下来,我们定义不同语言的 json 资源文件,你可以放入你习惯的文件目录,我这里放入 public/dictionaries,格式如下:
en.json
1 |
{ |
zh.json
1 |
{ |
紧接着,我们创建一个文件,用于加载多语言资源文件并获取相应语言文本。
在 app/[lang] 目录添加 dictionaries.js,注意检查文件目录及文件名是正确并匹配的。
1 |
import 'server-only' |
我们在 pages.tsx 页面中使用多语言功能。
首先,为函数增加 lang 参数,注意为函数添加 async 关键字,
1 |
export default async function Home({ params: { lang } }: { params: { lang: string } }) { |
添加多语言的调用,
1 |
const t = await getDictionary(lang); |
在页面上使用,为了方便我将 page.tsx 上默认的代码进行清理,只保留文本展示。
1 |
<main className="flex min-h-screen flex-col items-center justify-between p-24"> |
重启程序或等程序热更新成功,分别打开不同语言的页面 http://localhost:3000/en http://localhost:3000/zh 即可看到效果。
看起来不错,但是细心的朋友会发现打开 http://localhost:3000 会出现 404 error。为了解决这个问题,我们需要在未选择语言时,默认设置一个语言。
为此,我们可以在 src 目录创建一个 middleware.ts ,然后复制文档中的代码。
核心逻辑很简单:
判断 URL 的 pathname 中是否含有某个语言标识,如果有则直接返回,否则在获取合适的语言后,将 URL 重定向为 /${locale}${pathname}
重点在 getLocale 函数中,我们需要指定合适的语言。在此处,我们先简单处理:使用默认的 defaultLocale = "en" 。
1 |
import { NextRequest, NextResponse } from "next/server"; |
程序更新后,我们打开 http://localhost:3000/ 可以看到会自动跳转到设置的默认语言页面。
在上一节获取默认语言时,我们简单处理为 defaultLocale = "en" ,更优雅的方式是:根据用户的系统或者浏览器的语言来设置默认语言:
我们可以通过获取浏览器 HTTP headers 中的 Accept-Language 字段来达到目的。它的数据格式大致如下:
1 |
英文时: |
我们将 middleware 改造如下:
Accept-Language,如果为空则返回默认语言Accept-Language 中的语言列表,并根据配置的语言列表,匹配获取对应的语言(如果没有则返回默认语言)安装依赖 @formatjs/intl-localematcher, negotiator, @types/negotiator,并实现如下逻辑:
1 |
function getLocale(request: NextRequest) { |
通过修改系统的语言,打开 http://localhost:3000 会自动跳转到同系统语言一致的页面,测试成功。
更进一步地,我们可以在 Cookie 中存储用户网页中的语言,并在下次访问时使用:
1 |
// 获取Cookie |
在网页 metadata 中使用多语言时,page.tsx添加如下代码:
1 |
export async function generateMetadata({ params: { lang } } : { params: { lang: string } }) { |
在处理静态站点(SSG)中使用多语言时,layout.tsx代码如下:
1 |
interface LangParams { |
可根据实际情况添加语言选择器(下拉框)或不同的链接,从而跳转到对应语言的页面。
例如通过链接实现多语言切换:
1 |
<div className="space-x-2"> |
通过上述步骤的学习,我们初步熟悉并实践了在 Next.js 中使用多语言。千里之行,始于足下,国际化的工作不止于此,我们当然也还有尚未完善的地方,就留给屏幕前的你吧。
最后附上 middleware.ts 完整代码:
1 |
import Negotiator from "negotiator"; |
完整代码可在 https://github.com/xumeng/next-i18n-demo 获取。
最终运行效果:https://next-i18n-demo-two.vercel.app/
https://nextjs.org/docs/app/building-your-application/routing/internationalization
https://en.wikipedia.org/wiki/ISO_3166
https://en.wikipedia.org/wiki/List_of_ISO_639_language_codes
https://en.wikipedia.org/wiki/IETF_language_tag
https://www.alchemysoftware.com/livedocs/ezscript/Topics/Catalyst/Language.htm
2024-04-10 11:03:22
This post introduces the implementation of i18n internationalization multi-language feature in Next.js 14 (based on App Router), and takes into consideration actual scenarios to optimize and perfect the feature step-by-step. By reading this post, you will immediately get how to implement i18n in Next.js.
In an era where the Internet world is becoming increasingly flattening, the importance of multi-language products is growing. Fortunately, Next.js allows us to quickly support multi-language with simple configurations and code. However, when we search for how Next.js supports multi-languages on the Internet, we might find a variety of implementations, jumbled information, and excessively clever solutions. Then we become confused and start to question: What’s the issue here?
Today, let’s implement multi-language from 0 to 1 in Next.js and unravel the mystery of multi-language.
We can refer to the i18n introduction in the Next.js official documentation here: https://nextjs.org/docs/app/building-your-application/routing/internationalization, which is quite clear and detailed. This article will be based on this documentation.
Before we begin, let’s take a look at the final running effect: https://next-i18n-demo-two.vercel.app/
First, We create a Next.js app,
1 |
npx create-next-app@latest |
Plese select App Router, I am using TypeScript here.
1 |
❯ npx create-next-app@latest |
Run locally,
1 |
npm run dev |
Open http://localhost:3000 and you will see that it is running okay.
Before we start it, let’s briefly introduce about internationalization. internationalization, aka i18n, this means supporting multiple languages, cultures, and customs in products, mainly including language, time, currency symbols, etc. This article will focus only on the language part.
In terms of internationalization, a common approach is for a website to default to a certain language’s official site (usually English), and to support the selection of language or region, allowing for a switch to different language versions of the site.
Specifically, some websites use a language abbreviation as a prefix, such as en.wikipedia.org, zh.wikipedia.org; some use it as a path suffix, such as aws.amazon.com/cn, aws.amazon.com/jp, and others distinguish based on the country or region domain name, such as apple.cn, apple.jp.
Among these, en, zh, cn, jp, etc., are language codes, which can vary slightly in different versions. You can refer to the reference materials at the end of the article for specifics.
In this article’s particular case, the ISO_3166 codes en and zh will be used to represent English and Chinese respectively.
The original file structure of the project was:
1 |
├── package.json |
We create a new folder named [lang] in the app directory, then move laytout.tsx and page.tsx from the app directory to [locales].
The file structure after moving is:
1 |
├── package.json |
Tips:
Please modify the reference position of globals.css in layout.tsx.
Next, we define json resource files for different languages, which you can put in your preferred file directory. I put it in public/dictionaries. The file format is as follows:
en.json
1 |
{ |
zh.json
1 |
{ |
Then, we create a file to load the multi-language resource files and get the corresponding language text.
Add dictionaries.js in the app/[lang] directory. Make sure the file directory and file name are correct and match.
1 |
import 'server-only' |
We use the multi-language feature on the pages.tsx page.
First, add the lang parameter for the function, add async for the function,
1 |
export default async function Home({ params: { lang } }: { params: { lang: string } }) { |
Use it on the page, add the multi-language fuction call,
1 |
const t = await getDictionary(lang); |
For convenience, I clean up the default code on page.tsx and only retain the text display.
1 |
<main className="flex min-h-screen flex-col items-center justify-between p-24"> |
Restart the program or wait for the program to hot update successfully, open different language pages http://localhost:3000/en http://localhost:3000/zh to check the effect.
It looks pretty good, but careful friends will find that opening http://localhost:3000 will result in a 404 error. To solve this problem, we need to set a default language when no language is selected.
For this, we can create a middleware.ts in the src directory, and then copy the code from the documentation.
The core logic is simple:
Check whether there is a certain language identifier in URL’s pathname. If so, return directly. Otherwise, get the appropriate language and redirect the URL to /${locale}${pathname}
The focus is on the getLocale function. We need to specify the suitable language. For now, let’s deal with this simply: use the default defaultLocale = "en" .
1 |
import { NextRequest, NextResponse } from "next/server"; |
After the program updates, we open http://localhost:3000/ and see that it will automatically redirect to the default language page.
In the previous step, while get the default language, we treated it simply as defaultLocale = "en". A more graceful way is: Set the default language based on the user’s system or browser language.
We can achieve this by getting the Accept-Language field from the browser’s HTTP headers. The data format is approximately as follows:
1 |
English: |
We update middleware as follows:
Accept-Language from the HTTP headers. If it’s empty, then return the default language.Accept-Language and match to get the corresponding language based on the configured language list. (If there is no match, return the default language)Install dependencies @formatjs/intl-localematcher, negotiator, @types/negotiator, and implement the following logic:
1 |
function getLocale(request: NextRequest) { |
By changing the system language, open http://localhost:3000 and it will automatically redirect to the page with the same system language. Test successfully.
Going a step further, we can store the user’s web page language in the cookies and use it on the next visit:
1 |
// Get Cookie |
When using i18n in web page metadata, add the following code to page.tsx:
1 |
export async function generateMetadata({ params: { lang } } : { params: { lang: string } }) { |
When handling i18n in SSG, the code in layout.tsx is as follows:
1 |
interface LangParams { |
You can add a language swicher (like a drop-down menu) or some links.
For example,
1 |
<div className="space-x-2"> |
Through the learning of the above steps, we initially familiarize and practice using multi-language in Next.js. A journey of thousand miles begins with a single step. The work of i18n is not limited to these, and of course, other areas need improvement which I’d leave to you, the reader.
Finally, here is the complete code of middleware.ts :
1 |
import Negotiator from "negotiator"; |
You can get the full code from https://github.com/xumeng/next-i18n-demo .
The finally running demo: https://next-i18n-demo-two.vercel.app/
https://nextjs.org/docs/app/building-your-application/routing/internationalization
https://en.wikipedia.org/wiki/ISO_3166
https://en.wikipedia.org/wiki/List_of_ISO_639_language_codes
https://en.wikipedia.org/wiki/IETF_language_tag
https://www.alchemysoftware.com/livedocs/ezscript/Topics/Catalyst/Language.htm